
Finishing the drawer system framing and making it work!
Uh…yeah. That’s what I’m doin’…winging it.
Last weekend marked “Day 1” of my quest to makeover my garage workshop. I’m now totally obsessed with this project and am progressing, though slowly, towards my end vision.
Wingin’ it all the way! Is that stupid, or what?!?
Still, the “before” would motivate even the most novice do-it-yourselfer to attempt any change. And as luck would have it, with several years of DIYing experience under my tool belt (snicker*), I felt confident to try my hand at cabinet making.
Yes, me! The girl who’s never made a drawer or shelving system in her LIFE!

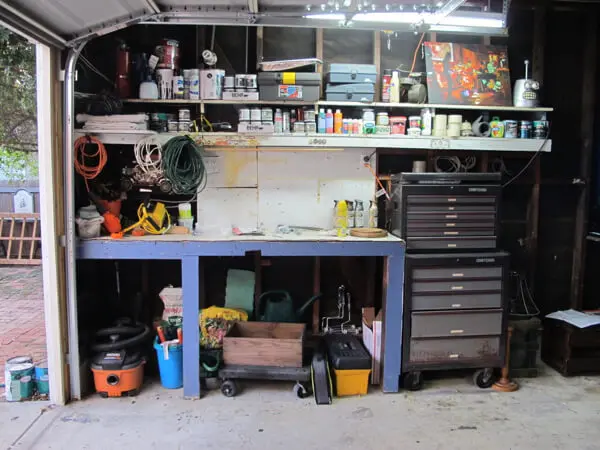
Garage-workshop-before. Ugh.
Garage Makeover Projects List:
Here is the list of wood-working projects I’ve completed so far:
• create a drawer system (scroll down to see)
• create an open shelving system (m-hmm…keep on scroll’n!)
• get electrical wiring checked by HomeAdvisor pro
• paint drawers, shelves and workbench front
• install and paint peg boarding
• repurpose an I-almost-threw-it-out vintage monkey wrench
• custom paint vintage work light using HomeRight’s Finish Max sprayer
• rust-up a PLASTIC light cage for an industrial light fixture
Coming soon…
• install and finish new workbench top, 10′ shelf, and natural wood panels
• build and install folding table
How much wood, would a woodchuck chuck…?

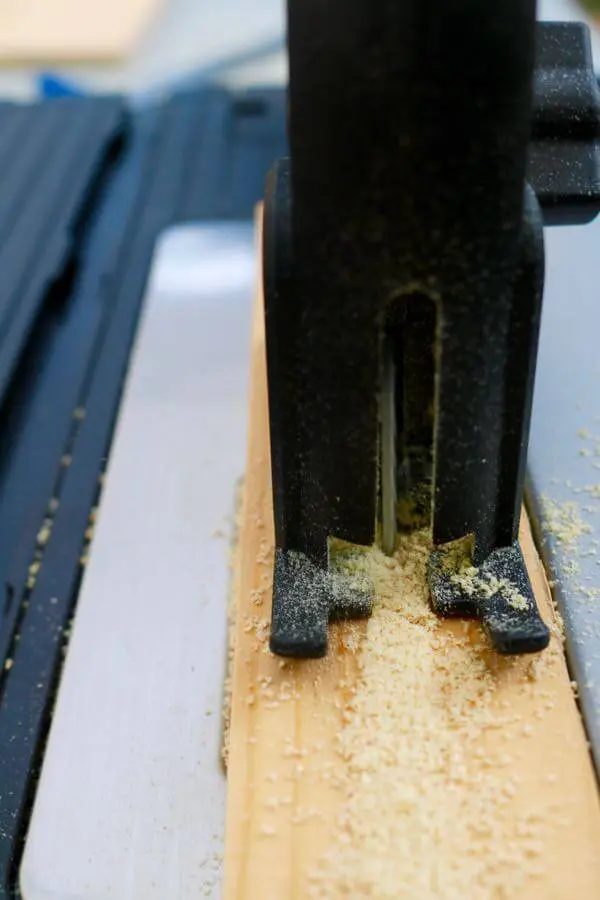
Home Depot’s saw can cut your pieces to pieces!
Shortcut Tip!
If you’re looking to install, utilize or create something with wood, and you need specific dimensions, have Home Depot cut it! It’ll be (mostly) straight and a helluva lot easier to get into your car to take home.
‘Cause ya know it’s so fun to ride in the front passenger seat moved all the way against the dash – it’s like rid’n in an airplane!
Additionally, I’ve smartly collected lots of scrap wood over the years, so, my goal is to use as much of it as possible…yay for upcycling!
Now, for the winging it part. I had recently upcycled a trashed dresser into a home gym cabinet which left me with about 5 leftover drawers I strategically planned to upcycle, repurpose, etc. As a result of all that DIY fooling around, I made these cool picture frames, and I pretty much gained a ton of confidence and was determined to make this project work.
(Thank you, Tim Gunn!)
With a smattering of gumption, I simply looked at the drawer system in my gym cabinet and recreated it under my current crappy, space-wasting workbench.

Cutting scrap wood to build cabinetry framework.

Drawer system is complete! I did it!

And, yes! The drawers fit!
Gulp.
Yeah, so…it took a bit longer than expected to finish it, but, hey! I think I nailed it!
Oh, my God, I’m such a dork!

Building an open shelf to raise my stuff off the floor.

Cutting the 1″ bys for the open shelving.

Cabinetry completed! Now, on to finishing the rest of it.
I have to say that I’m sorry I don’t have any real how-to instructions other than this:
Step 1: Examine and study a form (e.g. furniture piece) you wish to copy/mimic.
Step 2. Have the correct tools and materials to do so.
Step 3. Start constructing piece by piece what you wish to make (i.e. keep referring back to the original form/furniture piece).
Step 4: If you make a mistake, re-work it, repair it, then make it happen.
Step 5: Which should actually be Step 1…GO FOR IT! Have confidence, act stupid and have fun!!!
Next…Painted Pegboard Install!
What do you think about “winging it”?
Cool or for the birds?
All photography by Skaie Knox, HomeJelly