
This is a sponsored post that contains affiliate links.
Even though we’re waist deep in springtime, it seems everywhere other than southern California still looks and feels like winter (What-what?). Still, this foul-weather forecast doesn’t mean we can’t start thinking about preparing for sunnier days and all that comes with outdoor living.
That being said, this past weekend, I decided to perk up our patio space, a place still a work in progress, but an area in our backyard that we love to invite our friends to for happy hour hangouts and lounging under the trees. If you saw its before, you’d understand our love for our custom brick courtyard and the snugly furniture and gas fire pit that keeps it company.
Here now, are a few DIY solutions to cleaning, prepping, and de-winterizing your patio in time for spring…gophers are welcome to lend a hand.
Outdoor Furniture Cushion Cleaning

DIY Cushion cleaning solution supplies.
Thanks to Talking Dirty With the Queen of Clean, I discovered a DIY solution to cleaning my dusty, dirty, bird-poopie outdoor furniture cushions…and it really, really works! Oh, by the way, throughout the winter, we used a tarp cover, but dust and twigs still managed to blow underneath and leave a lovely winter coat of yech!
Supplies:
• dish soap
• Scotch Guard Water & Sun Shield
Cleaning Solution:
- In a standard sized spray bottle (see above photo), start by filling it 3/4 full of warm water.Note: if you add the soap and borax first, it will bubble out of the bottle before you can fill it.
- Next, pour in 1 teaspoon of dishwashing liquid and 1 teaspoon of borax, then gently fill remaining spray bottle with warm water. Shake to combine.
For springtime clean cushions…
Instructions:
Step #1: Brush off leaves, dust and debris on all your cushions.

Brush off leaves, dust and debris.
Step #2: Spray on cleaning solution and let sit for approximately 15 minutes.

Spray on cleaning solution.
Step #3: Hose off using a strong spray and scrub brush for tough dirt.

Hose off, scrub where necessary.
Step #4: Placing them over their chairs, allow cushions to dry in the sun. Note: be sure to have the cushions dry off the ground so water can drip.

Allow cushions to dry in the sun.
Step #5: Once dry, spray on Scotchgard Fabric Protector (available in most grocery stores) to protect your cushions and making cleaning much easier the next time around!

After cushions are dry, spray on Scotch guard for future easier cleaning.

Clean cushions!

Spruced up patio furniture and bright throw pillows!
Easy-peasy…and don’t they look fabulous!?! So much so, that…well, I’m tempted to spray paint the chairs, because now, they’re looking a little bedraggled. I’ll keep y’all posted.
How to repurpose a broken and empty fountain…

Empty and broken fountain.
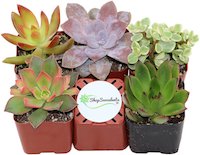
The water pump on this hand-me-down fountain has long since stopped working, and, frankly, we just never got around to buying a new one. I do love its rustic, garden charm however, and have left this little angel to look over our work-in-progress outdoor space (hopin’ it’ll entice the DIY gods to inspire us to finish!). Our prayers were answered when I finally decided to fill it with succulents…my new best foliage friends.
Supplies:
• drill or nail (for poking holes)
• used or broken fountain
Instructions:
Step #1:Before adding the dirt, I had make a DIY filter so the drainage hold wouldn’t get clogged up. So, I cut a small disc out of a cottage cheese carton lid, then drilled holes in it (similar to what I did with my stacked planters).

Drill hole in plastic container lid.
Step #2: I placed the DIY filter over the drainage hole and carefully placed the soil around it to secure it in place.

Place DIY filter over hole to prevent dirt from clogging drainage hole.
Step #3: Finally, I placed my plants where I wanted, then filled the basin with dirt.

Place plants into fountain and add soil.

Repurposed fountain!

Garden Angel watching over plants.
A fabulous way to revitalize winterized decking

Klunkers not too thrilled about his dusty winterized patio.

These bricks could use some serious perking up.
Just in time to perk up our very weathered brick patio, I discovered another fabulous find from HomeRight called the “succulents“. I’m always game to try a new gadget, and this one is simply a brush you attach to a hose that allows you to sweep and wash at the same time. It was totally easy to assemble and it performed great. What’s nice about this, too, is that you can use it as a regular broom. I love multi-functional tools.

Deck washer to the rescue!
Instructions:
Step #1: Assemble the brush, then simply attach to your garden hose.

Assemble the brush, then simply attach to your garden hose.
Step #2: Brush and wash at the same time. Note: there’s a toggle switch that allows you to shut off the water to brush the dirt into the grass or drains.

Brush and wash at the same time!
That was it! I was really impressed at how quickly I was able to clean our patio…now for the “afters”…!

The deck after the “Deck Washer”.

Klunkers loves his perked up patio.

Perked up patio ready for spring and summer entertaining.
Now It’s Your Turn!
Do you have any “patio perking-up” solutions? Share them with us!
All photography by Skaie Knox, HomeJelly