The most awesome thing about DIY is that you really can have what you want. I recently discovered this when I refurbished a left-behind cabinet for my brother-in-law. Isn’t it so fun to make stuff for your home that is SO YOU!?! Yes! So, when this same fabulous brother-in-law (Johnnie – wink*) emailed me today’s oh-so-adorable how-to from my newest favie blog A Beautiful Mess, I just had to share it with y’all.
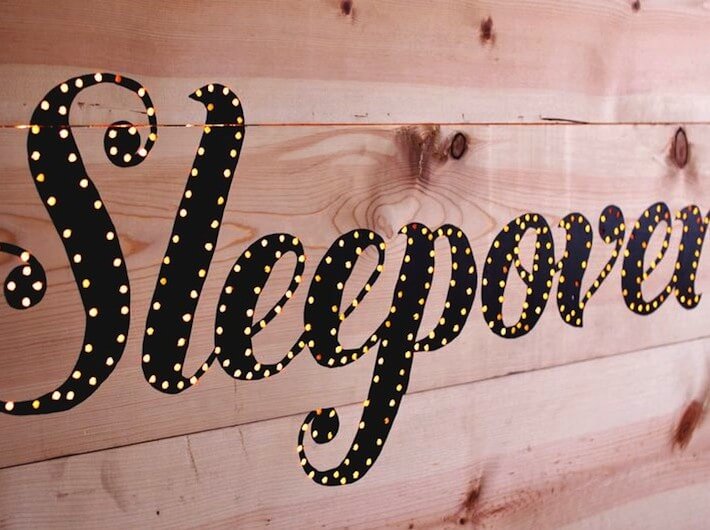
This project has now put a fire under my behind to get myself one of those old-school projectors (anyone know where I can get one cheap?). If so, you may want to snag one for yourself. Then, this weekend, or sometime soon, grab some lumber, unpack your tools and a few inexpensive supplies and get ready to impress your sleepover guests by putting them in lights.
DIY Light Up Headboard Supplies:
- six (6) thin planks – i.e. 1/4″- 1/2″x 6″ boards (they should equal the width of your bed)
- two (2) 2″x4″ boards
- three (3) 1″x4″ wood framing pieces (equal to the two sides and top of your headboard)
- projector
or tracing paper template (Elsie and Emma chose a font called Buttermilk…love.)
- pencil
- drill & drill bit (depending on the size of your lights, experiment with the diameter of your holes on a practice piece of wood)
- paint (have fun with your paint color!)
- white Christmas lights
- electrical tape
- optional: extension cord
Visit abeautifulmess.com for full how-to.*
* Note: be sure to read Elsie and Emma’s safety tips regarding this project.
What would you write on your guest bedroom headboard?


