Last week, I was invited BACK onto Hallmark Channel’s Home & Family show...woop! I wanted to do something doable and cute, so I pitched today’s project.
I’m also a self-proclaimed Pinterest-aholic (yep, still), and I’m also lucky to have some amazing books cross my desk like Color, Create, Decorate, Guerilla Furniture Design, DIY Rustic Modern Metal Crafts, Salvage Secrets, Hand-Built Outdoor Furniture and my latest find, Crafting a Colorful Home.
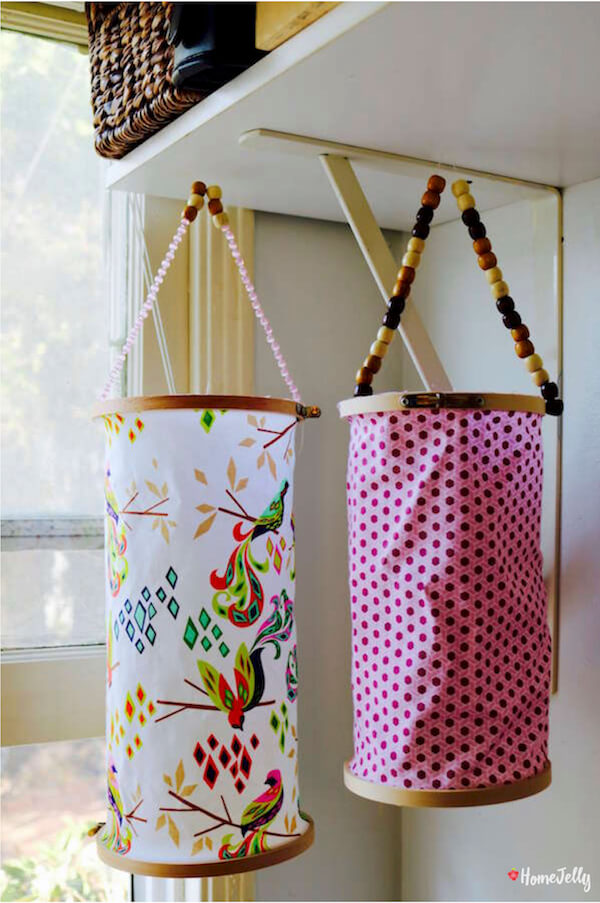
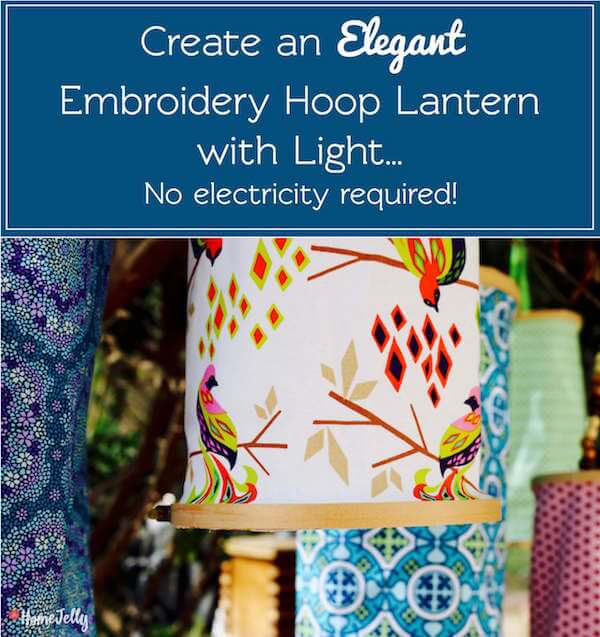
This last book inspired me to flex my textile mixing-patterns-and-colors muscles and create my version of an embroidery hoop lantern that I absolutely love. I, of course, had to add a few twists and shed a little light inside this simple, hanging decor piece of flair! I sure hope you’re inspired to do the same in your next project!
Supplies:
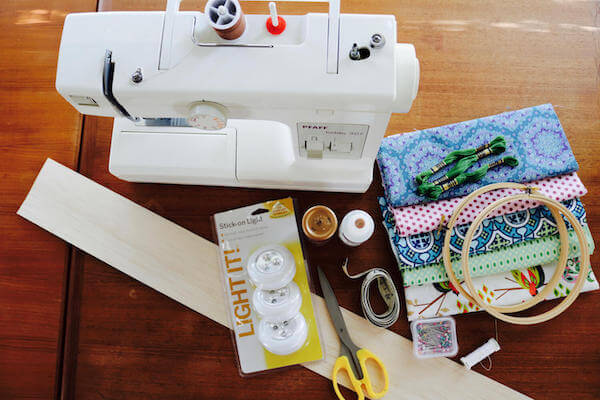
• 2 embroidery hoops
• fabric (new, scrap or even from a pillow case!)
• measuring tape AND a yard stick
• scissors
• push pins
• iron
• sewing machine
• needle and thread
• craft glue
Optional:
• fabric glue (if you prefer NOT to sew!)
• balsa wood
• embroidery thread
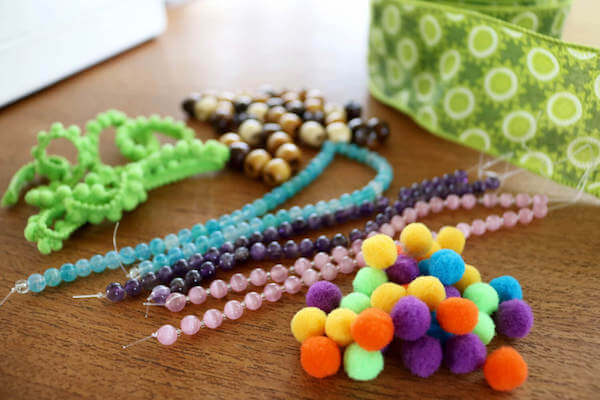
• embellishing materials – lace, yarn, pompoms, beads, French ribbon
• Command Party Ceiling Hooks (to adhere/remove your lanterns w/ease!)
HOW-TO:
1. Measure the outside circumference of the inner ring of the embroidery hoop.
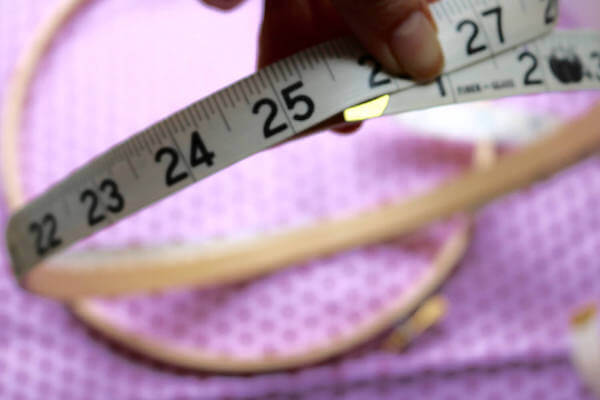
Measure the circumference of the inner ring, then add one inch for the seam.
2. Measure, then cut a piece of fabric with one side the same size as the circumference of your embroidery hoop, plus 1 inch for the seam (side A) and the other side as long as you like the lantern to hang (side B).
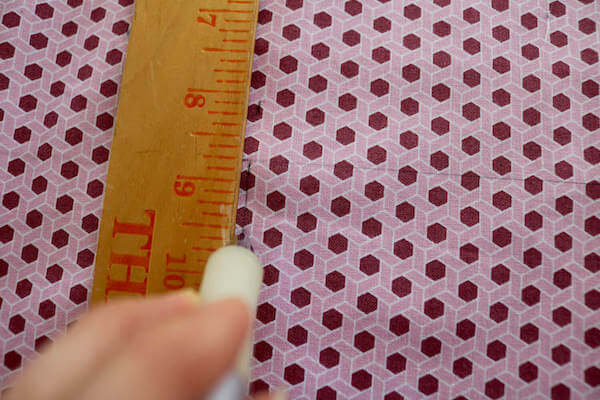
Measure then mark cut lines with a pencil.
3a. Fold side A of the fabric in half with the wrong side out, aligning the lengthwise edges, pin closed. In other words, you’ll pin along the length of your fabric (the vertical side of your lantern).
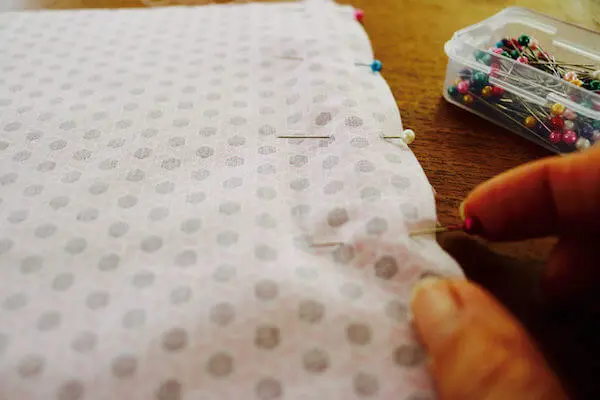
Pin fabric right sides together.
See Also: How to Make a Lampshade with Peek-a-Boo Flair
3b. Sew a 3/4″ seam to create a fabric tube. Note: I know we allowed for a 1″ seam, and now we’re sewing a 1 1/2″ seam, but for whatever strange reason, it works out right.
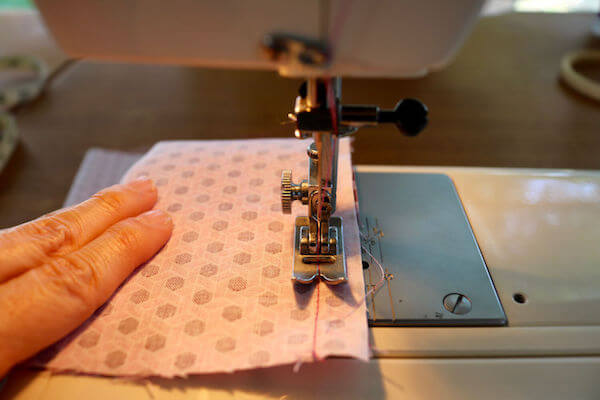
Sew side B together using a 3/4″ seam.
OPTIONAL: if you do not have a sewing machine, you can:
a. hand stitch the side seam – measure with a yardstick and mark with a pencil a 3/4” line from the edge of the fabric. Hand sew a straight stitch along this line.
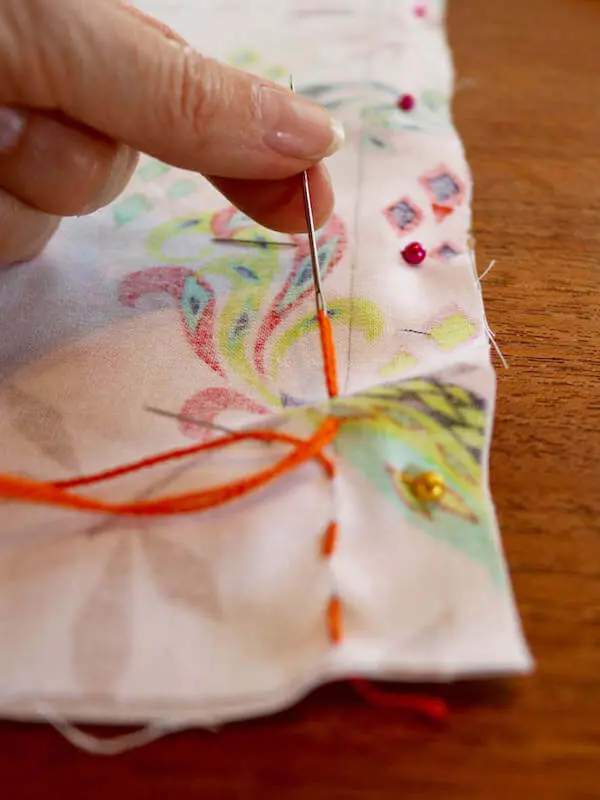
If you don’t have a sewing machine, hand stitch a stright stitch using embroidery thread.
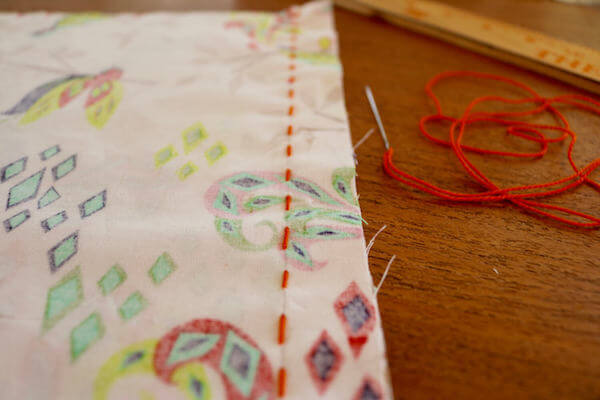
Finished straight stitch, then press the seam open.
b. use fabric glue – simply fold the fabric right-side out, then glue 3/4” of one edge over 3/4” of the other. Allow to dry.
3c. Turn the fabric tube right side out, then press the seam flat.

Press open the seam so it will hang beautifully.
4. Using craft glue, apply some around the outer edge of the inner hoop. Smear with your fingers…your best tool!
Apply craft glue to the outside of the inner ring.
5. Stretch the fabric tube around the inner embroidery hoop, lining it up so that the fabric edge is flush with top edge of the hoop. You may still have extra fabric, so gather and glue, then place the outer piece of the hoop over the fabric and tighten it. Note: the great thing about this project is you don’t have to be Martha Stewart perfect! Yes!
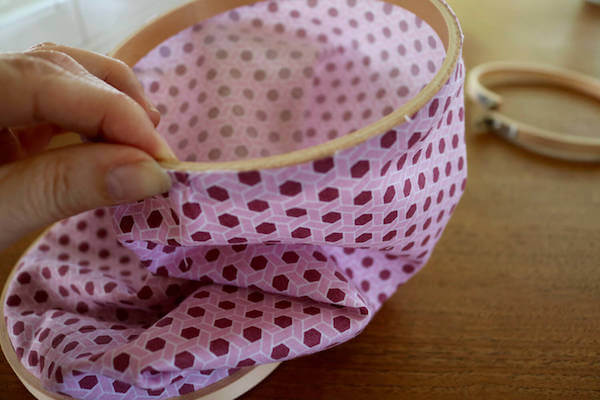
Press it against the edge of the hoop flush to the edge.
6. Repeat for the bottom hoop. Make sure the screw fastener is opposite the top one so that it won’t hang all wonky and uneven.
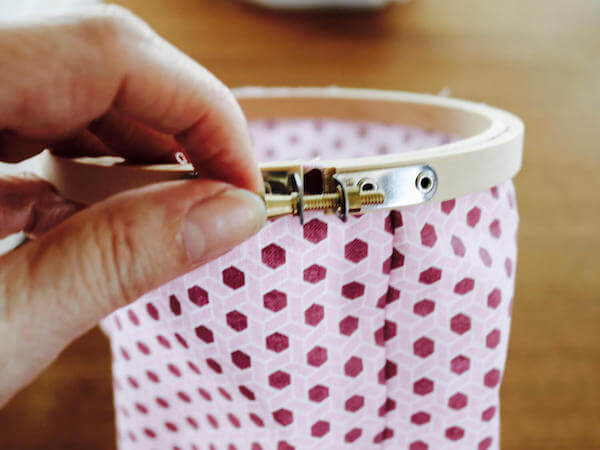
Place outer ring over hoop and fabric, then tighten.
7. OPTIONAL LIGHTED LANTERN STEP: if you’d like to add light to your lantern, do the following steps:
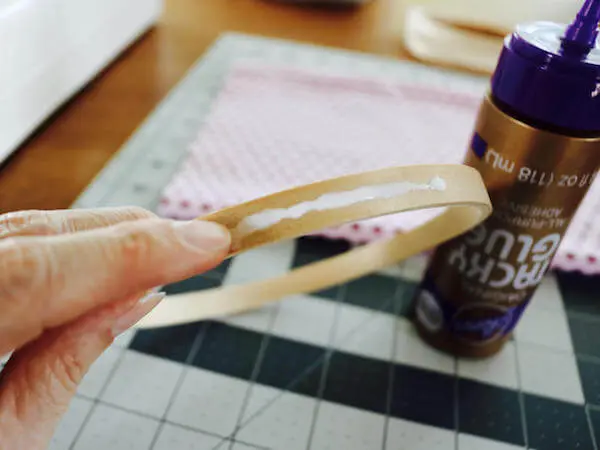
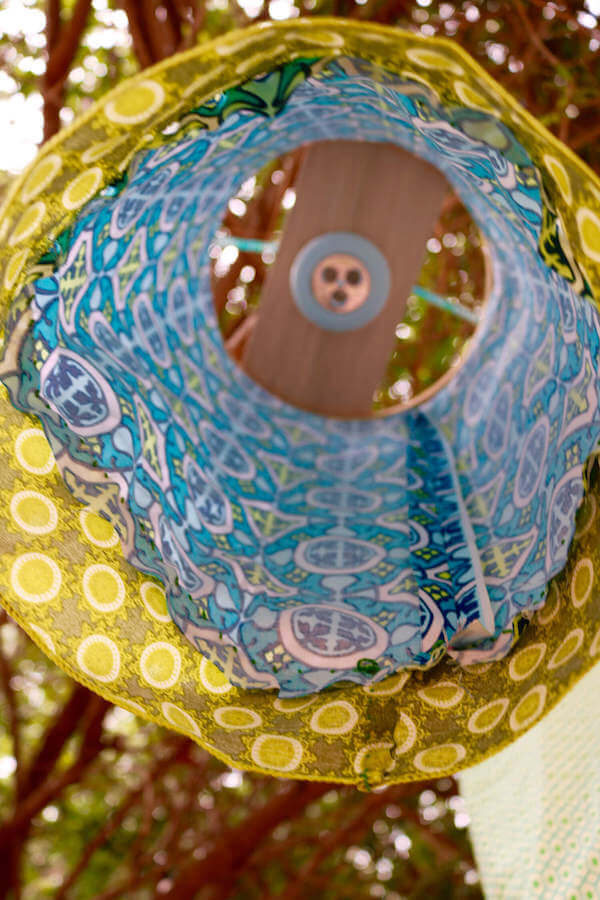
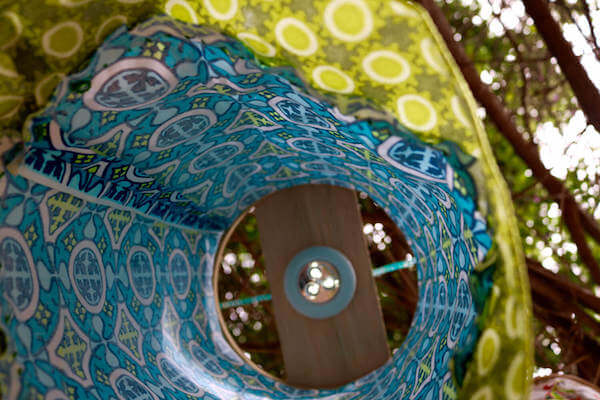
a. Take balsa wood, and trace the outer edge of your embroidery hoop. Cut out with scissors.
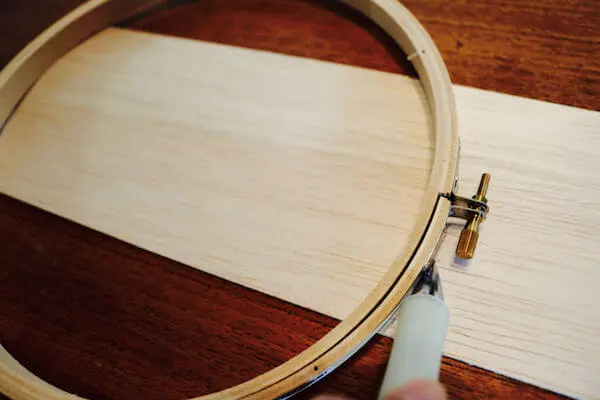
To add a light, trace the outer ring onto balsa wood, then cut with a scissors.
b. Adhere a mini tap light to the center of your balsa wood circle or piece, then glue the balsa wood along the side edges, flip it over, then place on the top of your lantern.
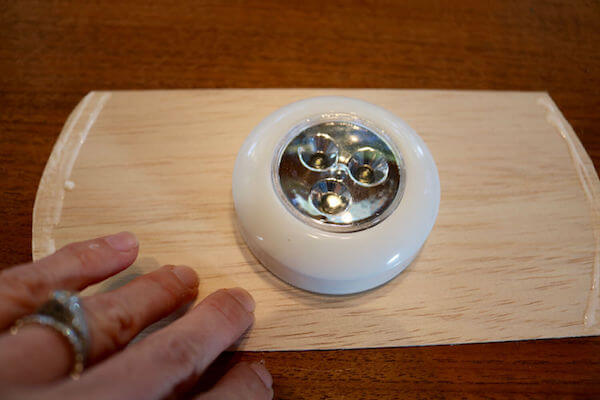
Peel and stick on tap light, then glue along the side edge of the balsa wood.
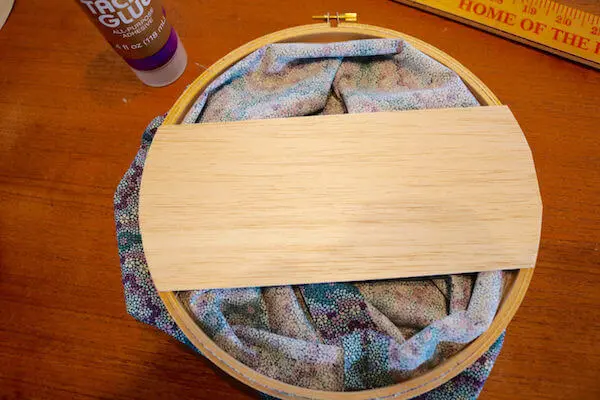
Flip over and adhere to the TOP of your lantern.
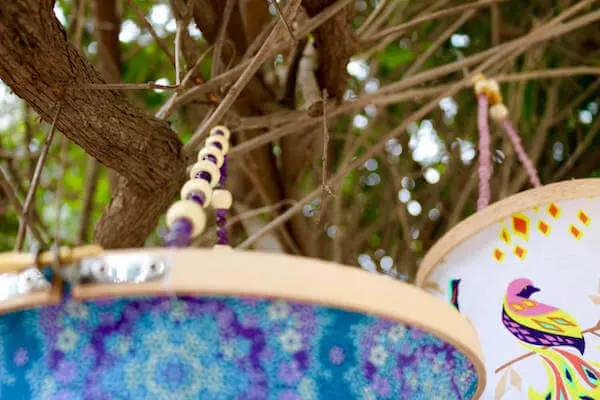
8. Create a handle for the lantern by threading a needle with a 36-inch length of thread. Double the thread and knot it. Run the needle through the top side of the lantern and loop over the embroidery hoop once and back through. Continue to the opposite side and tie off.
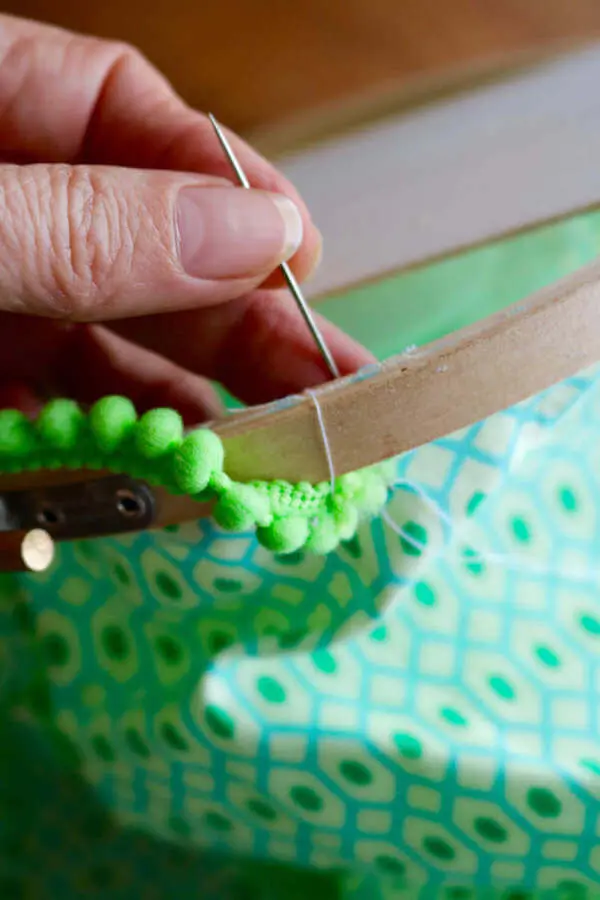
To attach handle, run your needle and doubled thread in and around the top edge of the embroidery hoop. Knot, then do the same on the opposite side.
OPTIONAL: if you’d like to embellish your lantern, you can create a handle using embroidery thread, lace, pompoms or even beads. NOTE: be sure before threading your beads or pompoms, to (a.) FIRST run your needle and thread a couple times through and over one side of your embroidery hoop. (b.) Then you can add your embellishments. (c.) Finish by running your needle and thread through and over the other side of your hoop. Tie off and knot. Done!
Double-thread a needle, approximately 1 yard long, then add embellishments like beads or pompoms.
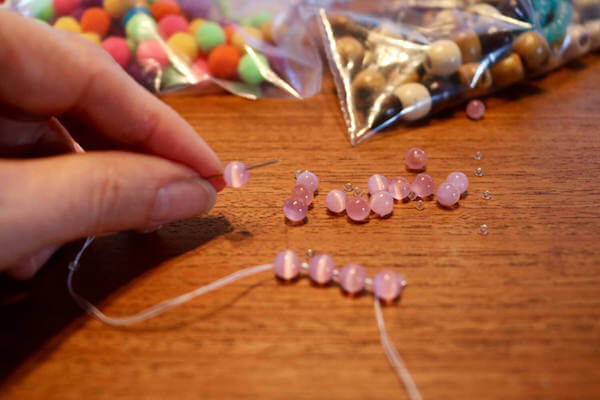
9. You can also add an additional length of embroidery thread (doubling it, then doubling again for a decorative look). Make a knot, then add a bead for added texture and interest! You can attach with a paper clip, loose leaf rings, or any kind of hook.
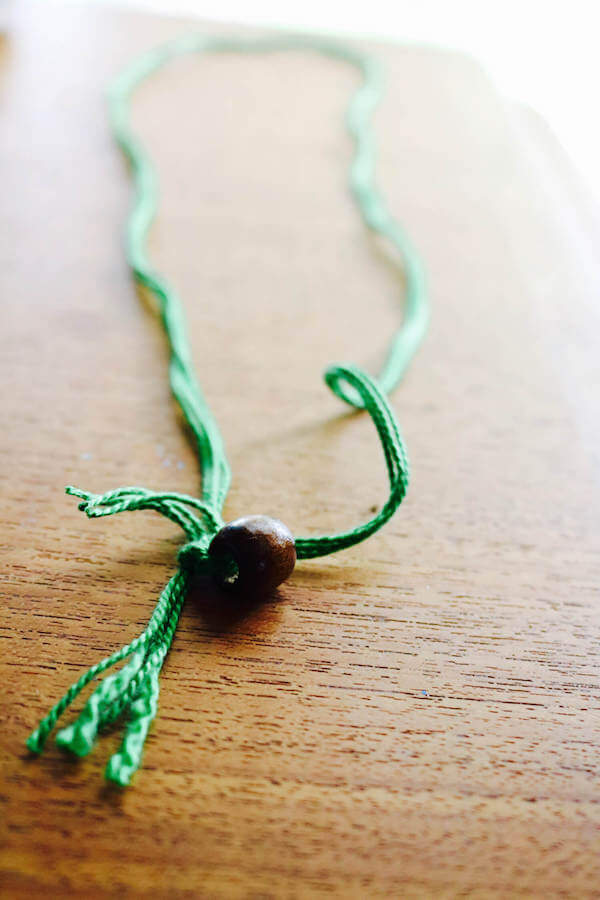
Add length to your lantern with embroidery thread and bead.
You’re DONE!
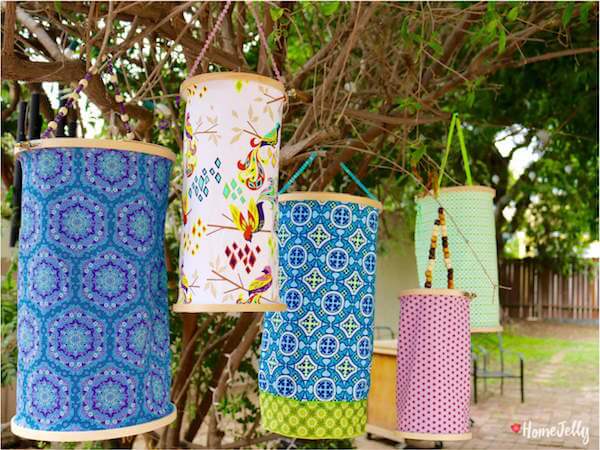
Embroidery hoop lanterns finished!
Added details are lovely!
Not yet ready to turn on the lights!
Now, we are! Lights on!
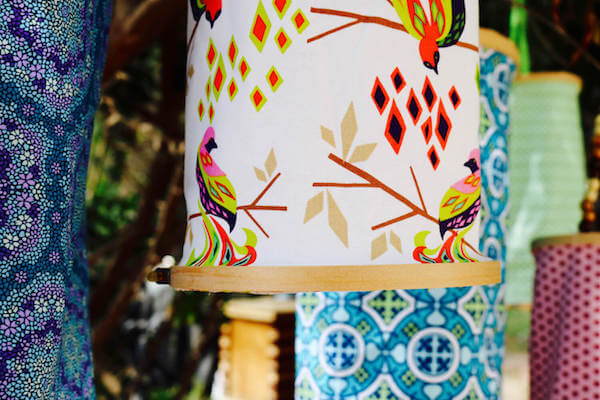
Mixed patterns and colors are interesting and unexpected.
These lanterns are also great indoors! They perfect for dorm rooms because there’s no flame or electricity required, and you can hang them anywhere you wish! They’re so cute…I just wanna hug ’em!
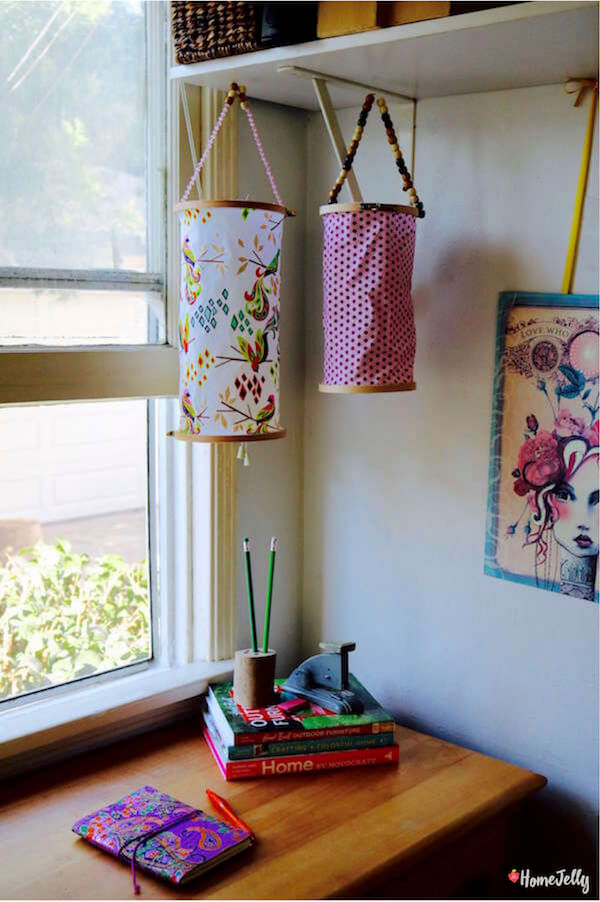
Embroidery hoop lanterns add cheer to a desk area.
Sweet embroidery hoop lanterns.
And the winners are…
1. Like her HomeJelly Facebook page, then leave a comment in her LANTERN GIVEAWAY feed.
OR
2. Follow her on Instagram. Be sure to tell her you’d like one of her lanterns!
This giveaway is now closed.
All photography by Skaie Knox/HomeJelly


