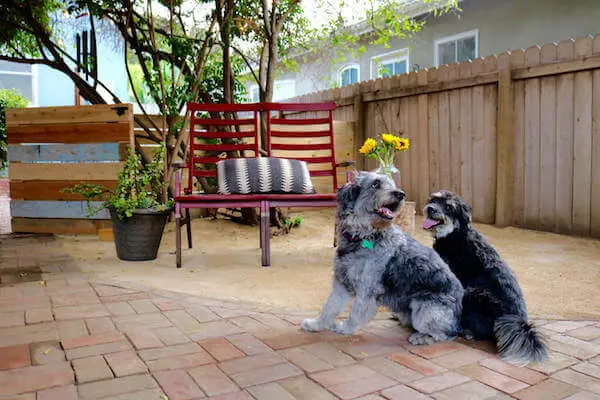
Pups ‘n bench on newly installed decomposed granite.
Along with the arrival of spring, comes the season of outdoor entertaining. How exciting is it to start planning our al fresco gatherings with friends and family whom we’ve been mostly calling, emailing and/or Facetiming these past few months!
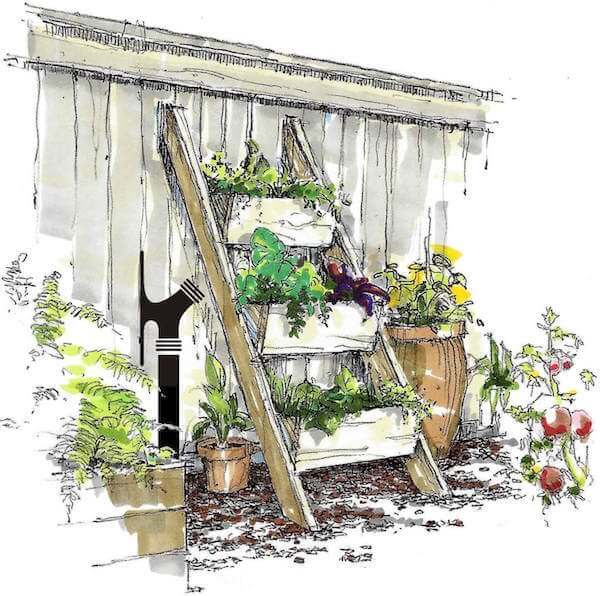
Re-Beautifying Guide
Firstly, to make this seasonal soiree transition, I thought I’d offer a super simple guide to re-beautify your backyard. By ticking off a few or every item on this list, you’ll be springtime-ready (and even on into summer!) to be the mostest host or hostess!
See also: Paving the Way to a Non-Permanent Brick Patio Makeover
Video: Installing Decomposed Granite
Secondly, watch how my energizer bunny-hubby, Matt and I install decomposed granite in a 60-second time-lapse video. Not only does our new DG add to the re-sprucing up of this outdoor space, it also adds much needed square footage.
Oh, yeah! The before-DG-dragged-in dirt from our pups’ paws has gone from ugh! to almost none! Woohoo!
1. Clear Out
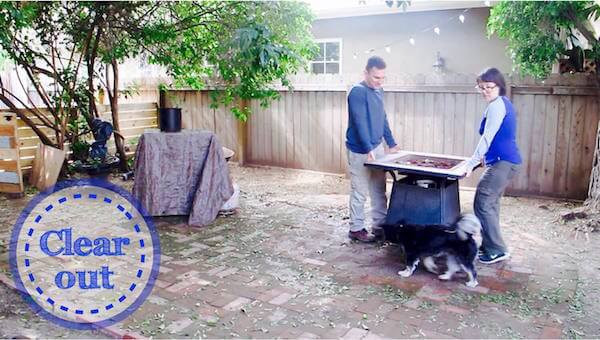
Clear out your patio furniture to make cleaning easier.
After a winter of rain, snow and wind, it’s important to clear out your backyard patio deck. Why? By this time, critters tiny and not-so-small have most likely taken shelter in your furniture and BBQ areas. With everything moved out, you can really get down to some serious cleaning.
2. Clean, Scrub ‘n Dust

Clean, scrub ‘n dust patio furniture to fresh’n everything up for lounging.
Rule #1 to beautifying? Clean! Now that your patio deck is cleared out, you can easily tackle this task. Start by a good deck washing – if you’ve got a brick one like ours, you’ll want to clean up all those mud and dirt-attracting cracks and crevice to ready it up for flip-flops and bare feet!
Next, dust off your BBQ, any cabinets, chairs and tables. Tip: pipe in some upbeat tunes to add some fun, and for some additional tips on cleaning, hop onto this HomeRight post, “Spring Into Cleaning One Room at a Time in No Time”.
Don’t forget your cushions! After months of being stored away, they’ll need a good scrub! Here’s my easy-peasy recipe for cleaning cushions…once dried, they’ll be patio perked-up for park’n it!
To finish reading my super simple guide to re-beautify your backyard patio, hop on over here to my HomeRight DIY Expert page!
Installing Decomposed Granite
As you can see on the video, decomposed granite (commonly referred to as DG) can absolutely change the look of a yard and add usable square footage. It’s also surprising easy to install…yay!
What is decomposed granite? Simply put, it’s crushed, fine granite. It comes in different colors, from sandy brown to buff, red, green and even varying shades of modern grey.
I love that it can be used in a park-like sitting area or installed into a pathway. It’s natural, porous, and fabulously inexpensive. Did I mention it’s EASY to install?!? It sure is!
How to Install Decomposed Granite
Here’s a very simple guide…follow it and you’ll be digg’n your DG in no time!
Supplies:
• decomposed granite (see guidelines below to see how much you’ll need)
• DG activator (purchase with your DG)
• shovel
• metal rake
• watering can (with fine sprinkler head) or pump sprayer
• water-filled lawn roller/rolling tamper (avail. for rent at Home Depot for about $17 a day)
Instructions:
1. Clear out ‘n clean up: this includes raking leaves, digging up roots, and removing unwanted rocks and stones.
2. Rake flat: use the back of a metal rake to relatively flatten out the space you want to lay down your DG. It doesn’t have to be perfect, so don’t break out the level just yet.
3. Spread out and rake flat your DG: this is the fun part! But, how much decomposed granite do you need? Typically, most garden experts advise laying down at least 1″ of DG. So, thanks to sfgate.com, you can use these measurement guidelines to figure out how much you’ll need.
4. Spray on your activator: this is a VERY IMPORTANT step! If you’d like a nicely finished hardscape, you’ll need to completely cover your DG with this liquid. Be GENEROUS, but, make sure your spray is even and not blotchy. I noticed some white spots after it dried from areas Matt got a little over-enthusiastic with while using our watering can. It’s faded now, so, it’s not a huge deal if you get a little nuts.
5. Roll and flatten your DG: time to burn some calories! Actually, this step was pretty fun and satisfying. After you fill your lawn roller with water, it becomes quite heavy. Push away until you’re happy with the look.
6. One more spray of your activator: this final step will literally seal the deal! Spray generously again, then allow to dry for at least 48 hours. Be sure to keep pets away from this area unless you want to star over again.
(Krinkles ‘n Bear-Bear, off!)
This post was sponsored by