
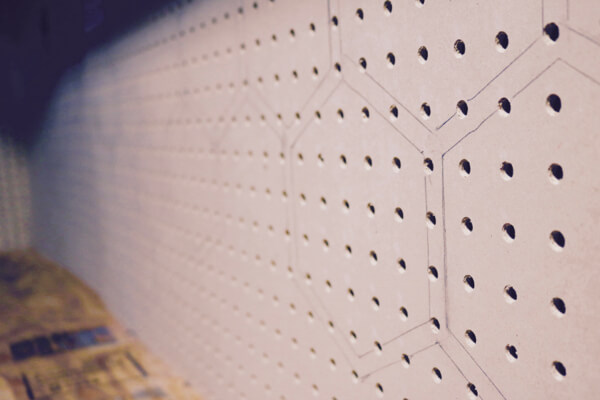
Finished stencil pattern closeup.
I’m not sure what it is, but…if a design doesn’t have some element of fun, then…
pa-shaw!
And, just as important, I love it when decor has function. Enter, today’s post.
Yep. This is Part V of my garage workshop makeover series that invites you to come along with me on this fun DIY adventure! Now then, let’s get pegboard’n!
Supplies:
• pegboard
• jig saw or scroll saw or (if you’re brave) hand saw
• lipstick
• sandpaper (medium – P60)
• stencil (I used a honeycomb pattern like this one from the blue chair)
• painters tape
• drywall screws
• drill
• paint and paint brushes
• wood stain (I used Varathane wood stain, golden mahogany)
optional: 1″ x 1 1/2 – 2″ strips of wood
Instructions:
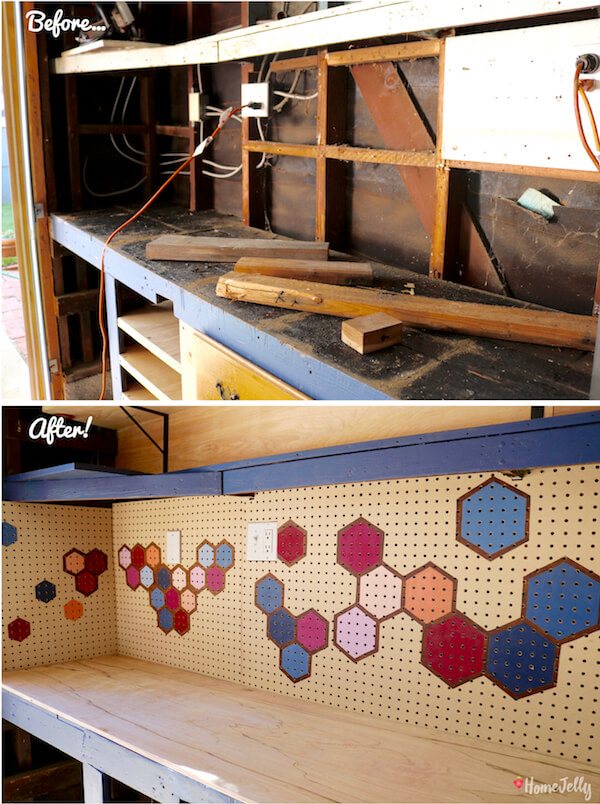
1. Measure and cut your pegboard to size. Be sure to sand down any rough edges.
FYI: Home Depot does not cut pegboard…I dunno why…they just don’t.
Measure and cut your pegboard to size.
2. Measure then cut out any holes for electrical boxes or outlets.
LIPSTICK TIP: “paint” lipstick onto the edges of your electrical box and/or outlet panel (apply a generous amount), then PRESS your pegboard against it. PRESTO! You’ll have an instant template to cut out…Boom!
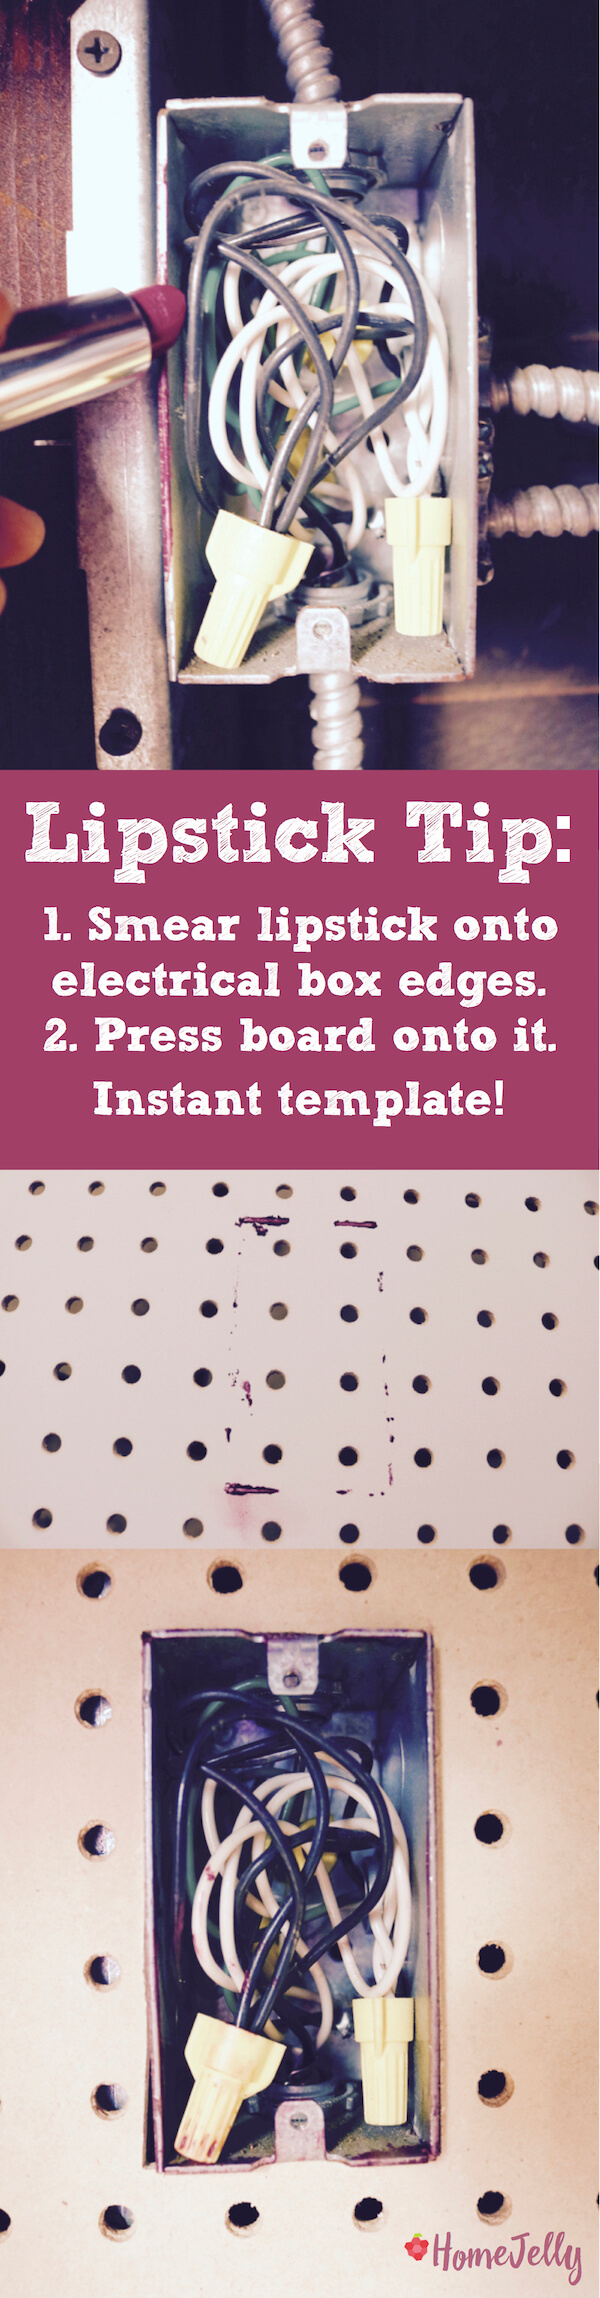
Lipstick tip makes nearly a perfect fit!
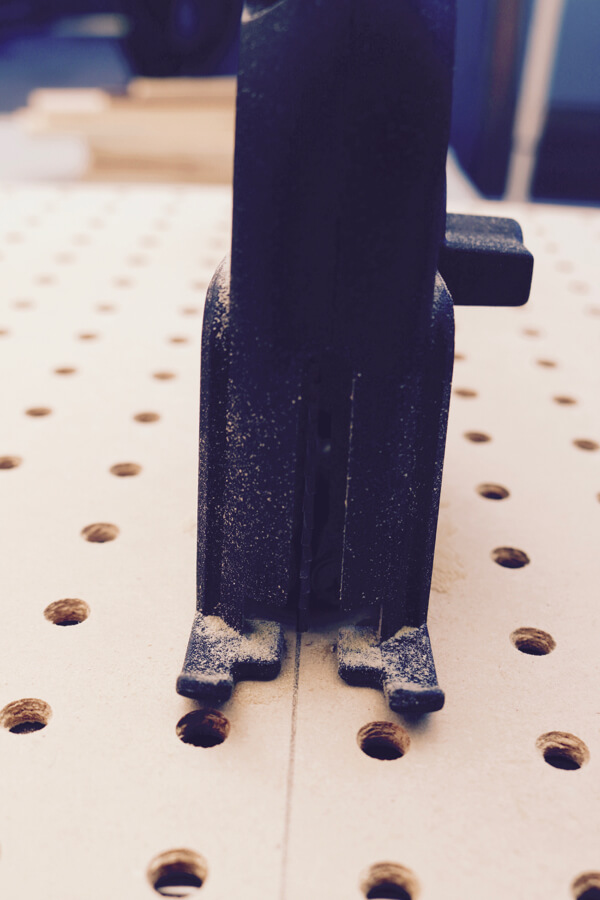
TIP: if you’re using a jigsaw or scroll saw, be sure to drill a hole large enough to fit the blade into to start cutting.
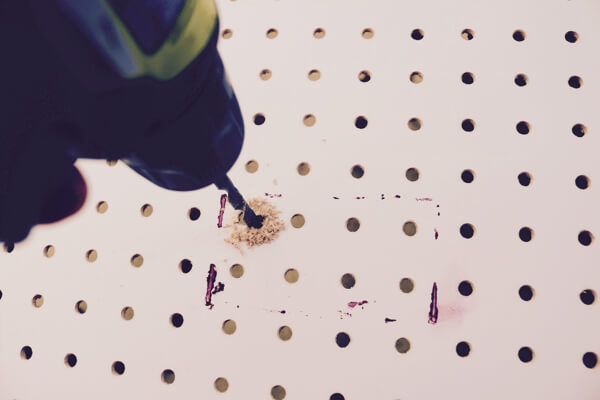
Drill a large enough hole to fit your blade for cutting.
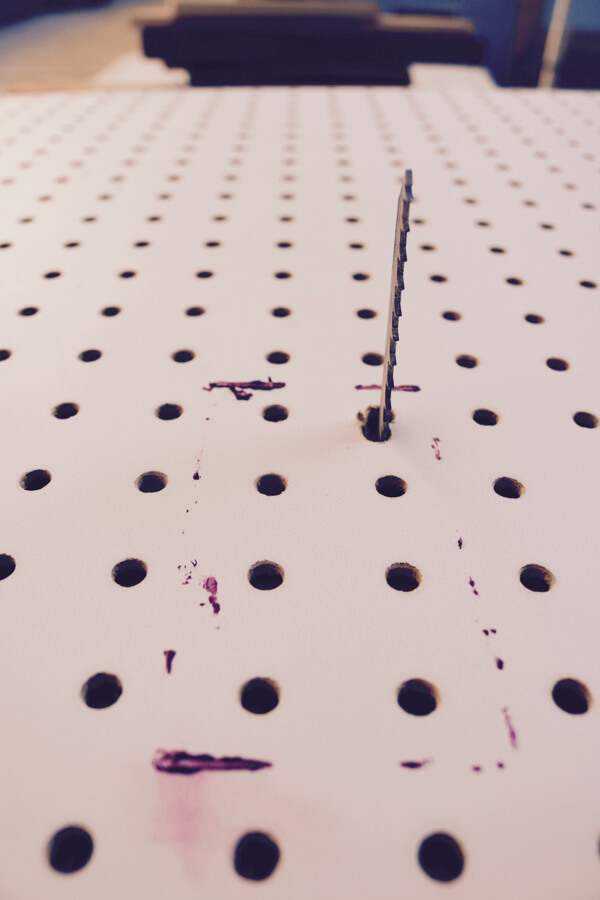
Cut out your electrical box hole…carefully.
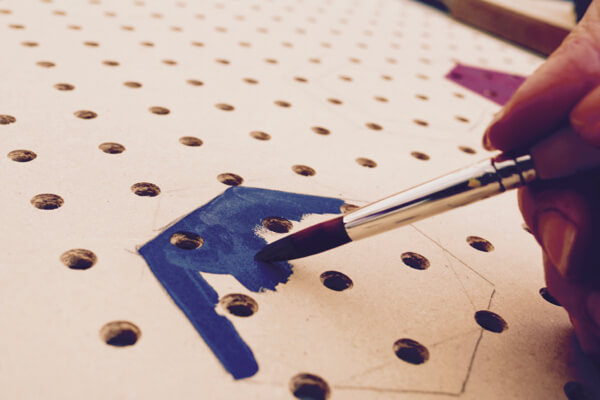
3. Cut out stencil, tape in place to wall, then trace pattern onto board.
NOTE: the reason I did this was so I could see exactly what the pattern would look like. If you wish, you can also do this on a tabletop, but it might be more difficult to see where to place your stencil.
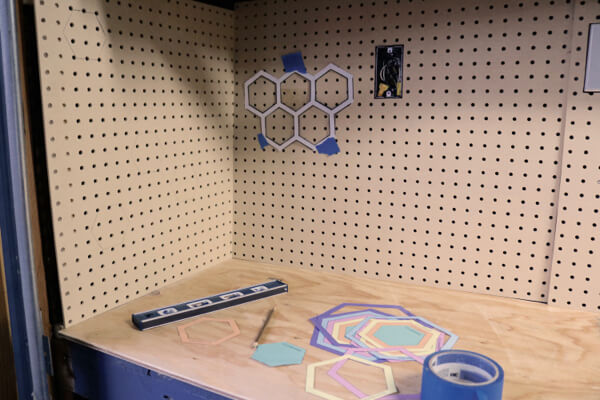
Cut out stencil, then trace pattern onto board.
4. Mix assorted colors, then paint onto board. Have fun and get STUPID!!! I also framed each honeycomb with a band of Varathane golden mahogany wood stain to make them pop!
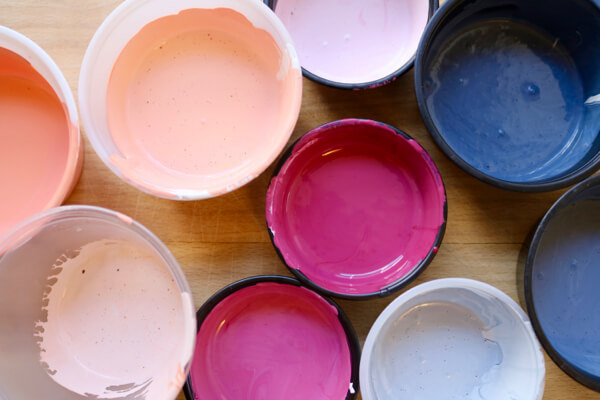
Mix an array of colors to meet your fancy.
I actually got my inspiration for these colors from this fun pillow:
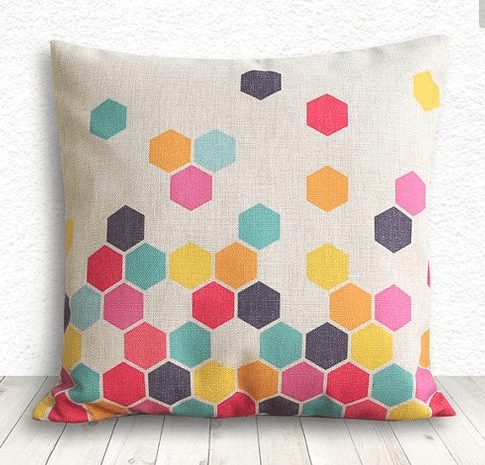
Honeycomb color inspiration. source: closed etsy shop via pinterest.com
Paint pattern onto board.
5. Attach pegboard to wall with wood screws. Replace your electrical box and/or outlet covers. You’re DONE!
NOTE: if you are screwing your pegboard onto a FLAT wall, you will need to FIRST attach a strip of 1/2″ x 1 1/2 – 2″ piece of wood to the top and bottom (behind the pegboard). This will insure you have space to insert your pegs.
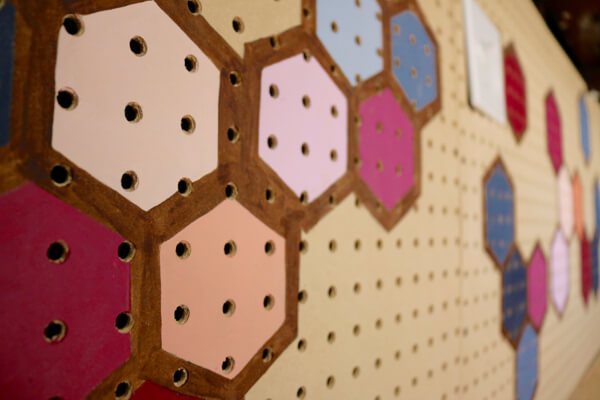
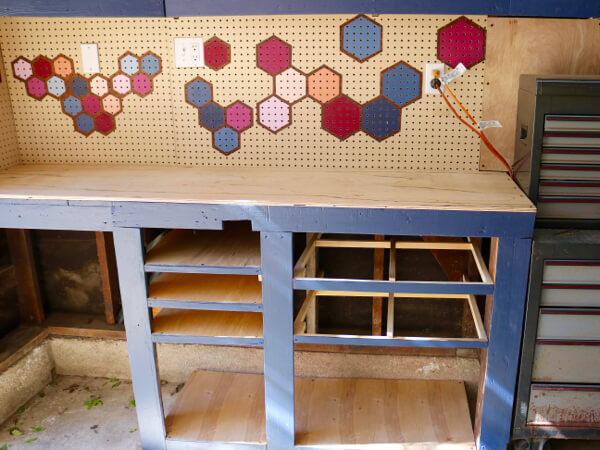
Pegboard honeycomb closeup.
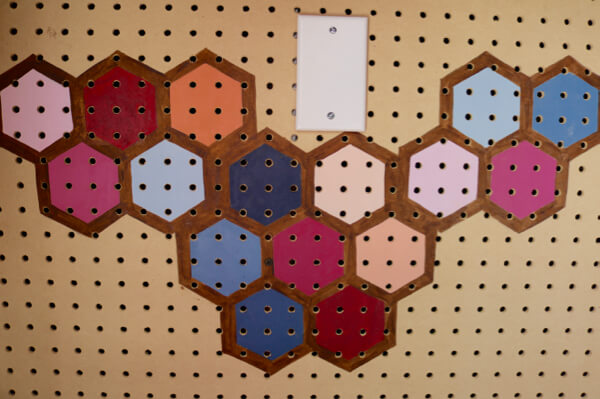
Pegboard pattern is totally inspiring.
Functional artsy pegboard.
Check out my next garage makeover project…and then…the REVEAL!!!
Don’tcha just love the drama?!?
All photography by Skaie Knox, HomeJelly
This garage workshop makeover series is sponsored by: 
 The opinions are completely my own based on my experience. I wouldn’t have it any other way.