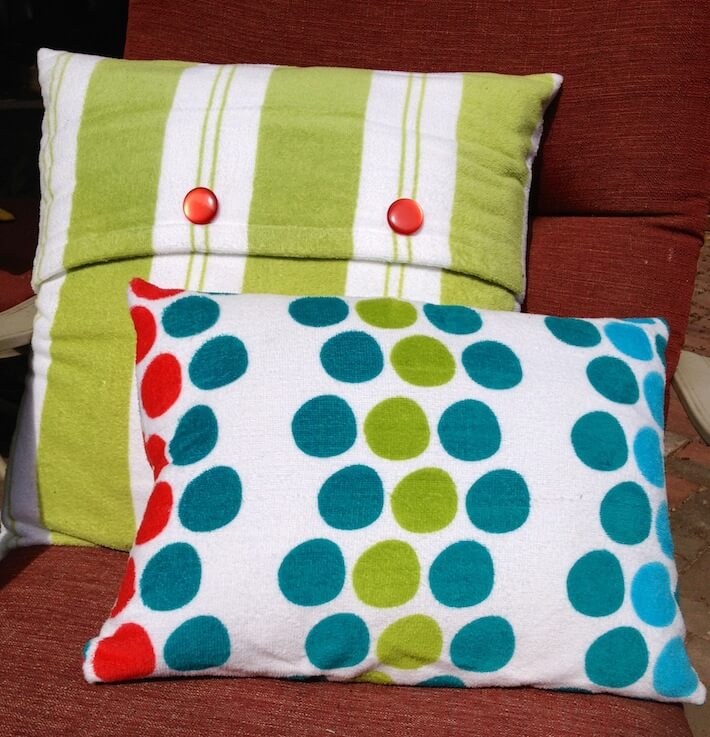

Finished beach towel pillows.
Now that summer is almost at its end, kids are slinging backpacks over their shoulders instead of beach towels. Besides, after long hours at the pool, some of yours may be ready to toss or send off to the Goodwill…but wait! There may be a way of upcycling them into something you can use for the rest of the warm weather season: beach towel pillows! For just a few dollars and an easy couple of hours, you can sew up simple envelope cushions for a comfy weekend hang on your patio’s patio chairs.
Supplies:

Beach towel pillow supplies.
• one or two large beach towels
• 2-4 pillow forms (we used both 12′ x 16″ and 18″ x 18″ forms)
• scissors
• sharpie
• pins and needles
• tape measure/yard stick
• matching thread
• Optional: sewing machine
• Optional: decorative buttons
Instructions:

Measure size of pillow form.
1. Measure the size of your pillow form: if you threw away the packaging, measure the dimensions of your pillow form so you know what size to cut your material (towel).

Find the center of you material.

Make sure you like the pattern placement.
2. Find the center of your material: if your towel has a pattern to it, place your pillow form and wrap it in the towel to find where you’d like the center point. Pin this point to mark it. Note: to reduce the amount of sewing, use the towel’s finished edges by placing the long side of your pillow the same direction as to the long side of your towel (see top photo here).

Include an extra 1/4″ seam allowance.
3. Measure from the center point: unwrap your pillow form, and starting from your pinned center point, measure half the distance on each side. Our pillow is 16″ long, so we placed the 8″ mark at the center, then pinned at 16 1/4″ (the extra 1/4″ is for the seam allowance-do this on both ends). We did the same for the other side…just flipped the tape measure over.

Fold towel’s opposite edge onto measured pins.
4. Fold towel’s opposite edge onto measured pins: now that we have one side measured, simply fold over the opposite edge onto the measured pins, and mark the new side with pins again (or mark a dot with your Sharpie).

Mark cut dots.
5. Mark cut dots: with both sides are measured and marked with pins, take your measuring stick, place it across the towel fabric from pin to pin, then mark your cut dots – approximately 2-2 1/2″ apart.

Cut along the dots.
6. Cut along the dots: carefully cut from dot to dot…you will then have your measured fabric ready to be sewn.

Lay pattern over remaining towel fabric and mark.
7. Lay pattern over remaining towel fabric and mark: if you’d like to make a second pillow using the same fabric and sized pillow, use your pattern to mark and cut another one.

Two pillow covers ready to be sewn.

8. Fold top down first: to ready your material, make sure fabric is right side up. Now, fold top down.

Fold bottom over top like an envelope.
")
Be sure folded piece measures 12″ (or the width of your pillow)
9. Fold bottom over top like an envelope: finish the second fold (bottom over top) and smooth out any wrinkles. Make sure all the edges are even and that the folded piece measures the width of your pillow (ours was 12″ wide).

Pin along both side edges.
10. Pin along both side edges: for easy sewing with your machine, place the pins perpendicular to the edge.

Sew side edges.
11. Sew side edges: either by hand or machine, sew just the side edges that you pinned leaving a 1/8″ side seam. Note: sew slowly at first as terry cloth can be thick. This will help keep your needle from breaking and keep a straight line.

Finish off edges with a zigzag stitch.
12. Finish off edges with a zigzag stitch: to avoid fraying, sew a narrow zigzag stitch starting on the straight stitch you just sewed. Note: while you’re at it, you can strengthen the envelope’s opening edge by adding an additional three stitches by sewing forward, back, then forward to the end of the edge.

Beach towel pillow finished, but inside out.

Beach towel finished, ready for pillow form.
13. Turn your finished pillow case right side out, then fill with pillow form: be sure all edges are sewn up and that there are no holes. If so, either re-stitch by machine or hand.

Beach towel pillow with buttons.
14. Optional: add a decorative button or two by attaching it with a needle and thread to the envelope’s top flap.

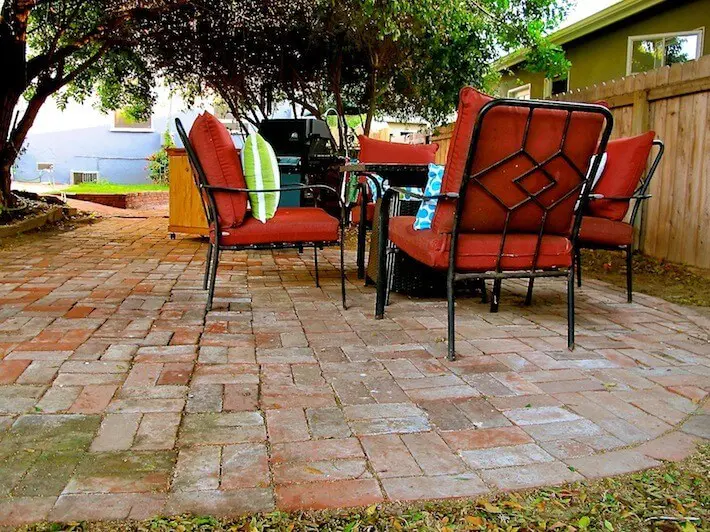
Finished beach towel pillows on patio chairs.

Dish towels.
With the leftover material, we had enough to make these coordinating dish towels! Simply sew up the edges (sew a 1/8″ seam) on both sides, and you’re good to go! Check out how this bar cart was refurbished into something really special!
Now It’s Your Turn!
Have you upcycled beach towels before? Share your projects in the comments below!
All photography by Skaie Knox, HomeJelly.com