
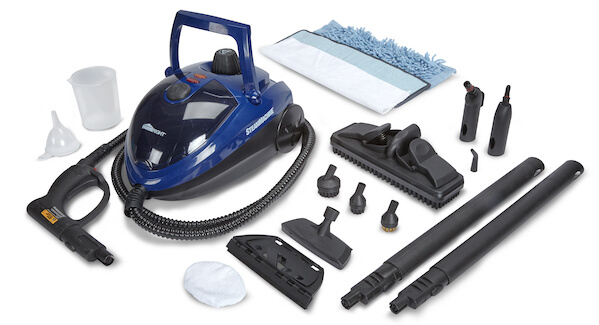
The SteamMachine.
I never knew cleaning my oven or bathroom tile could be so…steamy. But, when my husband volunteered to scrub out years of grease and grime from the bottom of our Frigidaire range, I have to admit, it was my temperature that began to rise (if ya know what I mean!). Yep, I knew I was on to something, though I wish I could have taken all the credit. I’m thinking Matt’s new found spot-removing eagerness had more to do with this new home gadget I was introduced to called the SteamMachine by HomeRight. It’s a compact, multi-purpose and chemical-free steam power cleaner most guys would love to get their hands on (oh, joy!).

Built-in attachment case.
Not only that, because it uses no chemicals (nada – just H20), I wasn’t freaked out about our dog Klunkers licking or walking on the newly cleaned floors, let alone exposing any of my family or friends to possible and unwanted harsh solvents. I also appreciated the satisfaction of knowing that I (and, of course, Matt) was ridding our oven, countertops and floors of germs and bacteria (apparently 99% of them!)…God knows the things that have lived amongst our tiles’ cracks and crevices, yikes! Okay, and, though this may not be included in the SteamMachine’s instruction manual, my skin felt fabulous after the two “spring clean fling” hours of steaming! A definite plus.
Getting Started:
1. Fill tank with water using the included measuring cup and funnel.

Fill tank with water.
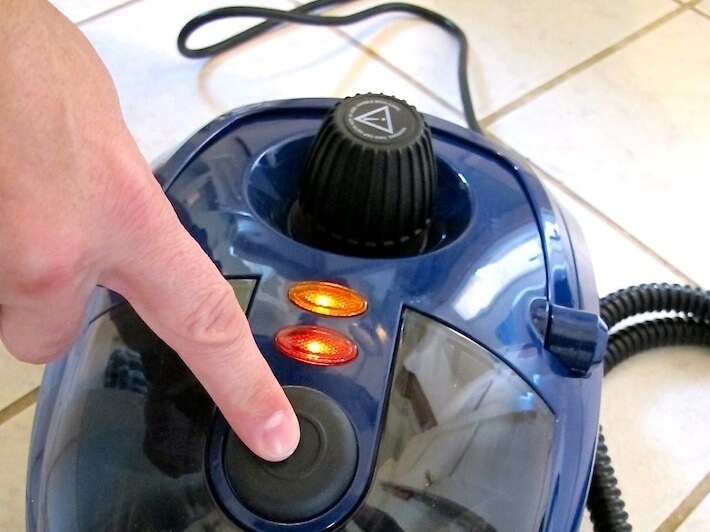
2. Turn SteamMachine on. The red indicator light means it’s on, the orange means it’s building up steam.

Turn on. Red and orange indicator light will glow.
3. Orange light off means we’re ready to clean.

Orange light is off…full steam ahead!
Here’s how it worked:
Our oven BEFORE:

Oven before.

Oven door before.
…and then, we used the SteamMachine. Because our oven hadn’t been cleaned in years, I was pretty skeptical this would work. Still, we used the wire brush for maximum scour power!

Wire brush for oven cleaning.
Here’s where Matt went to town (and, as I used a sponge to mop up the released grease, I received a facial!). Note: the handle was clearly designed to avoid losing one’s grip, but the grooves made it uncomfortable to hold after a while, so we ended up wearing gloves.

Matt steam cleaning the oven.
Our oven AFTER: (We were quite impressed by these results!)

Oven after.

Oven after, too.

Oven door after. Yay!
Basically, this was worth this gadget alone. I seriously thought I’d never get that baked on grease cleaned. Ka-pow!
Our bathroom floors BEFORE:

Bathroom tile floors before.

Bathroom tile floors before, too.
Please don’t judge us…these were mopped just minutes before. I’ve even hand-scrubbed this grout, to no avail. But, then we steam cleaned them using the nylon bristle attachment brush…

Cleaning the bathroom floors.
Our bathroom tile floors AFTER:

Bathroom tile after.

Bathroom tile after, too.

Cleaned bathroom floors, ready to use.
There are many other uses for the SteamMachine (and if we had some, I would have loved to have tried the wallpaper remover attachment!), but, we thought we’d have one more go – our icky kitchen countertops (you know, the kind that ultimately inspired solid top surfaces? One day…a girl can dream, can’t she?).
Our kitchen countertops BEFORE:

Kitchen countertops before.

Because these counters are most likely from the 1960s, a lot of the grout has deteriorated or discolored. So, though they didn’t end up looking stark white, they looked noticeably better.
Our kitchen countertops AFTER:

Kitchen countertops after.

Kitchen countertops after, too.
So there you have it. I guess we should have some people over this weekend before this place loses its pristine clean gleam! As for this compact steamer, since we have limited closet space, we’ll most likely have to store it in our garage and make sure to collect the attachments in a box or bag. When it came to the tough-dirt areas of our home, the SteamMachine put up a good fight and left us with a never-before-seen clean evidenced by our white floors, tile, and an oven that will no longer “smell weird” every time we turn it on!
If you’d like to try this gadget in time for your spring cleaning, visit HomeRight and purchase their SteamMachine Model 53 for $149.99. There are two other models, the AutoRight Steam Machine ($129.99) to deep-clean your automobile, and the SteamMachine Model 52 ($119.99) for an easy-reach and effective way to clean floors.
source: homeright.com
All photography (other than indicated) by Skaie Knox, HomeJelly