
IKEA wooden planter box looking more shabby than chic.
Sometimes it’s the little things that make big impacts in our spaces. I noticed, upon my sink shelf, sadly sat my cute little IKEA wooden planter box that wasn’t looking so cute anymore (and the plant had seen better days as well!). Sigh. I knew it would be an easy fix, but, I’m slightly embarrassed to say, it took me about 6 months of daily doses of “ugly” to finally do something about it.
So, on an open highway kinda Saturday, I got started. I knew I wanted to maintain its original woodiness, warm and rich, so I decided to use the simplest path to refurbishing this otherwise plain cube into an updated, mod feature piece. With leftover DIY supplies, this cost me zippo. Otherwise, the price for these items is quite minimal.
When it comes to your main piece, anything wooden, from a planter box, to a toy box, even a picture frame, can be transformed using this DIY how-to. As a reminder, our home’s smaller accessories have a lot of decor power potential when given the attention they deserve and “shined up” like a bright penny.

IKEA wooden planter box before and after.
Supplies:
• IKEA wooden planter box (or any other wooden accessory you’d like to refurbish)
• sand paper – medium – P60-P80, fine – P100-P120
• sanding block
• Painters tape
• small paint brushes
• stain + poly – I used Varathane stain + poly, American Walnut
• poly urethane
– I used Varathane outdoor clear semi-gloss to minimize water staining
Instructions:
Step #1: Sand away all the water stains. Use your medium grade paper to remove the stains, then the fine to smoothen.

Sand away all the water stains.
Step #2: Use the painters tape and vertically wrap around your box. You can create whatever thickness of lines you’d like and how many you wish. Note: you can actually create whatever design you wish, horizontal or diagonal, etc.
Step #3: With tape in place, paint on your stain + poly to cover, then allow to dry. You can paint on as many coats as you wish to create as deep a color as you’d like.
Step #4: Remove the tape and cover the entire box with clear poly urethane. I used about three coats. Just allow your box to dry for approximately 2 hours before applying the next coat.

Poly stain and poly urethane is all you need!

Staining is just as transforming as paint.
Easy-Peasy!

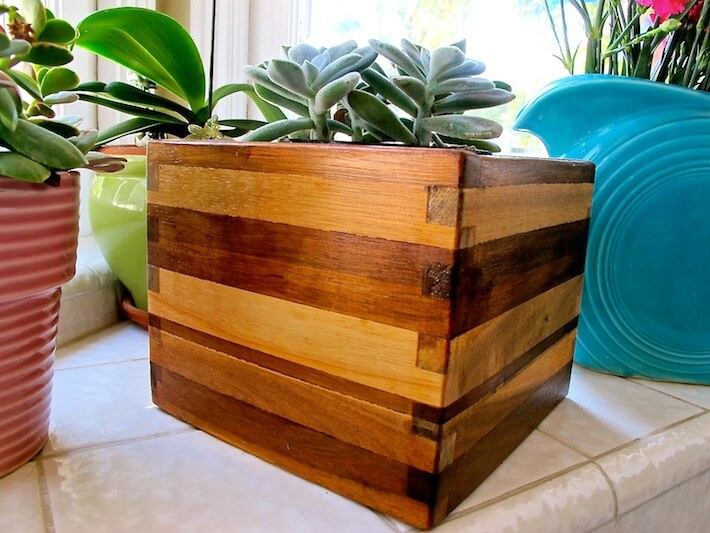
Spiffed up wooden planter box…love the warm wood that balances out the bright colors in our kitchen.
Have you ever done an IKEA accessory makeover? Tell us about it!
All photography by Skaie Knox, HomeJelly