

Peachy balloon banner.
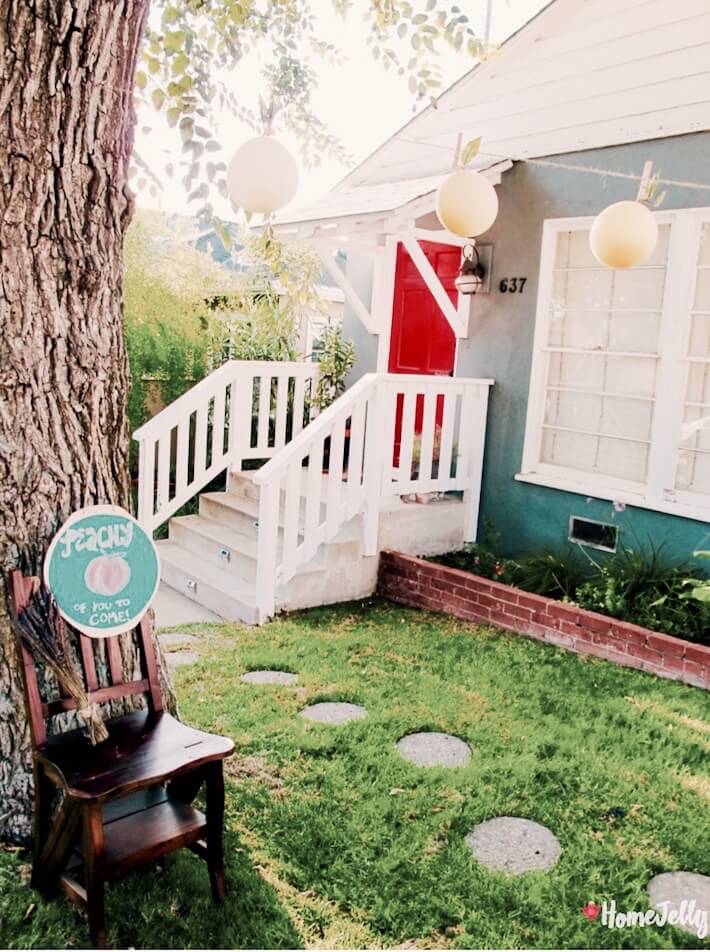
There’s something wonderful about simple design, and in today’s post, simplicity comes in the form of peachy party decor. Because our beach bungalow is quite small (just 840 sq ft!), we often host gatherings in our backyard. So, to make accessing the party easy and more direct, we open our side gate and let guests enter there. One trick we use is to string a banner from our front yard tree (or post a sign at its trunk) to the edge of the fence, to help point everyone in the right direction.
Since we were throwing an “It’s-Been-a-Peachy-Summer” party, I saw a perfect opportunity to string this cutie-pie peach balloon banner (an idea I tweaked from fellow Swede and blogger, Willow of willowday) which greeted everyone with a whimsical “Hello!”, giving a sweet first impression and the anticipation for a swell time.

Peachy balloon…leaf and all!
I took this the morning after. Juicy tip: make fruit banners the day before for super realistic results! This will also save you from having to do so much the day of the party.
See also: DIY Holiday Banners and Decorating Ideas on a Budget
Peachy Balloon Banner Supplies:

Peach balloon banner supplies.
• real or silk leaves – (Michaels has these in spades – this bunch cost $6.95)
• 9″ – 12″ balloons
• scissors
• twine or string
• clothespins
Peachy Balloon Banner How-To:
1. Snip off a pair of joining leaves.

Snip off a pair of joining leaves.
2. Blow the balloon only half-way. This is very important to achieve a more fruit-sized look – you’ll also get different color shades which, again, looks more realistic. Note: I could only find cream-colored balloons, but when not fully inflated, the color was more like a white peach (now, that’s mak’n it work! Sa-weet!).

Blow the balloon only half-way.
3. Tie a knot over the twig to hold leaves in place.

Tie a knot over the twig.
4. Attach the clothespin to the knot of the balloon. Not sure how I came up with this idea, except that I didn’t want to have to tie each balloon to a specific spot on the twine line. In other words…laziness resulted in a good idea! Boom! (Pun, totally unintentional…well, sort of.)

Attach the clothespin to the knot of the balloon.
5. Thread twine or string through the clothespin spring…you’re done! Note: the clothespin and twine really add a rustic touch to this banner. I did notice that the wind blew the balloons together, so, to keep them in place, you can wrap on each side, a small piece of Scotch tape, or, for added color, you can use washi tape.
.

Thread twine or string through the clothespin spring.
You can really place your peachy balloon banner anywhere:
• Along a fence
• Over or behind the food or cake table
• Zig-zag it above your lawn or indoor room
• Attach it from one end of a table to the other in front
• Across an archway
You can also make all kinds of different fruit:
• Pumpkins – use orange balloons, then cut a paper towel roll into 2.5″ lengths, paint brown or black, then tape to top of balloon
• Apples
• Strawberries – use a black sharpie to add seeds
• Lemons and Limes
and whatever your imagination can think of! Have fun and be creative!

Peach balloon banner completed!

To be more exact, this is a white peach balloon banner!
Now it’s Your Turn!
Tell us your creative decorative uses for balloons!
All photography by Skaie Knox, HomeJelly