
Repurposed, open box tile cheeseboards.
Waste not, want not. Such wise words, especially when it inspires a project like today’s leftover tile cheeseboard how-to. This past month, I was pottering through the aisles of Home Depot, when I came across a row of tile on sale.
The selections were quite lovely. I imagined our kitchen floors dressed in ceramic redwood wood (even though our current DIY’d vinyl floors are quite nice, too) and mentally placed them on my kitchen rehab wish-list.
Then, I noticed a box that was open, so I slid one out to have a closer look. “This would be an amazing cheeseboard!” I thought to myself. And at just $1.43 per tile (open box price), I realized I could have at least a piece of this floor in our kitchen.
The final cost for this project was just over $10-$12, so I thought I’d make a couple versions for y’all! With minimal supplies and a slice of creativity, you’ll have one super s-tile-ish cheeseboard! Ugh…I’m such a dork.
Supplies:

Tile cheeseboard supplies.
• ceramic tile (choose any style that melts your butter)
• vinyl bumpers
• glue gun
• fine sand paper (P100-P120)
• two drawer pulls (versions are endless and can be either old, new, found, repurposed or bought…be creative!)
• E6000 Craft Adhesive, clear
Instructions:
1. Using your glue gun, adhere vinyl bumpers to the back four corners of your tile. Even though the bumpers have sticky backs, they will adhere better and longer if you use the glue gun. For even more long-lasting results, use the E6000 (admittedly, I just thought of this…darn…I guess I can re-glue when and if the bumpers come off…hindsight 20/20’s a bitch).

Glue on the vinyl bumpers.
2. Measure the center point of both short ends and mark with a pencil.

Measure the center point of your tile.
3. Gently sand and roughen the part of your drawer pull that will lay down onto the tile. This is to help the glue adhere to the handle.

Lightly sand pull to roughen.
4. Place your drawer pull where you’d like to adhere it onto your tile, then using a pencil, trace a line along the inside edge.

Trace the inside (or around) the flat part of your drawer pull.
5. Glue along this line.

Glue along your traced line.
6. Place the drawer pull onto the glue and allow to dry for 48 hours. You’re done!

Place your drawer pulls onto the glue line and let dry for 48 hours.
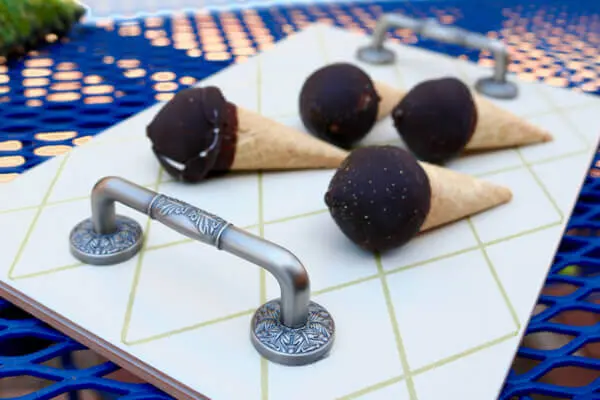
Shown above is the rustic ceramic redwood tile cheeseboard and the modern ceramic marble cheeseboard (with the cheese lavash triangles)…two different styles, but both easily DIY’d!

A washable, durable, stylish cheeseboard you made all by yourself.
You can also use these tile cheeseboards for bread, hors d’oeuvres, desserts, chocolates, a flight of beers, jewelry, and so much more!
Update!
I recently visited my local Habitat for Humanity ReStore in Orange County, California and, with the items I bought there, created three easy ReDIY projects.
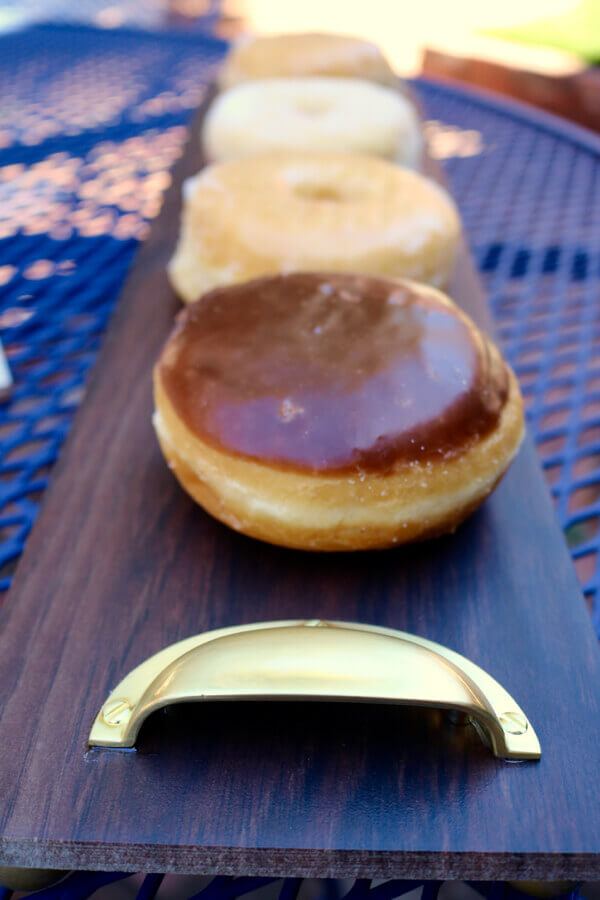
Cabinetry hardware and tile create an elegant cheese or dessert tray.
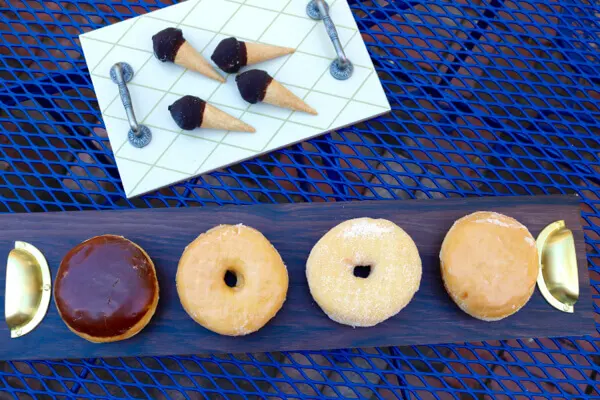
Tile trays are great for serving your favorite foods.
You can get as creative as you’d like with different tile and hardware designs.
Here’s a fun how-to video showing a slightly different style cheese/dessert tray using wooden beads for feet! Watch, then give it a try!
Now It’s Your Turn!
What do you think about this project…delicious, or cheesy?
All photography by Skaie Knox, HomeJelly