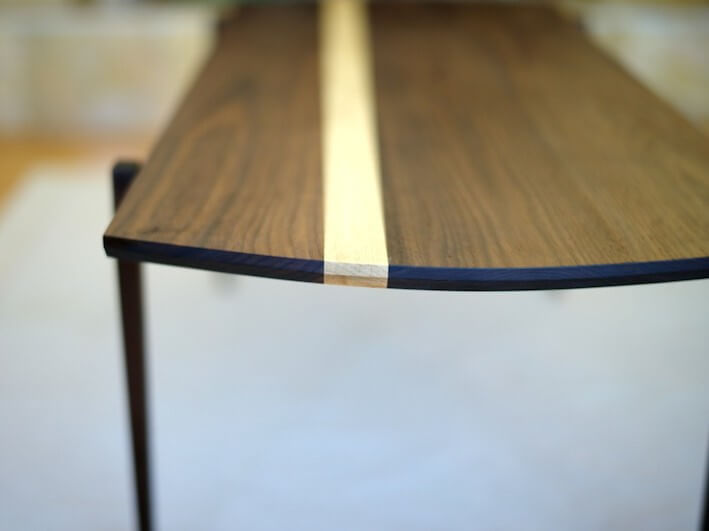

Oakley cocktail table. source: woodworking.jackpien.com
Like making music, crafting a piece of furniture takes creativity, dedication and attention to detail. In that light, I hope you find today’s post visually tantalizing and intellectually entertaining as it did for this decor nerd.
When it comes to DIYing, I’ve always pretty much faked my way through. Yeah, I know…I’m not alone. But, frankly, I’m just so overjoyed that I’ve been able to make anything on my own with a power tool.
Well, not this Dartmouth-trained furniture designer and wood maker! No, Jack Pien is the real deal. I must tip my imaginary hat at the precision and delicate work he demonstrates with this beautiful Oakley cocktail table (uh…yeah, I so want this!). Its style smacks of mid-century modern coolness with inlays that convey a trendy surfer/skater sensibility. All the while, you can see it was hand-crafted with care and humbleness. Yes, if this table was a song, it would be a hit.

Under table detailing. source: woodworking.jackpien.com
I had the pleasure of interviewing Jack, so I could share his journey as a designer/wood maker with you all. I’m gonna give the floor to Jack, now, so please point your attention to him…
HJ: What is your furniture-making background? Did you go to school or are you self taught?
JP: I learned how to make furniture back when I was at Dartmouth College in New England. Dartmouth’s wood shop was across the street from my apartment. I passed by one afternoon and thought, “Oh, huh, that’s kind of cool.” (when I was at a point in my youthful life when anything “cool” was enough to call-to-action). I dropped in, signed up for orientation, and from then on, it was history.
If you can stereotypically imagine what a wood shop nestled in the middle of rural New Hampshire would look like, you can probably accurately describe Dartmouth’s shop. Dudley Whitney and Greg Elder ran the shop at the time and I couldn’t ask for better mentors. Both of them had a great sense of humor, super patient with everyone’s idiotic questions, especially mine. “No Jack, you cannot run your finger over the table saw.” I hope they still remember me. Before I left, I helped co-design a shop jig. In good fun, they decided to designate one of them a “limited-edition” which I signed and they hung on their office wall. They were just cool guys like that.
HJ: Tell us about your very first DIY project? Was it making furniture or refurbishing or something else entirely?
JP: Wow, you are taxing my memory. Can’t recall my first DIY project, but my most *memorable* DIY project was a silver pendant, which I designed and made at Dartmouth’s jewelry shop for my then girlfriend, now wife. It was the only piece of jewelry I ever made, but I think it came out relatively well. I also made the accompanying jewelry case at the wood shop out of walnut and maple. I even bought silk fabric and hand-sewed the jewelry pillow placed inside the jewelry box.
My girlfriend wore it for a handful of years and then lost the pendant / necklace! Being a master of deflection, she decided to use this as an opportunity to challenge me to make another one to prove that it wasn’t a one-hit-wonder. But, by that time, we were out of school, and I was in the San Francisco area and did not have access to a shop – until I met Edith Schneider, a local SF jewelry designer and maker.
I had decided to propose to my girlfriend at the time but didn’t want to just get a ring. So instead I redesigned the pendent, and Edith lent me the use of her shop (and much jewelry-making refreshers) to remake the piece. We still had the original jewelry box pillow. So when I presented my girlfriend the box, the first thing she said was “well, finally”, then when she pulled out the pendant and saw the ring under the pillow, she said “You’ve got to be kidding me.” LOL.

Wood inlay and construction detailing. source: woodworking.jackpien.com
HJ: Regarding this fabulous table, what inspired you to design it the way you did?
JP: First off, thank you so much for the compliments about the Oakley table.
About 2 years ago, my dream of owning a home that has a sizable garage for a shop materialized. I bought the tools and proceeded to endeavor into an overly elaborate bookcase project, which quickly lost momentum due to some very complex joinery which taxed my patience. In an effort to get back on the woodworking wagon, I decided to look for a more digestible project.
[Typically], I do preliminary research by walking around boutique furniture stores in SF – looking for something light in feel, mid-century-esque in inspiration. A coffee table at HD Buttercup in SF caught my eye. I liked how the piece seemed like it was floating – like a surfboard on water.
I didn’t like the skirt design or how the legs were nailed into the table without any consideration of the expansion of wood. But I decided to expand on what I saw. The custom floating dowel joint (holding the table top to the legs/skirt) “fixed” the oversight on how wood moves and stays true to my aversion against using metal hardware. The joint ended up working really well. I added the maple strip to accentuate the linearity of the table top. The leg tapers and hidden-skirt contribute to the airy, floating feel of the table top.
HJ: Ah…true design. Now, if you might indulge us…can you give us a list of what you used and a brief “step by step”?
JP: Here are the overall steps and some pictures to illustrate.
Step 1: Find inspiration. I strongly believe inspiration, will lead to unique design. This often means looking at the world around us. This step is also the most difficult and I definitely struggle with being a good artist that is effectively “stealing” vs a bad artist “copying”.
Step 2: Design in CAD. I use Google Sketchup.

Operation-Coffee Table. Walnut with maple inlay strip. Trying to decide on which leg design. source: woodworking.jackpien.com
Step 3: Visit lumberyard! Buy wood.
Step 4: Most lumber is rough (not parallel, not flat, not orthogonal). Mill out your pieces of lumber.

Milling wood. source: woodworking.jackpien.com
Step 5: For the table top, you will most likely have to glue multiple pieces together. This was also the step to add the maple inlay.

Gluing multiple pieces together including inlay. source: woodworking.jackpien.com
Step 6: For the legs and skirt – while I use power tools to rough cut the pieces to size, I like the quietness of cutting out and making the joinery by hand with chisels and hand saws.

Cutting out and making the joinery by hand with chisels and hand saws. source: woodworking.jackpien.com
Step 7: Glue up the legs / skirt together.

Glue the legs and skirt together. source: woodworking.jackpien.com
Step 8: Hand plane, sand the pieces before putting the top on the skirt/legs.

Hand plane and sand the pieces. source: woodworking.jackpien.com
Step 9: Finish the top and skirt, separately, with oil.

Oil the top and skirt. Definitely not baby food in the jar. source: woodworking.jackpien.com
Step 10: Install table top onto skirt.

Attach table top onto skirt. source: woodworking.jackpien.com
Step 11: Add another couple of coats of finish, waiting one day between finishes. Allow one week for finish to dry fully.
Step 12: Presenting the Oakley Coffee / Cocktail Table.

Oakley cocktail table at home. source: woodworking.jackpien.com
Purchasing note: if you are interested in buying this beautiful Oakley cocktail table, listed for $650, please visit his DiggersList storefront, Jack Pien Woodworking.
HJ: Wow. Beautiful photos and serious tools! Thank you for sharing your process…I feel like a kid again watching Mr. Rogers! So, I have one more question. What tip would you give our HomeJelly readers if they wanted to start making furniture?
JP: The most important tricks of the trade I picked up from Dudley and Greg at the Dartmouth wood shop was around safety. Every other bad technique-driven mistake can be corrected or “done again”. But once you hurt yourself, you may never get another chance to “do it right”.
I am always more than happy to answer any questions people may have around safety or shop technique. It’s unfortunate that woodworking is not as accessible as say Instagram photography. But feel free to contact me any time with questions about safety, technique or on how to get started: [email protected].
Thanks to Ponga, a new way to share information about things you can see, with mobile and web applications that let you quickly tag an image with content and applications, you can learn more about Jack’s table and even view videos of his process.