*This is a sponsored post and contains affiliate links.
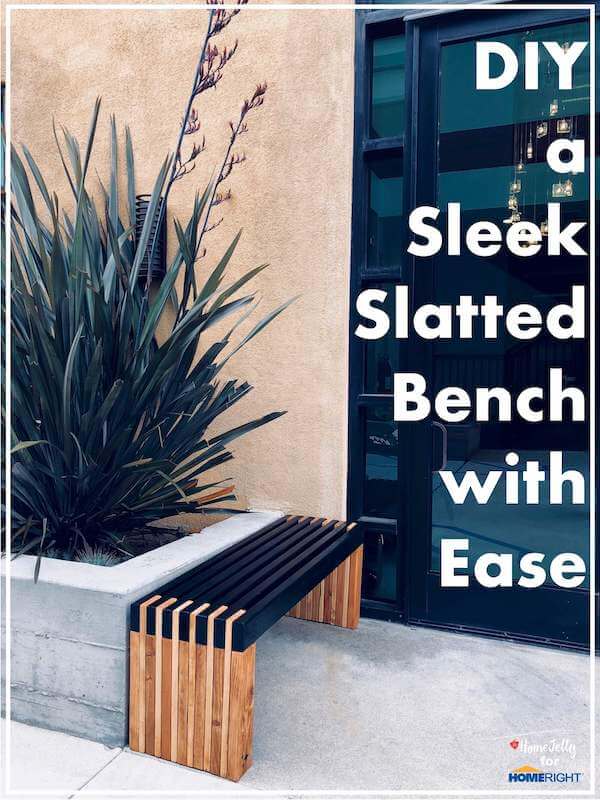
This beautiful DIY Slatted Bench looks expensive and complex, yet it was quite doable and affordable to make. Thanks to today’s fabulous sponsor, HomeRight, I was able to make this DIY slatted bench with ease.
I also want to give a shout-out to my DIY sister-in-arms, Ana White, for providing today’s schematics and guide. I made a few slight modifications, but she deserves the design props.
How to Guide:
Tools and Supplies:
• Circular saw or miter saw for cutting your own wood pieces.
*To save time, I went to Home Depot and had them cut the wood instead. You’ll need to show them the cut list that’s below and double-check their cuts. I had 4 pieces that were slightly off, and this caused some issues.
• Hand sander or block sander
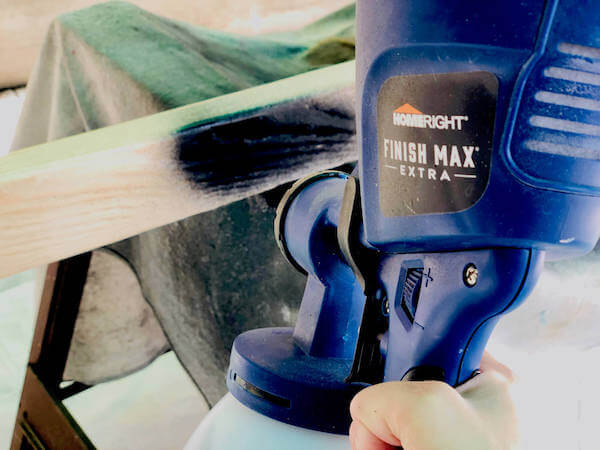
• HomeRight Super Finish Max Paint Sprayer
• Cordless drill (tip: you may want two for this project. See below for details)
• 7 pieces of 2″ x 4″ x 96″ prime kiln dried whitewood studs
• 2 pieces of 1″ x 4″ x 10′ common board
• P120/P150 sandpaper
• Paint and/or wood stain
• Wood glue – make sure the glue is EXTERIOR grade
• 2″ wood nails
• Drill bits – (a.) 1/8″ for pilot holes – add 1/64″ more if you have harder wood, (b.) 3/8″ for make-shift countersink holes, (c.) Phillips screw bit
• Clear multi-surface waterproofer spray
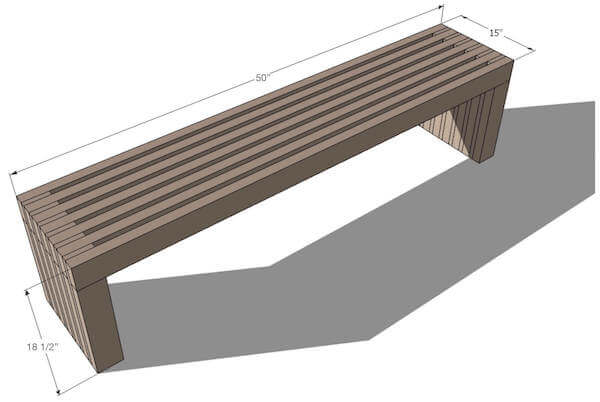
Cut List:
• 7 – 2″x4″ @ 50″
• 14 – 2″x4″ @ 15″
• 12 – 1″x4″ @ 18 1/2″
Prepping Instructions:
DIY Tip: Read all instructions and look over diagrams before starting, and be safe when using cutting tools! For this design, it’s best to paint and stain before putting this all together.
1. Cut the boards to size according to the cut list. Boy, did it save time having Home Depot cut my boards! Yes! Otherwise, put on some good tunes and cut away!
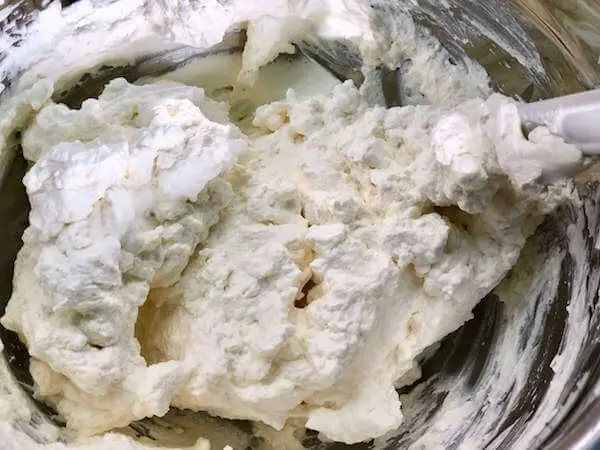
2. Sand all boards with P120-P150 paper to smoothen rough or sharp edges. This is the tedious part of the project, but absolutely necessary. You definitely don’t want to get splinters in your tushy!
3. Paint top boards. This is SO easy with the Super Finish Max Sprayer – it took me about 15 minutes to complete all 7 boards. Allow to dry.
4. Stain the edges of the remaining pieces. Organize your 1″x4″s and the remaining 2″x4″s.
• Set aside 4 pieces of 2″x4″s and stain all edges and ALL sides. NOTE: it is very important to SEAL all surfaces of your bench, especially if it will be kept outside. Moisture can wick from the wet ground and cause wood rot.
• Stain all the edges of the remaining 2″x4″s and 1″x4″s.
5. Drill pilot and countersink holes. This is VERY IMPORTANT to do! See the diagrams below where to place the pilot holes. TIP: be sure NOT to drill pilot holes into your FRONT long piece (this is the first board you’ll work with).
Putting-It-All-Together Instructions:
DIY Tip: have TWO drills for this project to speed up the process. One to create your second pilot holes, and the other for screwing in screws.
1. Start your first layer.
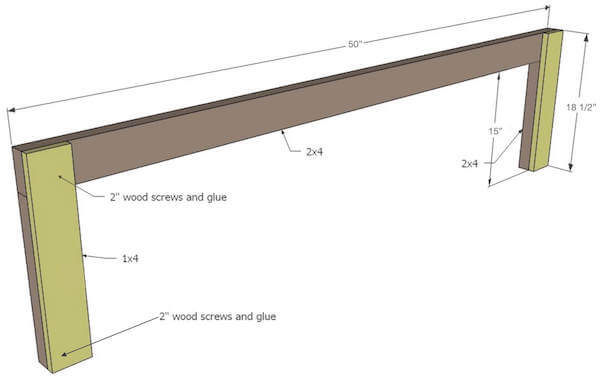
A. Place your first layer of boards face down (see diagram). Lay out 1 long 2″x4″ and 2 short 2″x4″s. Apply wood glue to 1″x4″, then place on top and screw down. TIP: Start with your best-looking top board first. This will be the front of your bench.
Once you’re ready to screw together your boards, you’ll want first to line them up where you want them, then create another PILOT HOLE by drilling through to the board you are going to screw into. You’ll avoid the gap creep that can happen when your screw doesn’t want to enter the wood.
B. Screw 1″x4″ down to both the top and leg 2″x4″. See the diagram for the placement of the screws.
2. Add the second layer of 2″x4″s onto the first layer of 1″x4″s. Be sure to create your SECOND pilot holes and add your wood glue. Note screw positions on the diagram.
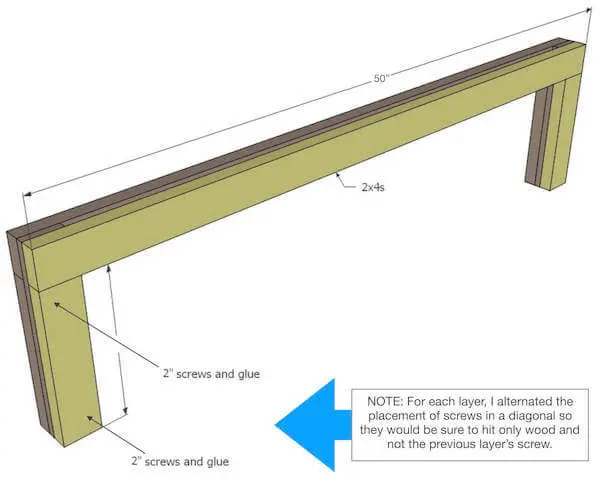
3. Repeat by laying down a 1″x4″. Again, add second pilot holes, glue, then screw down both the top and leg 2″x4″s.
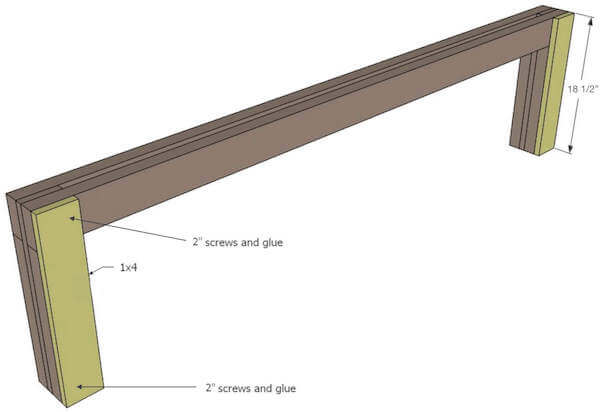
Check the top edges of your bench as you go to ensure you have no gaps.
4. Continue until you’re done! If you’d like, you can fill the back of your bench (the painted part) with wood filler, then paint over for a more finished look.
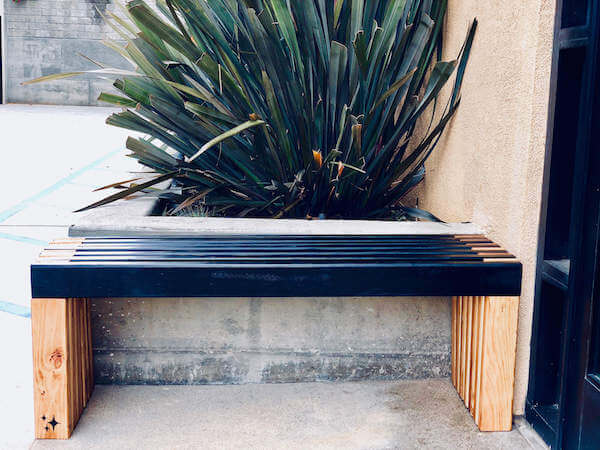
Finished Product
Here are some pictures of how this DIY Slatted Bench turned out:

Video Tutorial
PIN IT!
If you’d like to DIY this bench, pin it to your board for later or share it with a friend! Thank you!
This post was sponsored by HomeRight. I’ve teamed up with HomeRight and am proud to be one of their paid brand ambassadors. I received a HomeRight product sample to use in this post and included affiliate links to the tools and supplies I used in this project. My personal opinions are completely my own based on my experience.