You might have heard on one or two occasions that the simplest and most cost-effective way to make a decorative difference in a room or piece of furniture is to paint it. Unfortunately, for those of us who have taken brush or roller in hand, we’ve invariably suffered the oh-so-fun “sloppy, drippy paint can” phenomena. Ugh.
While watching HGTV’s Design Star, I discovered this quick-tip (that I’m so giddy about, I wanna holler it from my roof-top!): hole punch the rim to minimize overflowing the paint can’s edge. It’s so simple, yet such a powerful DIY trick, even a super hero would be impressed!
After climbing down off the roof, I asked my husband to assist me in putting it to the test…
 Before: pouring the paint…
 Before: the dreaded sloppy, drippy aftermath.
 Before:…an overflowing mess.
So now, here’s what you do:
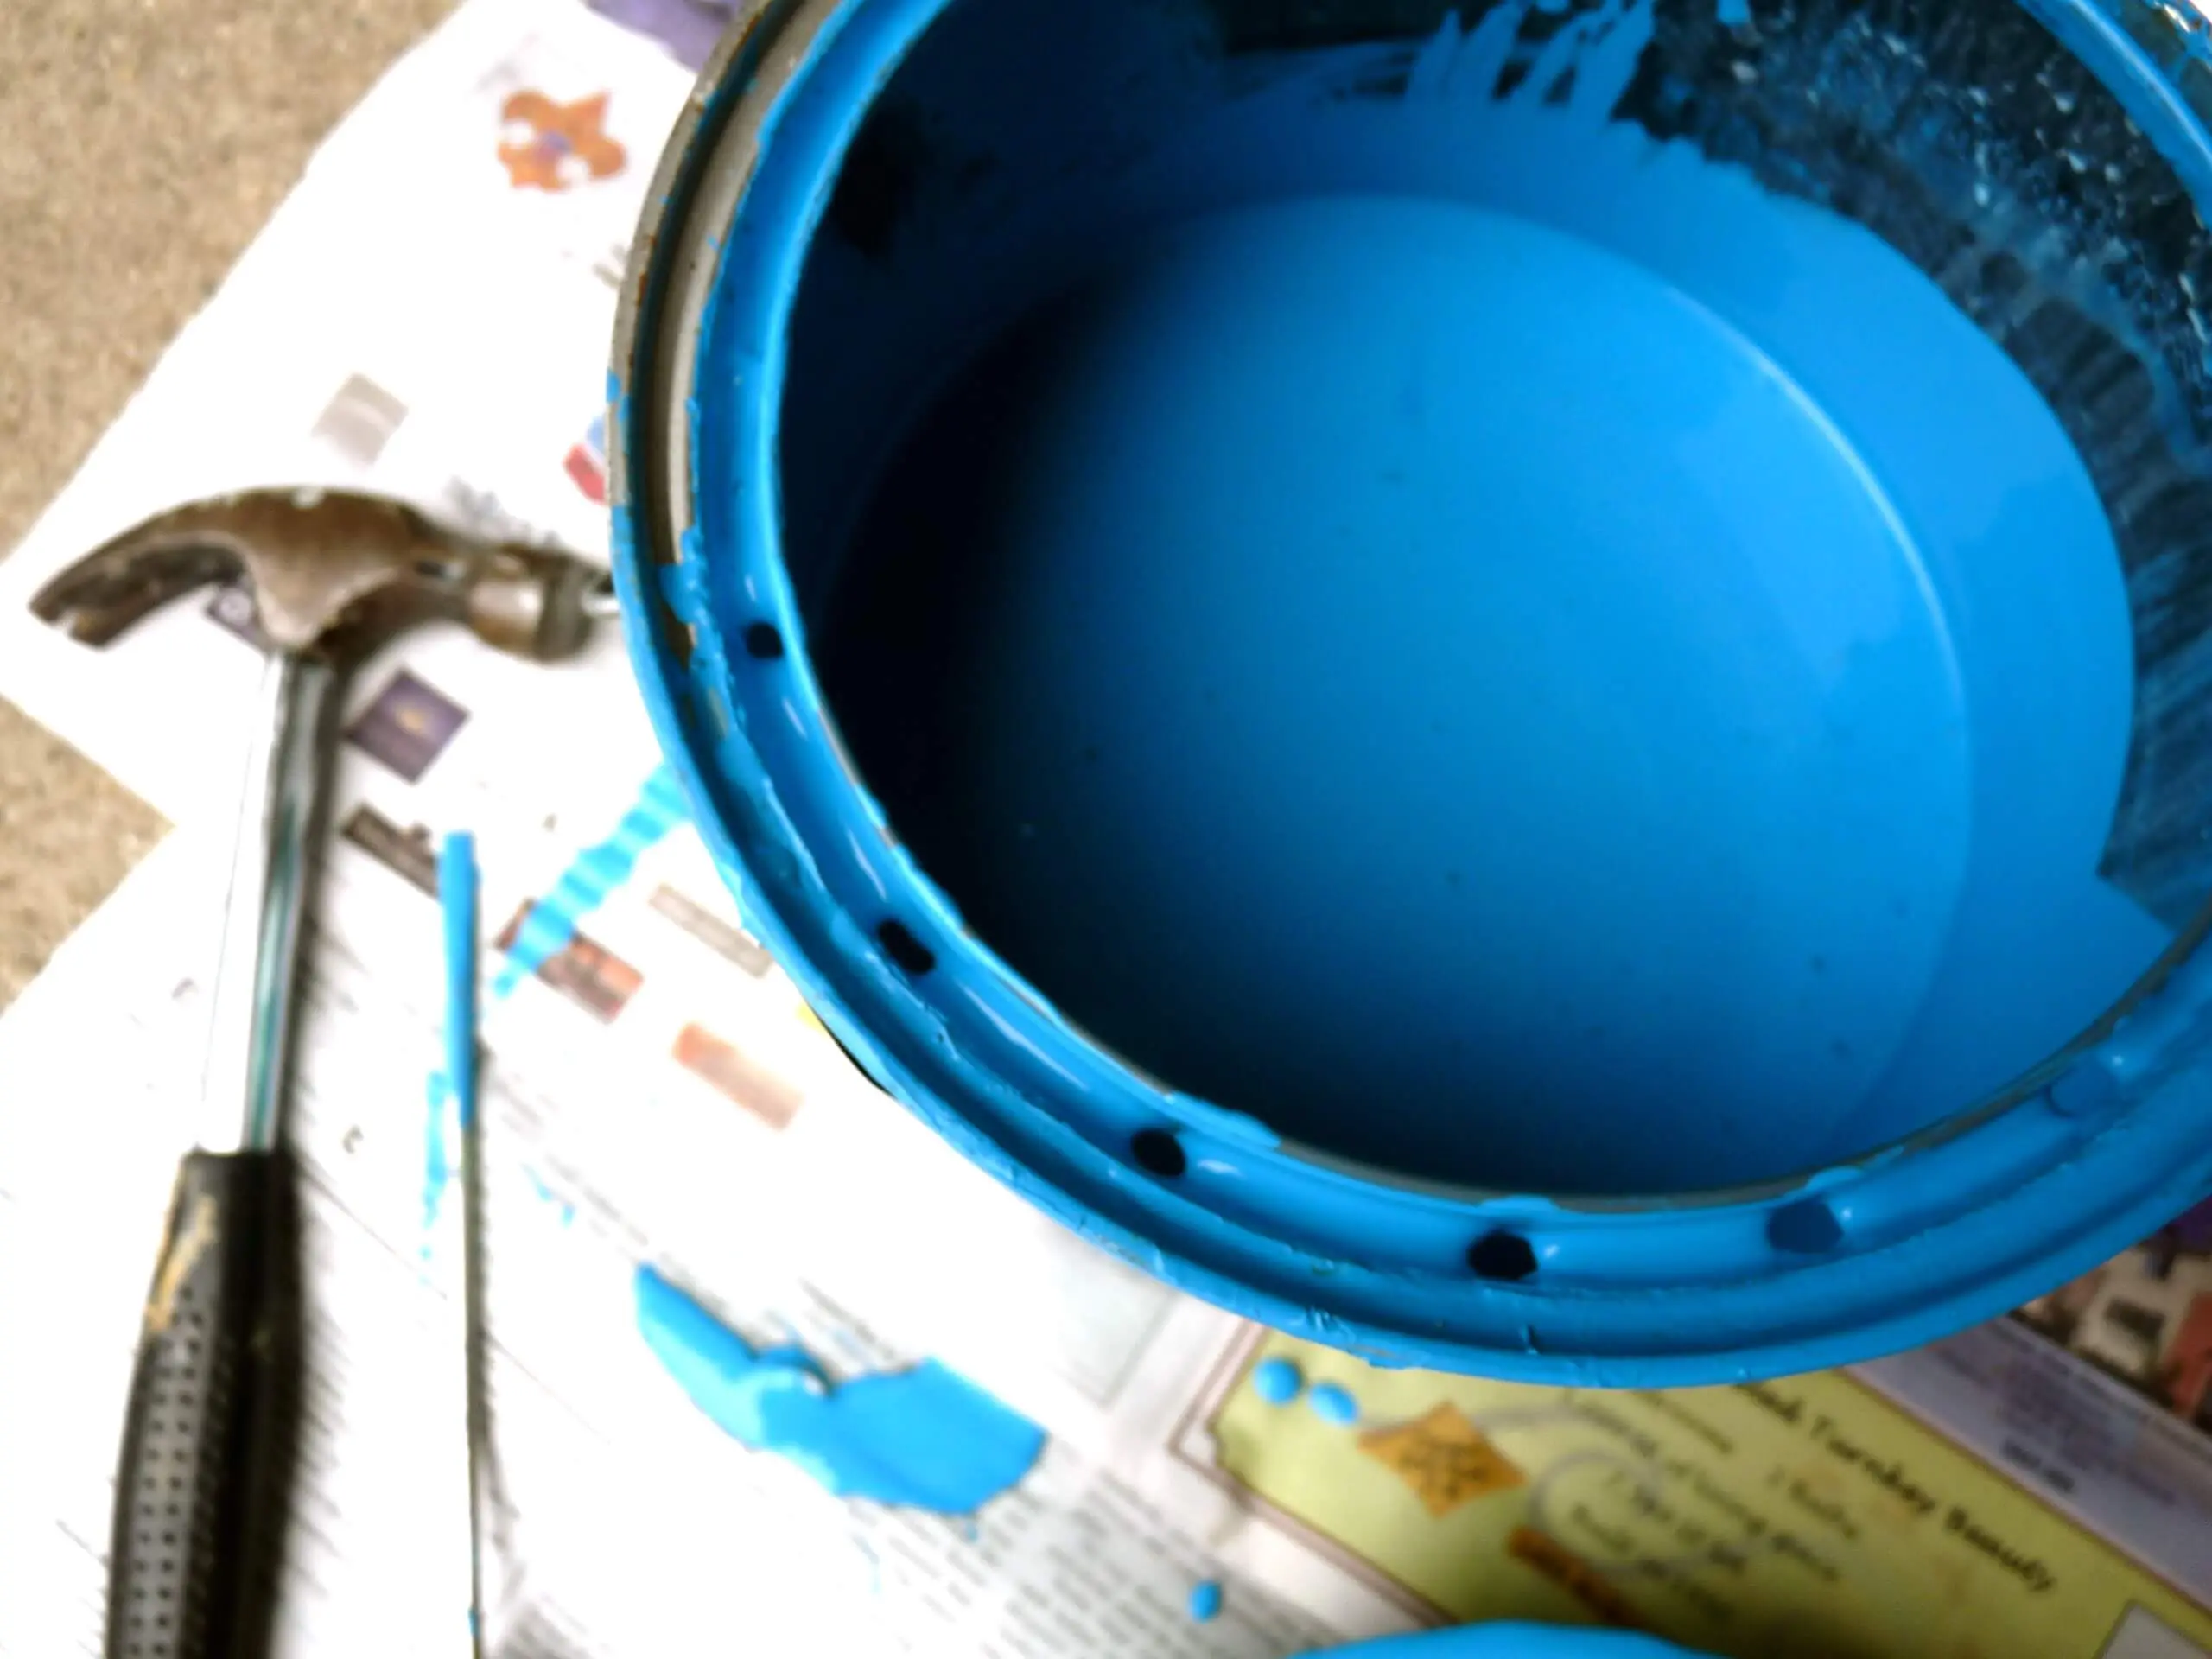
 1. Place the tip of a flat head screwdriver inside the channel of the rim so that its flat part is parallel to the edge of the can.
 2. Using a hammer, tap the screwdriver until it punches through, making a small hole.
 3. Repeat along the pouring side’s edge (about 6 holes).
Now it’s time to test it out…
 After: pouring the paint…
 After: paint is running through the holes inside the can.
 Before and After Results: though there is still a little paint dripping, it is far less and more manageable than before. Success!
 No storage mess: because the newly punched holes are located inside the rim, when the top is replaced, it covers them perfectly.
Q. Do you have any DIY quick-tips you’d like to share? Contact us and be featured on DiggersList!
All photography by Skaie Knox, HomeJelly