Medicine makeover will make getting ready more beautiful!
This is a sponsored post and contains affiliate links.
There’s something beautiful that happens when we allow color to color our lives, even in the most unexpected places: our bathroom medicine cabinets. Yep, by the simple DIY act of adding a pop of paint or wallpaper to this small space, the effect can be quite dramatic – both aesthetically and emotionally.
With today’s five simple steps, you’ll be able to bring beauty, organization and function to your medicine cabinet for a mini-makeover that will give you a daily dose of happiness.
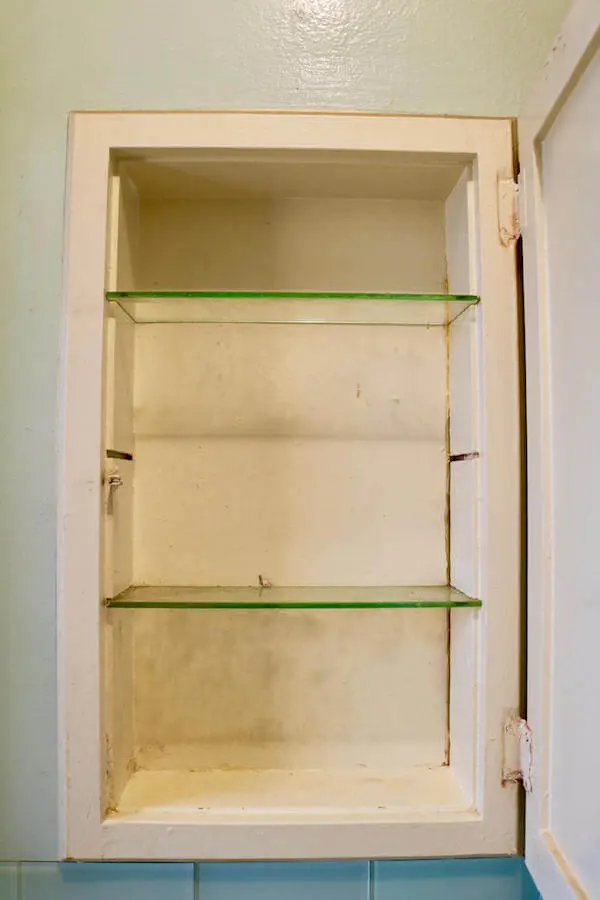
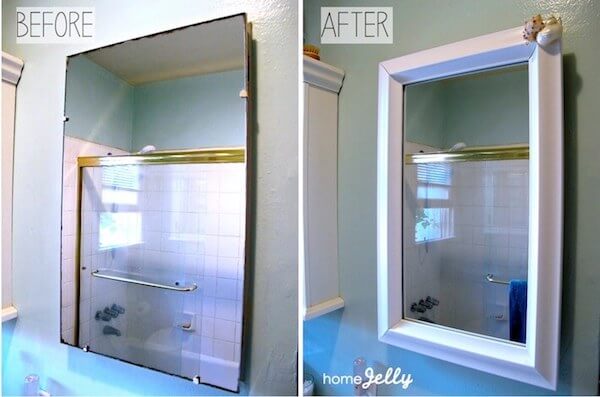
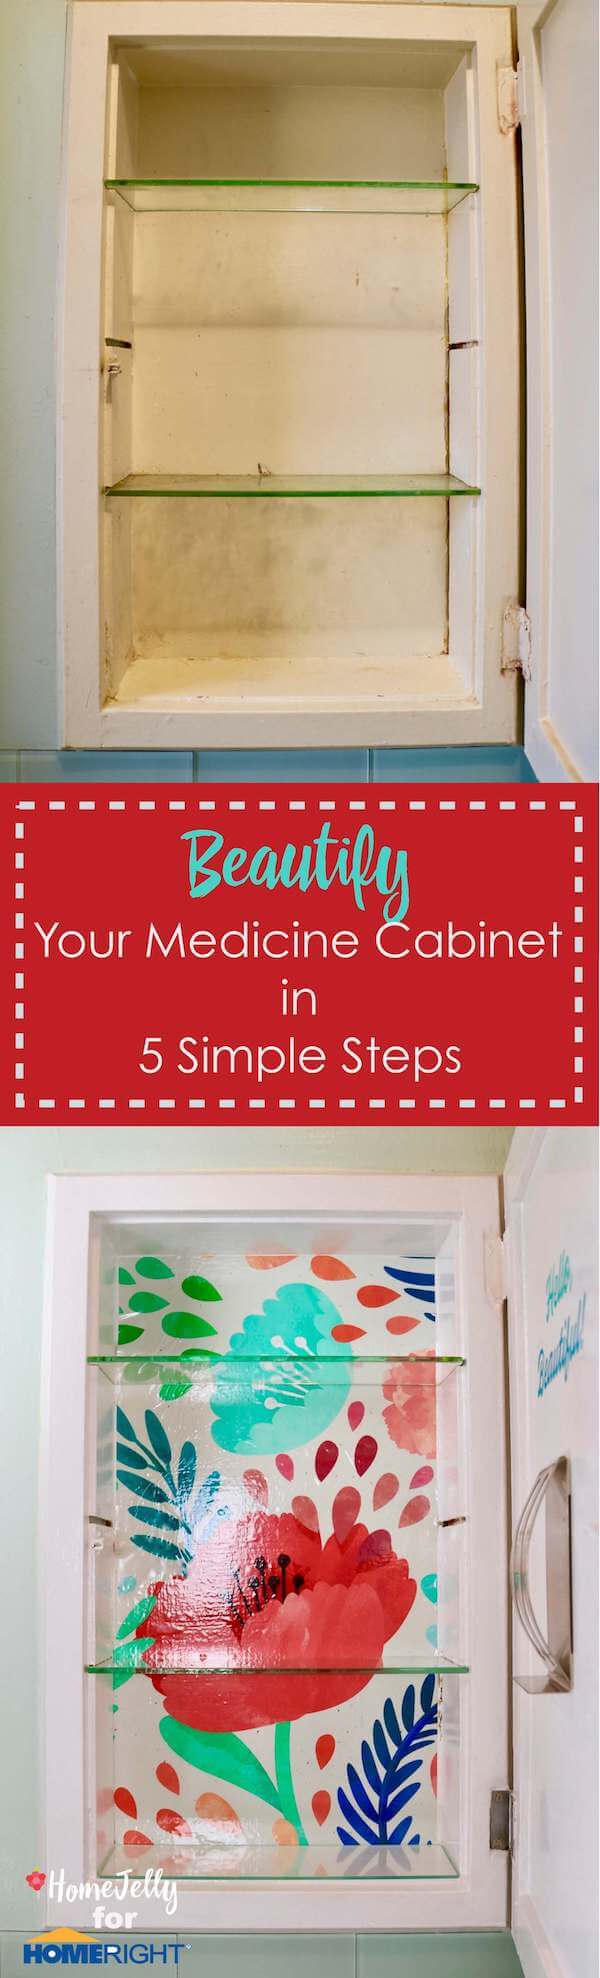
Medicine makeover BEFORE…yep, pretty ugly. I can’t believe we lived with it like this for so long.
Supplies:
• P120 sandpaper
• sanding block
• HomeRight Heat Gun (great for removing layers of paint on cabinets and hardware)
• semi-gloss paint (whichever color melts your butter!)
• removable wallpaper (I also love this pattern…see where I bought the design in this project below)
• ¼” glass inserts
• picture frame
Instructions:
Step 1: Clean out, remove and sand old paint. If needed, patch any holes or cracks. I used my HomeRight Duel Temperature heat gun on our hardware which worked slick. NOTE: if you’re working in tight spaces or on small items, it’s best to use the deflector nozzle attachment on your heat gun. You can also use it on other surfaces of your medicine cabinet as well. Read the FULL blog post on how to restore your beautiful hardware with the HomeRight heat gun.

Clean out, then remove old paint. We used the HomeRight Duel Temperature heat gun to make it go fast.
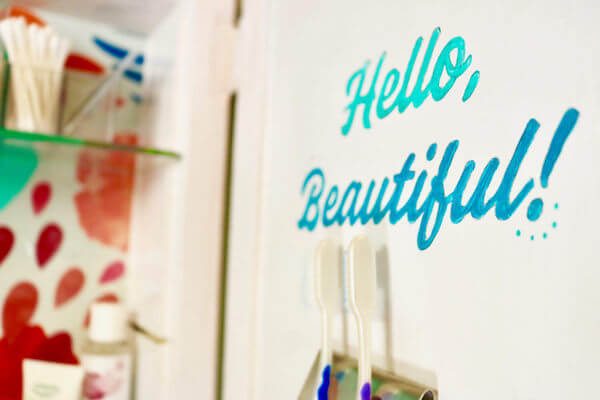
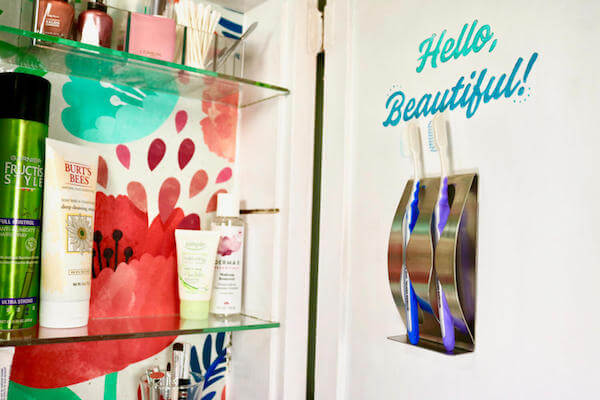
Step 2: Paint with desired color. Extra! Add some whimsy and wit with a hand-painted message to the inside of your door. Simply print out your message (flip the message so it’s backwards), trace the flipped message with pencil, then place the penciled side against your cabinet door. Next, trace over the letters (you’ll easily see it from the front), which will make an outline on your door. Finally, hand-paint your message in any color(s) using acrylic craft paint.
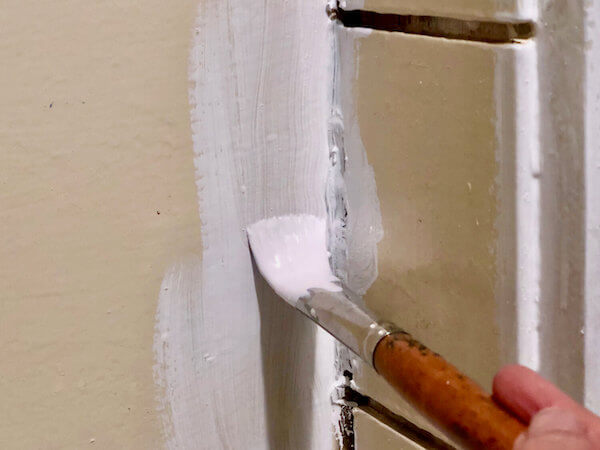
Paint using any color that will blend with your paper (and, melt your butter!).
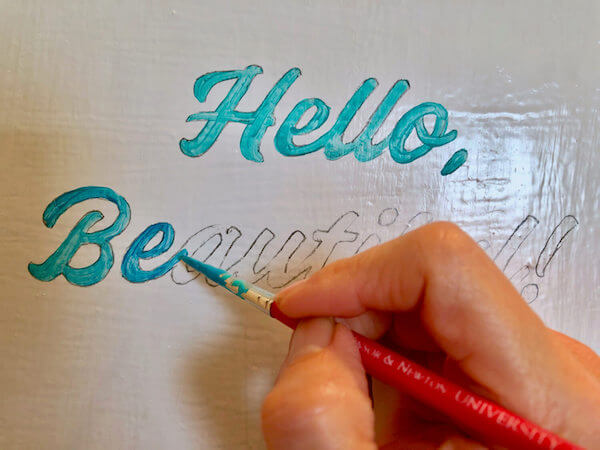
Add some whimsy and wit with an inspiring message.
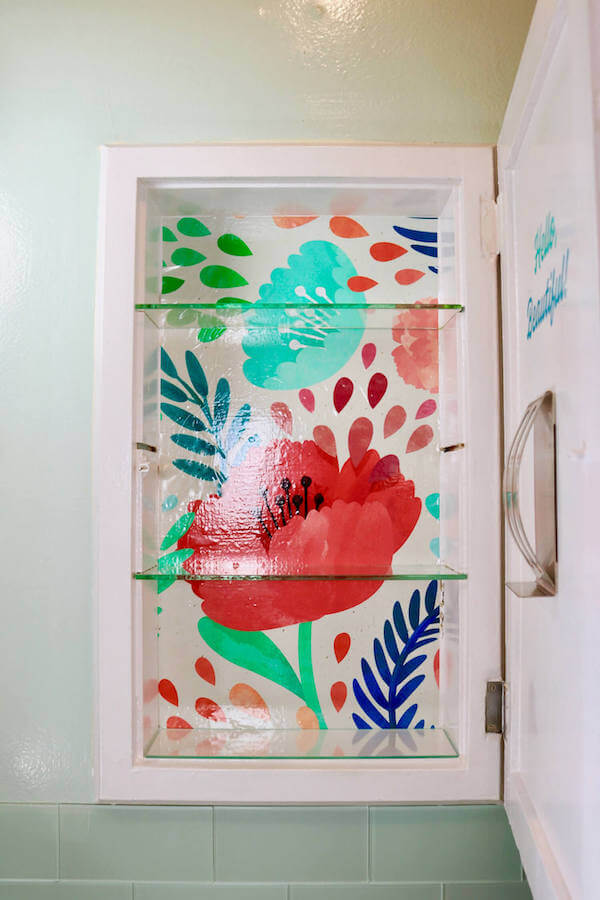
Step 3: Apply colorful wallpaper to the back of your cabinet. Removable, peel-and-stick paper allows you to easily swap out designs whenever you wish! We used the Vintage Poppy Flowers design from uniQstiQ. Check out this VIDEO TUTORIAL on applying removable wallpaper.

Apply colorful and removable, peel-and-stick wallpaper.
Step 4: Insert accessories and glass shelf toppers. Create more “square footage” in your cabinet by utilizing your door with adhesive toothbrush holders and trays. Add acrylic trays to shelves to keep items organized and easily removable. Glass shelf toppers allow for easy clean-up.

Add accessories like a toothbrush holder and acrylic organizers.

Glass shelf inserts makes cleaning so easy.
Step 5: Frame out your medicine cabinet for a picture pretty affect. DIY one like what I did here or order a stick-on frame online (we used the Chelsea Classic White frame from MirrorMate).
It’s such a difference adding this picture frame to your medicine cabinet mirror, don’tcha think?
The Medicine Cabinet Makeover!
Medicine cabinet makeover-AFTER.
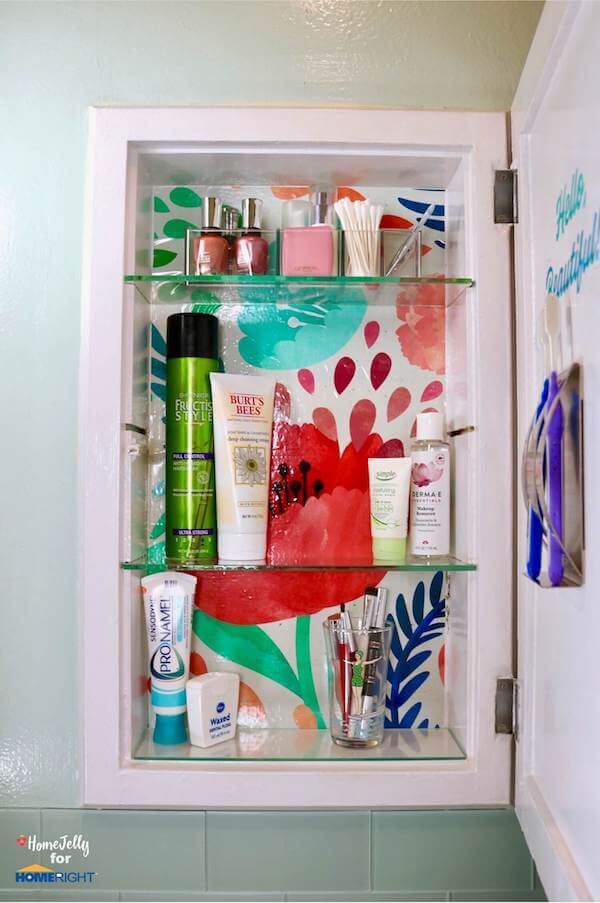
Marvelous Medicine Cabinet Makeover looks and functions beautifully.
Inside made over medicine cabinet.
PIN IT!
If you like this project, pin it! Aaaaaand, thank you!
All photography by Skaie Knox, HomeJelly