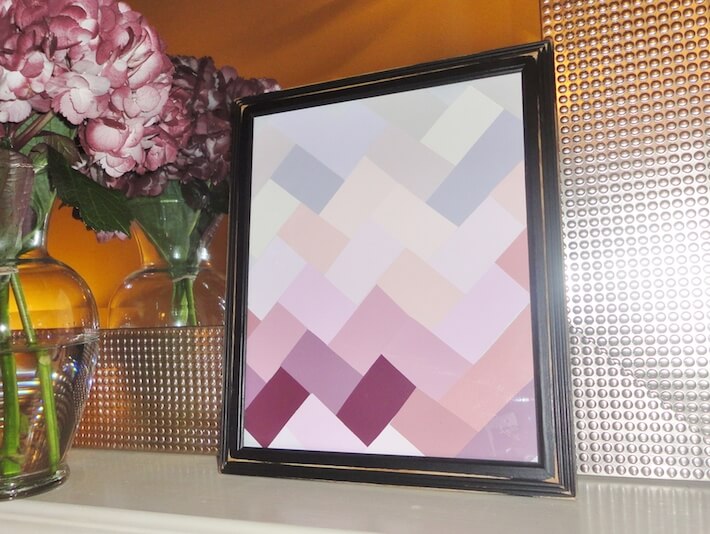
I used to collect paint chips as a child (don’t ask, I was a strange kid). So, when I saw a few of these paint chip art projects, I knew I had to try it…at least in the name of nostalgia. I decided to give it a try on a rainy day this week. I went to Home Depot and picked some up, pretending like I was looking for colors for my little girl’s room. I don’t know why we all feel like we’re getting away with something; you can’t really steal something that’s free…right?
I had a hard time finding the single-color chips, as most of the paint companies offer three colors per sample. Glidden had a pretty decent selection of single-color chips, though, so I picked up about twenty for this project. I also used an old distressed frame I’d had for years, so I there was no “chipping in” any money on this afternoon’s art project.
Paint Chip Chevron Art…here’s what you’ll need:
• Paint chips
• Scissors
• Double-sided tape
• Ruler
Here’s what you do:
Step #1: Using a ruler, cut each chip in half, twice. You can cut it however you want, obviously, depending on how thick you want the chevron lines to be. I wanted mine a bit thicker so I could use less. Here’s another pretty great example of a chevron design by Decorating Cents.
Step #2: Organize the chips according to color-I kept the greys, light pinks, and dark pinks all together. I wanted to create an ombré effect-going from light to dark from the top of the frame to the bottom.
Step #3: Find a frame you love and tape white computer paper over the cardboard insert. The white will be a good backdrop for the paint chips.
Step #4: Start creating the chevron pattern using double-sided tape and start with the lightest colors. Don’t worry about the chips sticking out over the paper.
Step #5: When you’re pleased with the color scheme, turn the cardboard over and trim the excess chips.
You’re DONE!!!
What pattern would you choose?
All photography by Olivia Glendale, contributing writer for HomeJelly.


