
Covered bench before and after.
The one thing I’ve learned from DIYing home decor is to always look at the bones of furniture. If it’s in tact, in good condition, and if it has good lines…it can always be salvageable! Whether it needs to be sanded down to the original wood, painted, shored up or recovered, life can be breathed back into an item with a little elbow grease and loooove (emphasis on the latter – working on some of these projects can feel like working on a relationship).
Today’s reupholstered bench “before and after” covers this topic perfectly (today’s pun insert…check!). Yep. This was a sturdy piece, but the original fabric no longer fit into the living room I had just updated. I had just the thing to use! Initially, I bought this fabulous 1964 vintage Kaivo fabric (heavyweight cotton) to create wall art:

1964 vintae Kaivo fabric.
I wanted to stretch it over a wooden frame that had held a canvas painting that no longer worked with our new color palette. The Kaivo fabric’s bold, graphic pattern was created when designer Maija Isola had inadvertently dropped a pail into some water and was inspired by the dynamic rings it made. Because we had minimal wall space, I decided to use this would-be black and white, minimalist Scandinavian wall art as the new fabric to cover our bench.
Supplies:

Reupholstering supplies.
• fabric (any will do…blankets, cotton, wool, woven, etc…be creative and go nuts!)
• muslin or heavy cotton
• pliers
• flat head screw driver
• scissors
• measuring tape
• staple gun and staples
Optional: if you wish to have two or more different fabrics, you can sew them together. In this case, the fabric piece wasn’t large enough, so I added black panels to the sides.
• extra fabric
• sewing machine and thread
• pins
Instructions:
1. Measure the length and width of your bench top. Don’t forget the fabric that is wrapped underneath the bench.

Measure the length and width of your bench cushion.
2. Iron your fabric.

Iron fabric.
3. If you wish to add another panel of fabric (to one half or the ends), sew them together.

Sew your extra fabric together.
4. Cover with muslin – trim excess. Hammer in any staples that are not fully inserted. For fabrics that are not woven, this will help with the durability and lie of the fabric over the cushion material – it’ll be much smoother. Note: If the condition of the current fabric is good, do NOT remove it. This current fabric will add to the protection of the new fabric. If it is in bad condition, remove it, then cover with your muslin or heavy cotton.

Attach muslin.

Hammer in any loose staples.
5. Cover muslin with your fabulous fabric.
(a.) start by stapling the long side (center-three staples), then stretch the fabric over the opposite side and staple the center.

Staple on your fabric.
(b.) continue alternating stapling working from the center out to the end (staple three on one side, then stretch the fabric to the opposite side and add three staples there.
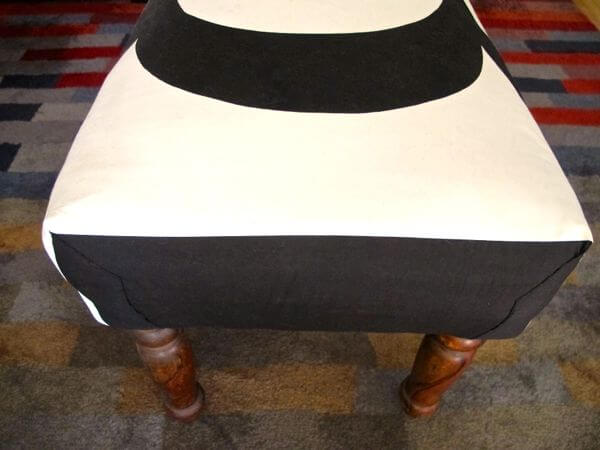
(c.) for a nice square edge, fold the fabric as shown below, sew together with same colored thread, then staple to secure. Note: be sure to use the technique in (a.) & (b.) stretching and smoothing your fabric as you go.

Fold ends of fabric for clean squared edges.

Sew the edges.
Finished!

Covered bench after.

Bench’s gorgeously graphic top view…Klunkers approves!

Wall art becomes a bench.

Neatly color blocked end.

Klunkers loves his new stylish bench.
What materials have you used to cover your bench or chair? Do share!!!
All photography by Skaie Knox, HomeJelly