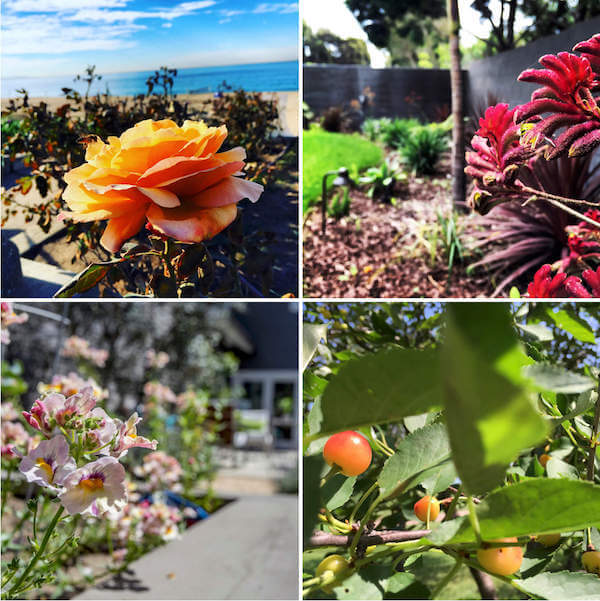
Flowers and fruit tree highlighted by the “Rule of Thirds”. Can you see the bee? source: (clockwise L-R) photo 1, 2 and 3 Skaie Knox, homejelly.com; photo 4 – Nick Meistrell, nickmeistrell.info
There’s a photo, then there’s a PHOTO.
What does this mean, exactly? Well, besides lighting, which is vital to a great image, how a subject is framed in a photograph is just as, if not more, important.
Oh, and to be super clear…not the Aaron Brothers’ framing, but where you position the camera’s lens when taking a photo of the person, place or thing.
Or was that already obvious? Anywhooo…
Yes, today’s post is all about the subject and how you can elevate and capture a mood, a personality, and/or a meaningful moment, simply by where they are placed within the picture.
And, by the way…you don’t need a fancy-schmancy camera to make this happen. The simplest of point-and-shoots or even a smart phone can produce fabulous, wonderful memories that can be framed, placed in a photo book, or printed directly onto glass.
Come on…let’s get started!
1. Off Center:
“Rule of thirds” gives focus on the subjects, but is balanced by the rest of the photo. source: Skaie Knox, homejelly.com
Here’s an example of a very subtle use of rule of thirds. source: Skaie Knox, homejelly.com
Photos using the rule of thirds can reveal a lot of information – showing what’s going on in the foreground and also what’s happening in the background. source: Heide Rosenthal
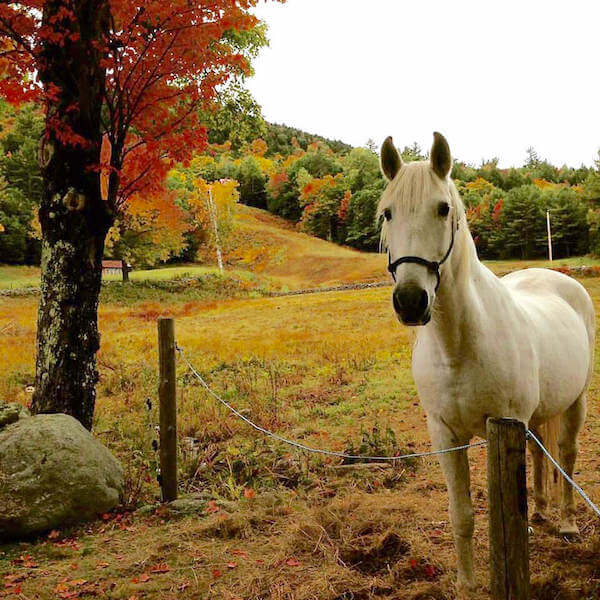
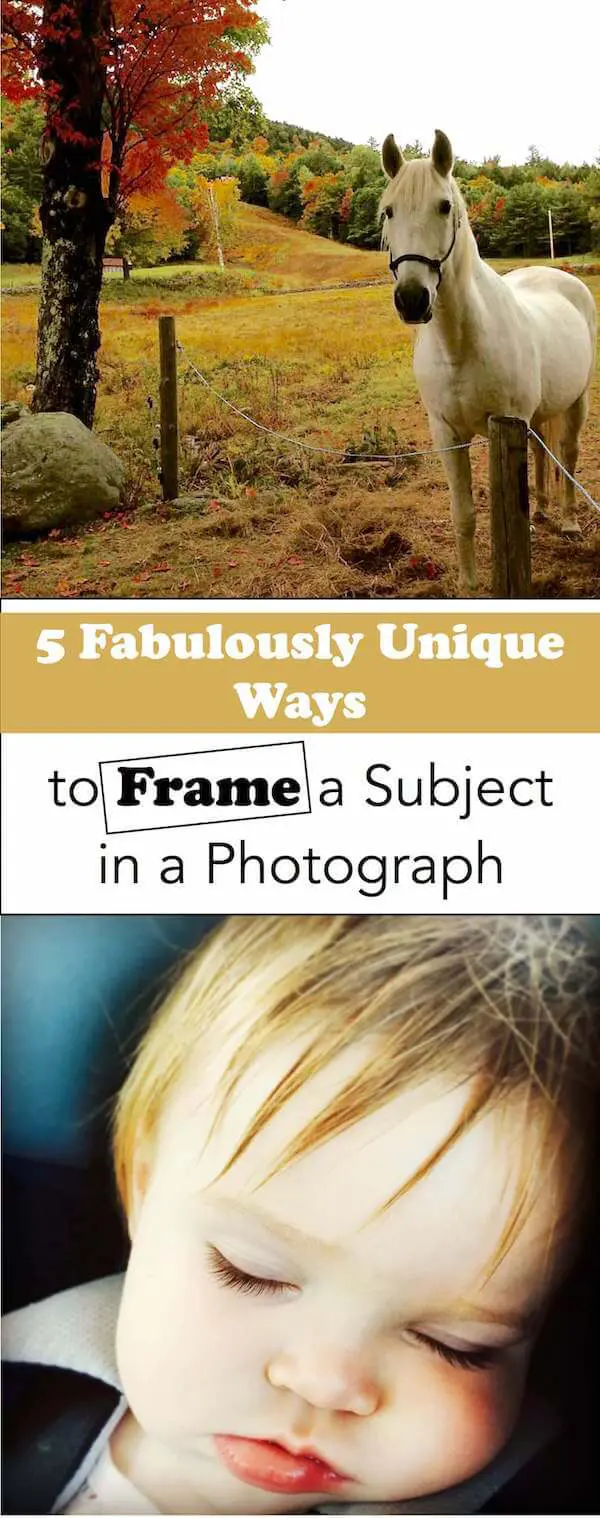
The use of rule of thirds makes an image interesting. We focus on the horse, then our eye moves to the tree and the golden field which visually balances the subject. source: Andrea White
To add interest and a uniqueness to your photographs, use the “Rule of Thirds”, where you place the subject one third into the left, right, top or bottom of the frame – hence, off center. Because the subject is often the largest element in a photo, the rest of the image can now add visual weight and balance to the picture.
Additionally, there’s an intimacy that happens, like you’ve secretly captured a moment.
Now, the popularity of Instagram has made this technique a little more challenging, but, the off-centeredness doesn’t need to be severe – just a hint will do the trick.
2. Directly Above:
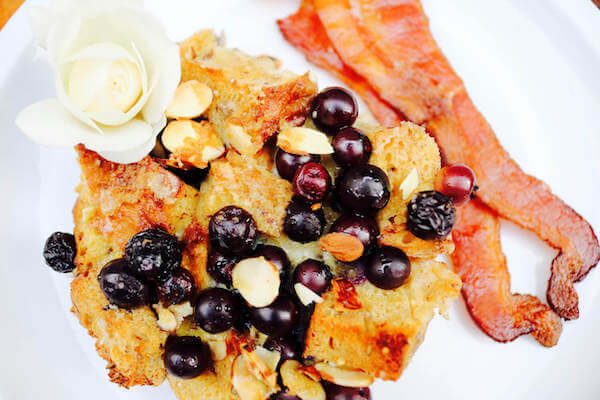
Blueberry almond French toast bake looks scrumptious from above with a graphic quality. source: Skaie Knox, homejelly.com
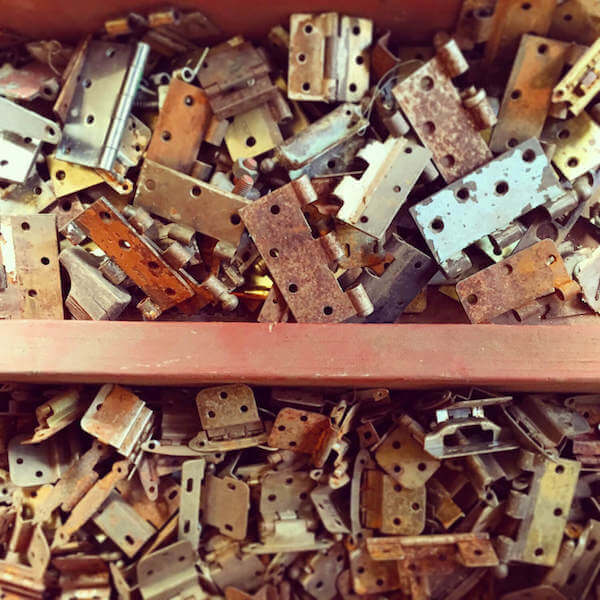
Shooting hinges straight down adds dimension and an editorial quality. source: Skaie Knox, homejelly.com
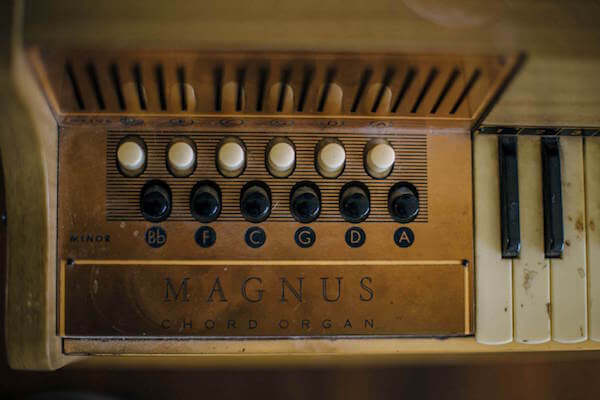
Shot from above and close up gives us an intimate view of the subject…even a kid’s toy piano. source: nickmeistrell.info
There’s an editorial feel to photos where a subject is shot from above looking directly down at it – the 2-dimensional affect is often very graphic and precise. Inanimate objects such as typewriters, plated food, floor tiling, etc. read especially unique and interesting.
3. Profile:
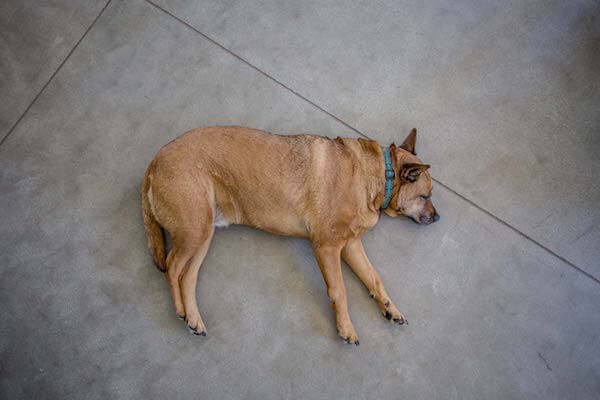
This pup pic does double duty – we see his profile from above – a captured sweet moment. source: nickmeistrell.info
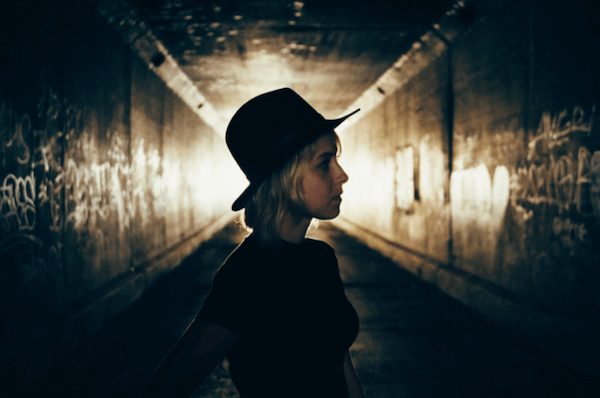
This sillouette image reads like living art – pensive and graphic. source: juliabrokaw.com
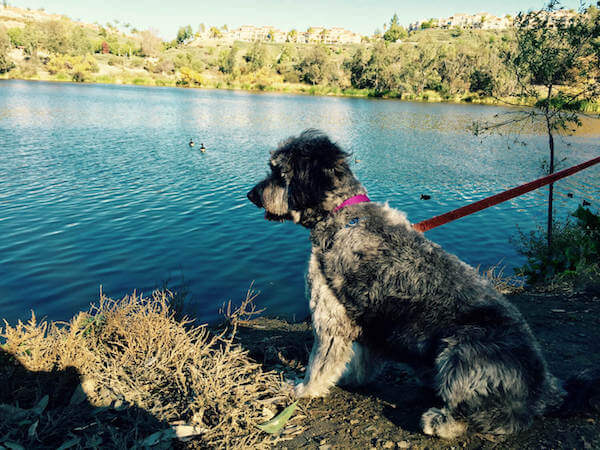
Krinkles’ profile is sweet and contemplative…he’s actually watching a duck and SO wants to jump in and grab him! source: Skaie Knox, homejelly.com

A tub’s profile is clean and shows its slick shape. source: nickmeistrell.info
If you’re looking to see another side to a person, you’ll literally be doing so using this framing technique. It’s surprising how a subject comes across in a photo when you see only half of their face and body. It’s quite intimate, too.
4. Focus/Out of Focus:
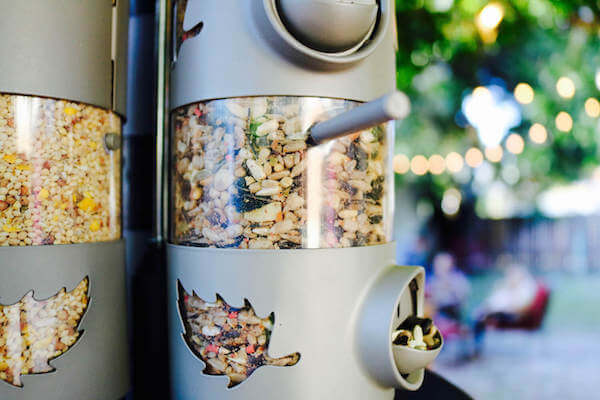
Depth of field offers more than just a bird feeder…the family and lights in the background suggest there’s some activity happening. source: Skaie Knox, homejelly.com

Focus on details to control where you want the viewer to look. source: nickmeistrell.info
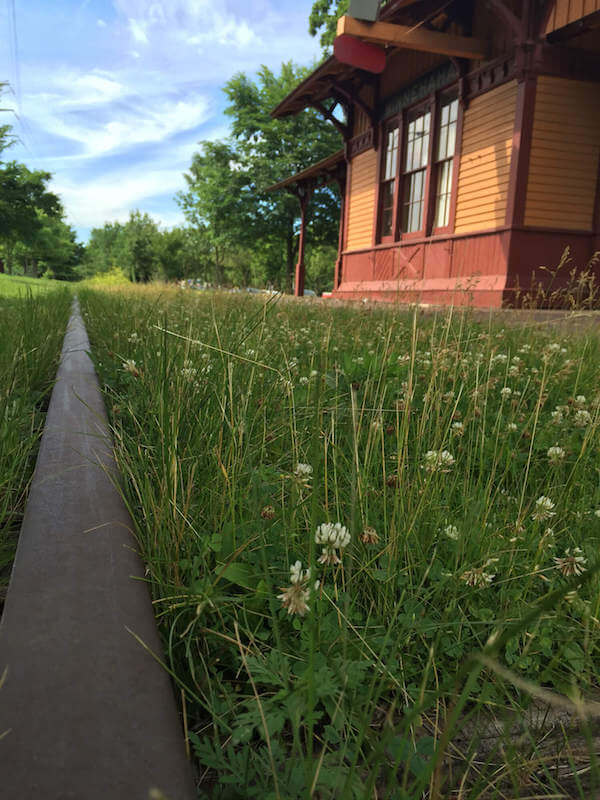
Focusing on compositional lines, like this train track, leads our eyes up and through a photo. source: Skaie Knox, homejelly.com
We look from the bird in focus to the ones out of focus – makes for a far more interesting photo. source: nickmeistrell.info

With a blurring of the subject our eye is compelled to move from the focused foreground to the man in the background. source: Skaie Knox, homejelly.com
There’s something beautiful that happens when we experience depth of field. In other words, when we focus on a subject close up, and the background is blurred out…we feel closer and more intimately connected to the person, place, or thing we can see clearly.
In contrast, when a subject is blurry in the background and we focus on, say, a leaf or chair or even another person, the effect can be intriguing and compelling. We want to see who or what the blurred subject is.
5. Cropping and Flipping:
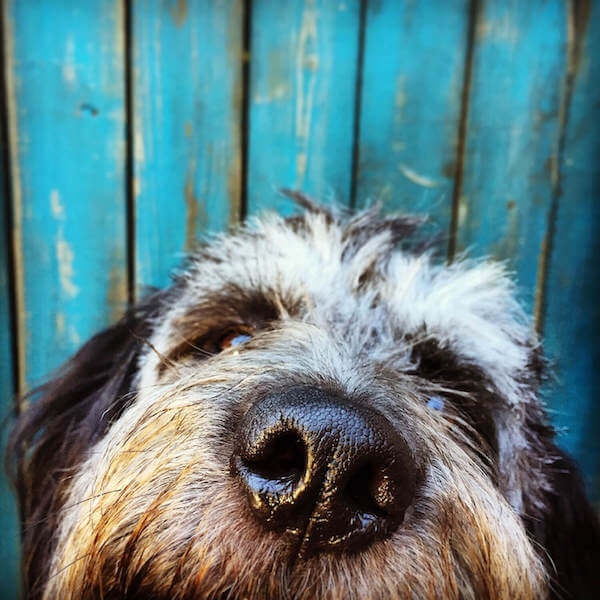
Cropping Krinkles’ face and placing him at the bottom of the page, visually enlarges his nose, making for a cute and funny photo. source: Skaie Knox, homejelly.com
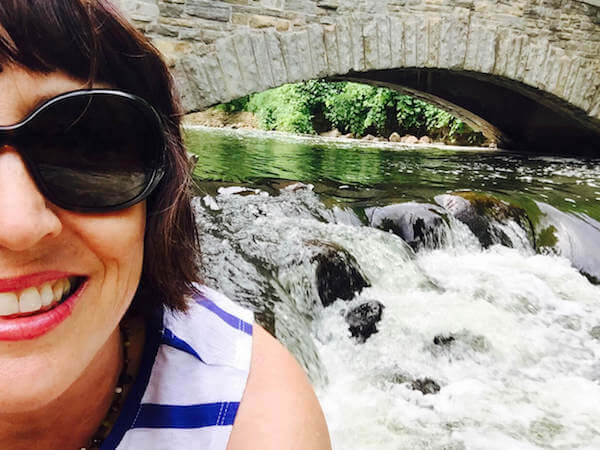
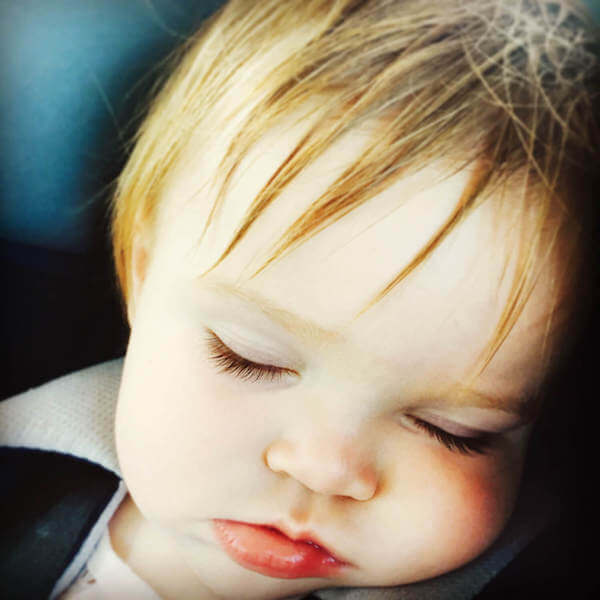
Side-cropped faces have become “selfie” identifyers, but they can be fun and allow the viewer to share the photographer’s experience. source: Skaie Knox, homejelly.com
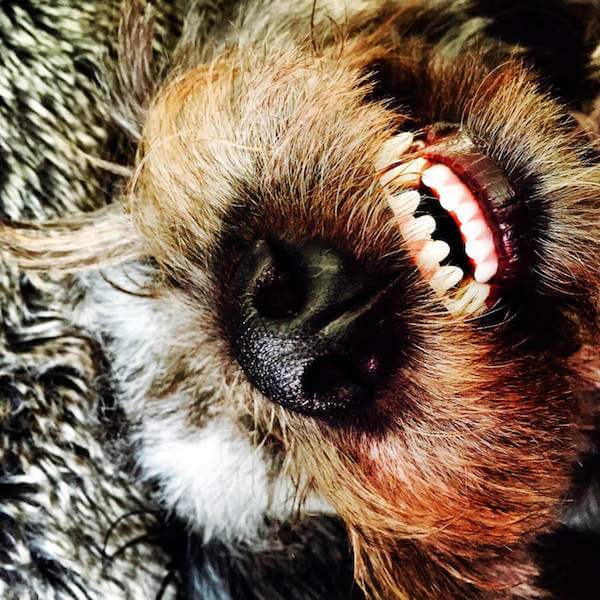
Flipping a subject makes for an interesting composition – add the technique of shooting from above and you’re golden! source: Skaie Knox, homejelly.com
The word, “framing” typically means encompassing the whole subject. But in recent years, the idea of cropping and flipping has caught on as a stylistic, photo-framing trend. You can crop part of their face from the bottom or side while taking the photo. To flip your image, the easiest way is to shoot them as normal, then, when editing, use the rotate right or left tool. Why the love of lopping and flipping? It’s artsy, humorous and fun!
I hope you try one or more of these fun framing techniques. Grab your camera or smart phone and give ’em a shot!
(Oiy!)
Today’s post is sponsored by:
![]()