 How would you like to make two fabulous and eco-savvy holiday gifts for $3 or less? Two frames, a hardcover book, a hot glue gun and a little RePurpose creativity are all you need! You’ve probably seen a book paper wreath and a book secret box before, but with this tutorial the project is zero-waste, environmentally conscious, and super affordable! When we encourage people to “Make Purchases with a RePurpose” we are promoting landfill diversion.
Instead of buying new materials and ‘antiquing’ them, support your local thrift shop or visit www.habitat.org to find the Habitat ReStore nearest you. I bought my hardcover book and two frames from our Riverside ReStore for $2.10 total! This purchase kept reusable items out of a landfill and avoided the use of non-biodegradable material (like a Styrofoam base wreath), all while supporting Habitat for Humanity.
I love that which is witty and clever. So I was over-the-moon when I happened upon a hardcover book entitled Something of Value. Could there be a better book to make a secret box out of!?!”
Here’s what you’ll need:
• When choosing your hardcover book remove the dust jacket and check:
- Inside– Do you like the color, look and condition of its pages and their edges? Note: These pages will become your wreath’s plumage.
- Outside– Does the spine and cover have the look you want? Is it structurally sturdy? If the spine is intact outside but separating from the binding inside it will be that much easier to deconstruct with edges that have appealing ‘aged’ hues. Note: The spine and cover will be used for your book secret box.
 •When choosing your frame for the book paper wreath: Only the shape and width matter.
- Look for a used frame already missing its glass and backing. It will be cheaper and we want to avoid waste. I chose a large oval plastic frame but you can use any shape you find appealing and a wood frame would work just as well.
•When choosing your frame for the book secret box: Have your hardcover book with you!
- Open your book- Place the frame on the first page, the frame should fit length and width.
- Close your book- Set the book and the frame down side by side, the frame should be shallower than the book to ensure that the book/lid will close properly.
Note: The depth of the frame fits the depth of the book and becomes the depth of your box. The frame’s sides will become the book’s ‘pages’ and the frame’s face will be what the lid opens to, so be sure you like it as is or plan to decorate it (before you glue it in). Again, glass and backing are unnecessary.
Here’s what you do:
Project #1: RePurposed Book – Secret Box:
- Open your book and carefully separate the binding from the pages with a box-knife or X-Acto blade. This is easier with older books where the glue has already dried out and begun to separate.
- Flip your book over, open and repeat.
- You should be left with a book cover and a bound ream of pages. You can set the pages aside to be used for your wreath.
- The inside cover is the lid and bottom of your secret box which you can paint, mod podge collage images from the dust jacket, line with fabric, or leave as is. Some books have wicked elaborate maps and images, use what you have.
- Take your secret box frame and set it inside your hardcover, if the book closes around it proceed. *If not, consider sawing-off the side of the frame that would be flush with the binding or finding a smaller frame and using this (too big) frame as another wreath frame instead.
- The bottom of your frame is going to be glued onto the inside back cover of your book. Align the outside edges of your frame with the outside edges of your book. This ensures that the binding will have enough room and the lid will close easily. Tip: If you are using a wood frame you may also want to consider tiny flat head nails or upholstery tacks for a ‘riveting’ decorative effect.
- Depending on your book’s spine you can choose to glue it flush with the frame creating a more traditional jewelry box look. Or leave it unglued so that it can lie flat open. Tip: This craft lends itself to so many embellishments and personal touches. Consider gluing a ribbon or fasteners to the inside covers first, then secure the bottom one under the frame and the top under a wax seal or button.
Project #2: RePurposed Book – Pages for the Ages Wreath
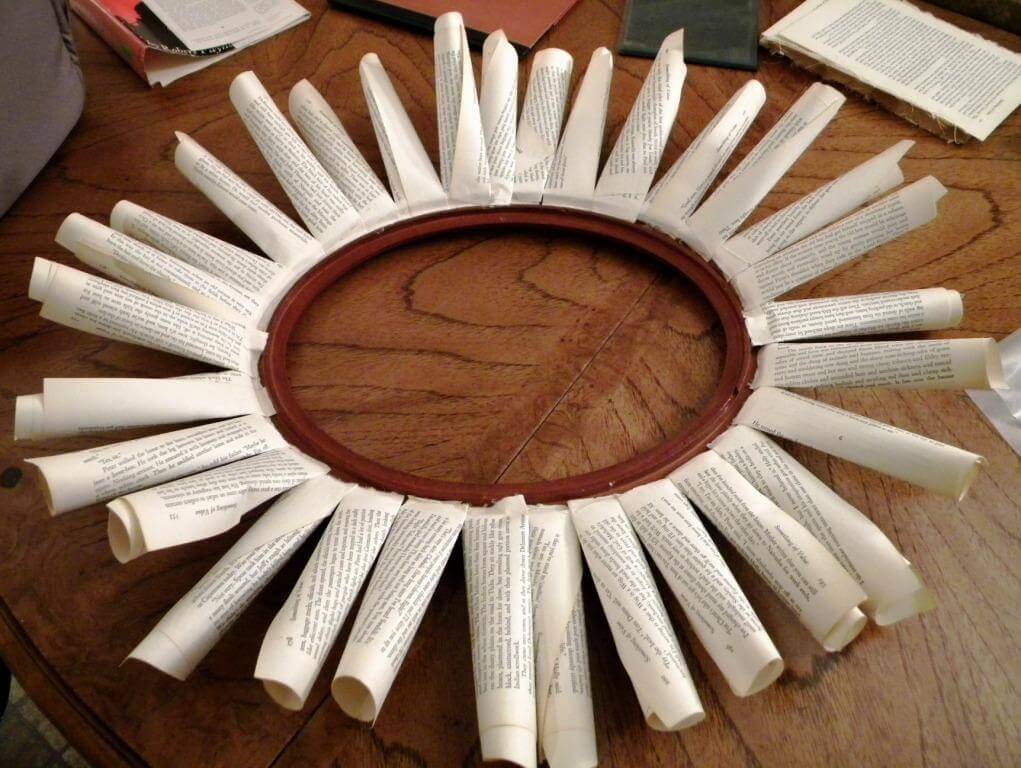
 1. Take your, previously set aside, bound ream of book pages and start to gently pull them away from their binding, or use your X-Acto or box knife to slice them out. Try a few different techniques until you find the way that works best for you and your book.
2. Decide how you want your frame to hang. A gorgeous and simple solution is to slipknot ribbon (at least a yard) onto the frame. You’ll be surprised how big the wreath is once all of your pages are glued and a yard will ensure enough ribbon to reach past the top and still make a bow.

 3. Now, take a page and without creasing it try a tube, accordion, ribbon candy or fanned style roll to decide what design you like best and stays sufficiently glued into shape. I chose a standard roll with the smooth tip out. If you fold a tab into the roll at the base it will minimize your glue points. Tip: To minimize your finger burns use a tool (unsharpened pencil) to press your glued tabs onto the frame.
 4. Start with the back of the frame, this will be the outside layer and you do not need to fold tabs. Fold tabs toward the center for the next layer and towards the outside for the layer after that.
 5. For my final layer I went from the back of the frame through the center to give it a very distinct oval shape. However, you can do as many layers as you choose. The more the layers the ‘puffier’ the wreath will appear.

 Riverside ReStore’s Chief RePurposer, Kristii Mac is always looking for creative and eco-savvy ways to bring new life to products that would otherwise be destined for a landfill.
For more information on the “Make Purchases with a RePurpose” program, please email [email protected]. Photos & Post by: Kristii Mac


