
Who knew a simple door could so drastically change our quality of life? Yep, a Dutch door was always on my DIY wish list, but, when I researched the possibility of actually doing it myself, I felt a cool sweat come over me.
I want this done right, not just done.
So, luckily, as a blogger ambassador for HomeAdvisor (your home improvement connection) and HomeRight (taking on DIY projects), I knew exactly how I could work around this little DIY dilemma: I’d hire a pro to do the heavy lifting, then I’d finish the job with the right tools.
You might say, I figured the carpenter and I could “go Dutch” on completing this project. And, for half the price of a prefabbed one (typically a Dutch door starts at $1,200 – we did this project all in for $600)!
Benefits

Dutch door has light, breezy and neighborhood-friendly benefits.
Why a Dutch door? Uuumm…’cause they’re awesome! Here are just a few benefits to these double-doored doors:
• Allows in a lovely breeze
• Invites more natural light
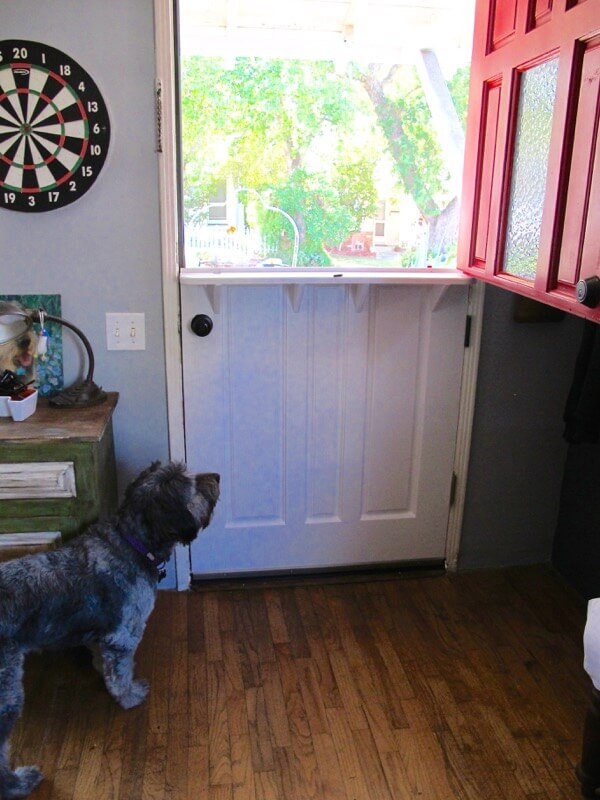
• Keeps our K9 kid secure – (especially during times like Halloween – trick-or-treaters won’t lose their candy to Krinkles!)

Our new Dutch door keeps Krinkles safely inside!
• Encourages neighbors to stop by and say, “Hello!”
• Delivery people can easily see us when they approach the front door and can hand over the food or packages with ease

So easy to pay and receive delivered food – note: this was the door before we painted it.
• It’s so darn cute!
Hiring our Pro

I hired All Level Installations from HomeAdvisor.
By now, I’m quite the pro at hiring a pro. And, because of the ample choices of local companies, along with a growing list of reviews on HomeAdvisor to sort and select the right ones, this part of the project took just a few minutes to complete*.
Who did I hire?
Martin Estrada, from All Level Installations of Finish Carpentry. After chatting with several carpenters, I felt immediately at ease speaking to Martin due to the fact that he was very nice and offered lots of sensical options to help us get what we wanted:
• reuse our door and turn it into a Dutch door
• cut it in half
• add a latch and an extra hinge to secure the upper door
• move around the hardware to accommodate the new design
• add a shelf for leaning on and placing a nice cool beverage (preferably a vodka soda)
We scheduled a first appointment and he was very prompt. Martin was also quite frank when he described where he’d have to cut our door.
Nope. Not gonna work.
The bottom half would have only had a height of just over three feet. That’s no sweat for Krinkles to hurdle.

While the crew worked on our door, our foreman, Krinkles, sits safe and secure inside his puppy pen.
Then, Martin offered to give us an old door he had stored in his garage. Now, how many carpenters would do that? The measurements were spot on and we were good to go! Thanks, Martin!

Martin’s door in his garage.
We scheduled the work day and he, along with his assistant, Amador, worked all day and fully completed the task of turning our his old door into a fabulous Dutch door! Bravo! Their work was precise and customized to exactly what we wanted.

Martin and Amador utilize the hinge template and cuts a rabbet that creates a better seal between the two doors…and makes it more secure.
They even did some extra detailing outside the scope of our work order. Besides the cute and functional shelf that Martin and Amador cut to our liking, our door jam was so wanky, they really had to custom fit it. Admittedly, if we had DIY’d this project, we most likely wouldn’t have made it work as well.

Martin built this custom mobile tool box out of salvaged wood and parts…I was so jealous!

Carpenter’s tools.
*With every project, HomeAdvisor assigns you a project advisor (mine was Mike Fioretto – 1-877-261-8387 ext.8830). They are fantastic at offering suggestions, ideas and advise as to how to successfully complete your project. Yeah, you can ask them whatever you need to get the job done!
Doing it Myself
Phase two of this project started a couple weeks later: paint the outside AND inside of the Dutch door, including the handy shelf, then install a new glass piece. If you’re thinking of painting your door, along with replacing windows, here now is what I did, along with some “learning curve” tips to avoid.
Supplies:
• sandpaper (medium – P60 and fine – P120 for finishing)
• hand sander, block sander, angled sponge sander
• exacto knife
• (optional) paint stripper (for doors with layers of old paint)
• exterior semi-gloss enamel paint
• HomeRight Finish Max Paint Sprayer
• brushes
• 5/16 molding (for the window)
• miter box and saw, or circular saw
• silicone sealant (to secure the window)
• window piece (we found ours at Allen Kenoyer Stained Glass in Hermosa Beach, CA – thanks to Kristen who was super helpful)
How-to:
1. Remove doors. A simple Philip screw driver can pop the doors off their hinges – and, ’cause there are two smaller doors, it’s a lot easier to do this alone.
2A. Clean and sand doors. This is a deceptively simple step, but it is VITAL to the finish of your project.
Learning Curve Tip: put on some good music, give yourself some shade, and make sure you’re hydrated. Yep, this is where you’ve gotta be real with yourself and know that you’ll be spending the next several hours prepping your door for painting. Depending on the shape of your door, you may want to strip it. There’s just no avoiding this step if you want pro results.

Sand and use a wire brush to roughen the detail parts of the door to ready it for painting.
2B. Remove old glass window(s). Here’s added “fun-time” prepping. Carefully pry off any molding, then, using your exacto knife, remove the silicone sealant from the glass by cutting along the edge. This will be a practice in patience….a meditation of sorts. I did a lot of Ooooohhhhmmmmmm-ing during this part of the project.

Cut the paint seal and pry up the molding to remove the old glass.

The tedious scraping out the old silicone sealant.
3. Set up your spray area, cover hardware with painters tape, then paint your doors. I, personally, think hardware, like hinges, shouldn’t be painted. They’ll be much easier to remove down the line if you need to, and it looks cool. Note: I a-love my HomeRight spray shelter that is so easy to use with so many types of projects.
Learning Curve Tip: make sure to keep at least three feet of distance between the item you are painting and the paint shelter or anything that you’re painting against. If not, you’ll get, what I call, “ricochet-overspray”. In other words, the paint will bounce off the back of the shelter/shield and onto the back of the item. Having to carefully take a wet rag and rub off the overspray is not fun when you’ve spent so much time making it looks so pretty!

Tape off the hardware! Tip: use aluminum foil to cover the door knobs…so fast and easy!

The fun task of using a paint sprayer…I used the Finish Max by HomeRight.

Now this is a beautiful finish!
After the paint dried a while, I placed the doors, one at a time, on my work horse so that I could paint the edges.
Pro Tip: Martin Estrada recommends to paint (thus, seal) all surfaces of a door so that it doesn’t expand and warp due to weather or temperature. If it does, it could affect how it hangs inside the doorway.
4. Measure, cut, then paint the window molding. Use a miter box or circular saw to make angled cuts, then adhere with silicone sealant and finishing nails.

Miter cut the new molding @ a 45 degree angle.
5. Insert glass, adhere with silicone sealant, then hammer in finishing nails. I needed to do this after the door was hung, but I’d do this while on the saw horse to make the task a little easier.

Apply silicone clear sealant to secure the glass window.

Place the molding over the glass for a nice finish.

Add finishing nails to complete the molding install.
6. Hang back onto hinges and enjoy!!! Note: be SURE to allow your paint to dry and cure for several hours before replacing, so that the paint doesn’t come off on the door jam.

Before and After Dutch door…whoo-hoo!

Our beautiful new Dutch door!

Dutch door opens to the world!

New glass insert – makes all the difference!

Krinkles safely behind the Dutch door.
My next door neighbor asked who I hired to paint the door. Nope! That part was DIY’d thanks to my pal the Finish Max paint sprayer! This was a fantastic project and “going
Dutch” garnered successful results.
Now it’s Your Turn!
Would you consider installing a Dutch door? Would you hire a pro, DIY it, or both? Do tell!
This post was sponsored by:
![]()
and![]()