

Brick pathway. source: garden-design-pictures.com
Rental properties. Lease as is. For those of us non-homeowners, renting a property can be esthetically challenging when the landlord is less than enthusiastic about paying for upkeep, updating, and/or sprucing-up the place we call home. Nevertheless, I have always believed in the philosophy, “My home is my castle,” whether I own it or not.
That being said, my husband and I recently took a gander at our not-so-spiffy back yard with dirt pathways, overgrown weeds, and the latest burrow our dog Klunkers just dug up creating a very comfy K-9 couch. The thought of bricking in this area and, thus solving the problems listed above, was quite satisfying. Unfortunately, prying open the wallet of our landlord was much like cracking open a pistachio nut with oven mitts. Not gonna happen.
We hopped onto DiggersList where we searched for bricks, hoping someone might have a pile for sale. We found several, but were holding out for that golden “free” ticket. We decided to create a listing for “looking for bricks” in the wanted section. Within a week, we were contacted by a contractor who was about to demo a home, along with about 400 bricks. He said they were ours for free if we wanted to come by the next day. Excellent. Free and recycled. Who could ask for more?

Laying a brick pathway. source: cornerhardware.com
With bricks in hand, we looked to this excerpt from an article entitled “How to Lay a Brick Path” on cornerhardware.com:
1. Lay out and excavate your path. Butt bricks together to determine your path width. Add 1 1/2 inch on each side for the 2-by-4 edging. For maximum accuracy, make batter boards as shown: Drive scrap-wood stakes a foot or so outside the paving area; then screw scrap boards to them horizontally. Finally, stretch mason’s line, as shown, to mark the outer surface of the 2-by-4 edgings. The batter boards make it easy to adjust the layout lines: all you do is untie the strings, then retie them in new locations. When the lines are set, use a square-edge shovel to excavate about 6 inches deep and an inch or two outside the lines. Note: Since walks are most stable when laid in undisturbed soil, don’t dig deeper if you can avoid it. If you must fill any hollows, be sure to tamp any fill firmly before you build.

2. Add forms and lay in the subbase. On each of the long sides, use a hand sledge to drive three stakes, 48 inches apart, just outside the string lines. Screw an 8-foot 2-by-4 to the inside of the stakes so that its top is at the height of your finished walk. The stake tops should be about an inch below this level. Add a 3-foot 2-by-4 at the end, screwing it to the ends of the side pieces. (You’ll add the other 3-foot 2-by-4 at the end of the path after you lay the last bricks.) Line the excavation with landscape fabric to prevent weeds from growing through your paving.
A 3-inch layer of engineered road base is next, leveled with a screed. To make the screed shown, simply screw a plywood blade to a 3-foot 2-by-4. Let the blade protrude 3 1/4 inches below the 2-by-4, and anchor it with six 2-inch drywall screws. Spread the subbase material with a rake, then screed it smooth. Tamp the subbase firmly. (A length of 4-by-4 with a 9-by-9-inch plywood square screwed to its end makes a good homemade tamper). If your job is large, rent a powered plate compactor; it does a more thorough job than hand tamping, although it’s overkill for small jobs.

3. Add the setting bed. Unscrew the blade of the screed, adjust its overhang to one brick-thickness minus a quarter inch, as shown, then screw it back on the 2-by-4 in its new position. The screed is now set to create a sand setting bed about 1 1/4 inch deep, on which you will lay the bricks. Cover the subbase with sand and screed it flat. Dampen the sand with a fine spray, tamp it, then rescreed, filling in hollows and retamping as needed. If your walk is longer than you can finish in a day, add the setting bed in stages as you proceed.
4. Lay the bricks. Lay bricks on the setting bed, using a mason’s line stretched between two bricks as a guide. Butt the bricks together as tightly as you can while maintaining the pattern you’ve chosen. Try not to leave any gaps greater than 1/8 inch, and tap down any high bricks only after they’re butted firmly against their neighbors.
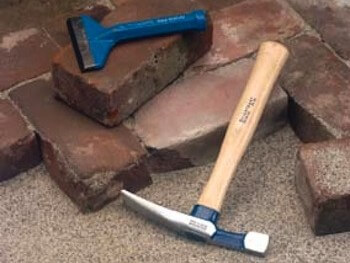
Many patterns require half-bricks. To cut a brick, use a brickset and hand sledge to score a line all the way around the brick. Rest the brick on a bed of sand and place the brickset on the line on top of the brick, with its bevel toward the waste side of the cut. Strike the brickset two or three times. The brick should break cleanly on the line.

5. Fill the joints. When you’ve placed all the bricks, spread fine sand over the surface, let it dry thoroughly in the sun, and then use a broom to sweep it over the surface. Hose down the bricks to help settle the sand, then check that it’s worked its way into the joints, locking the bricks in place. (Or, if you’ve rented a plate compactor, mount its rubber shoe and run the machine over the bricks to help settle them.) Mist the path with a fine spray and check the joints again. You’ll probably need two or three passes with the sand and the broom before all the joints are filled.
It’s amazing the resources available to us on the web. We will continue to add and showcase site tips like this to help spread the DIY word and make building and beautifying accessible to renters and homeowners alike.