
If you’ve been hopping around Pinterest and other crafting blogs these days, you’ll notice that the craft of cross stitch has reemerged in a new and, believe it or not, cool way! Cross stitchers are either creating more unique and modern patterns like these below: (click in to purchase any of these patterns)
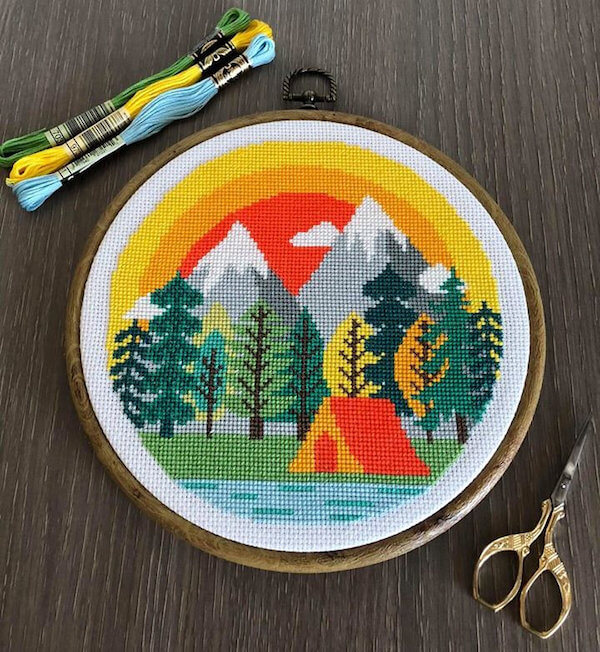
Camping at the mountains cross stitch pattern. source: axebe shop on etsy.com
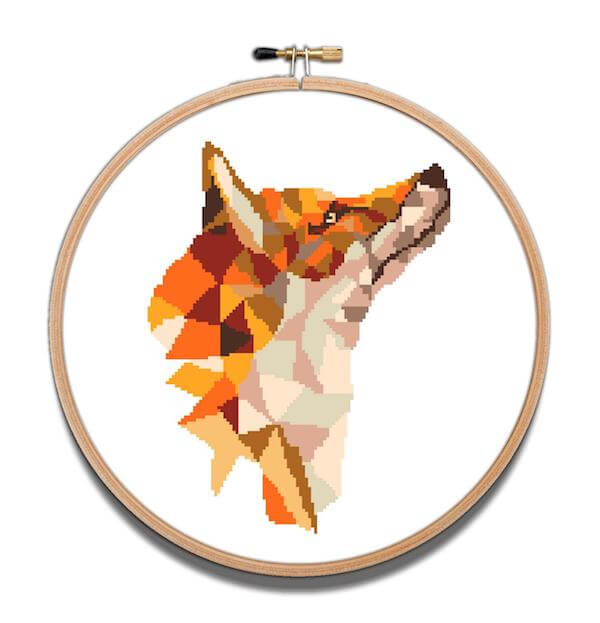
Geometric fox cross stitch pattern. source: NikkiPattern’s Pattern Store on shop.myblueprint.com
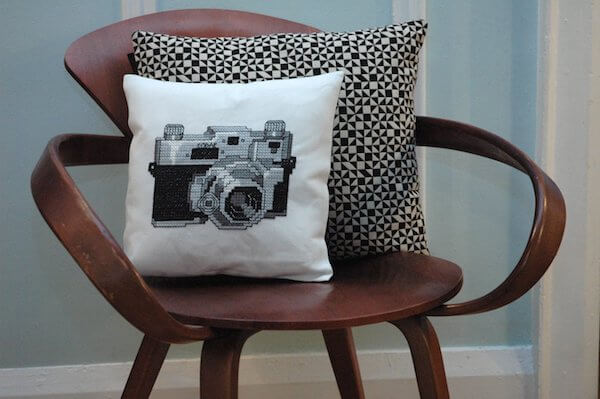
Cross stitch camera. source: tinymodernistcom
Or, they’re going BIG like this cross-stitch feature wall created by my cousin, Heide Janssen.
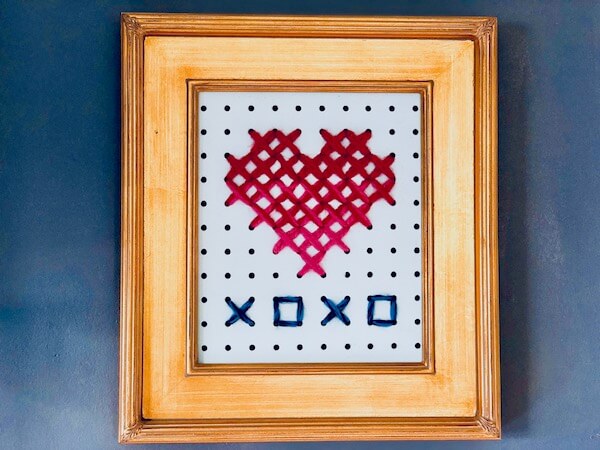
Today, we’re creating a sweet and simple Valentine that, frankly, can be made for all kinds of occasions like weddings, anniversaries, birthdays or to tell yourself how much you love you!
With just a few supplies and this how-to, you’ll be able to craft something unique and personal in just an hour or two.
Supplies:
• pegboard (they now come in smaller pieces or grab some scrap pegboard)
• measuring tape
• sand paper and sanding block (P100-P120)
• paint (use desired color)
• paint brush or paint sprayer
• jigsaw
• tape
• scissors
• 11″ x 14″ picture frame
• heart pattern (source: Craft Passion)
Instructions:
1. Cut and paint pegboard. Using your jig saw, cut out an 11″ x 14″ piece, sand edges, then paint any color you wish. Allow to dry.
2. Print out the heart pattern to the size that’ll fit your frame. Note: we also added an “xoxo” at the bottom which is just so easy you don’t need a pattern!
Option A: eye it, then with a pencil mark the pattern onto your pegboard.
Option B:
- use white chalk to color in the BACK of your pattern (make sure the pattern is completely covered from the other side of the page – you can hold it up to a window to make sure you’ve completely covered it).
- Next, place the pattern chalk-side down onto your pegboard. The pattern should be right-side up.
- Finally, using a pencil, trace over the lines of your pattern. When you’re done, the pattern should appear in chalk on your pegboard. Now you’re ready to cross stitch!
3. Select yarn, cut, then double it. It’s best to cut a piece that’s manageable – you can tie it to the next piece, then continue stitching, no problem!
4. Tape loose ends together like shoelaces. This will make poking it through the holes super easy! Be sure to clip off the end to make it neat and easy to work with.
5. Start stitching by pulling up from the back, then go down into a diagonal hole.
6. Flip pegboard over, then lace yarn through hoop to secure. This is for the start of your stitching only.
7. Continue stitching the design. Feel free to use different colors or shades of the same for an ombre affect. Finish by knotting to the back. Tape down to keep in place.
8. Frame your cross-stitch piece with or without glass -it’s up to you!
You did it!
Now, watch the full video tutorial!
[mv_video key=”nkivienss3oh0rnggkwc” sticky volume=”70″ aspectRatio=”16:9″ title=”How To Make a Pegboard Cross Stitch Valentine” thumbnail=”https://mediavine-res.cloudinary.com/video/upload/nkivienss3oh0rnggkwc.jpg”]