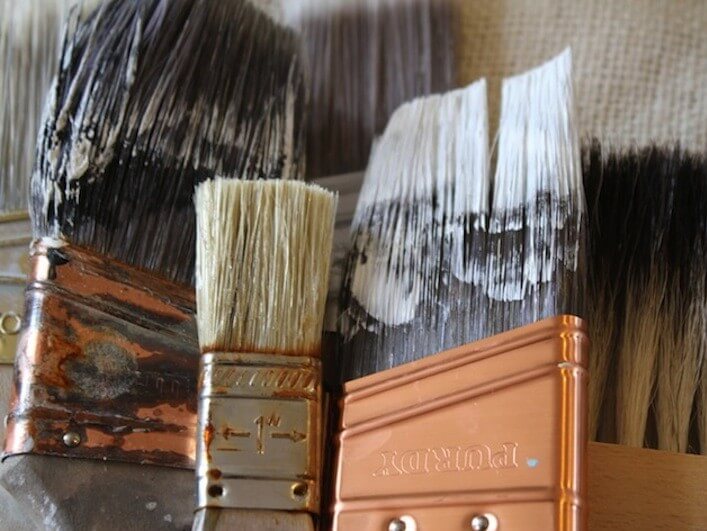

Hang drying brushes from a wire hanger. source: Skaie Knox, homejelly.com
If you were to look at my fingers today, you’d see that I’ve been painting…a lot. With all this nice weather, I just had to get my DIY on and tackle a few projects needing to be finished. The task list included lots a painting, from refurbishing an old piece of furniture to creating a decorative and functional sign. I was quite successful with most of the steps, but found myself jotting down mental notes as to how I would do things differently next time. As most of you do-it-yourselfers know, it’s all in the learning curve. So, when I came across the following tips, I knew I had to share them along with some inside knowledge that I bet will make your next paint project easier than pulling a rabbit out of a hat.
Trick #1: (see above photo) hang drying brushes from a wire hanger. Suspending brushes upside down eliminates the dreaded “bent bristles” nightmare that typically finds them ending up in the trash. This simple trick will keep bristles nice and straight and ready for next time. Inside tip: invest in a quality brush (or two)…they will be easier to work with, last longer and lower overall costs. Our favorite is Wooster hand brushes.

Remove painter’s tape with hair dryer. source: familyhandyman.com
Trick #2: remove painter’s tape with a hair dryer. It’s the heat that softens the adhesive, making it separate from the paint a bit easier. I was figuratively jumping for joy when I discovered this wonderful tip! I’m crossing my paint smeared fingers that this will do away with at least a portion of the touch-up painting I’ve had to do in the past. Inside Tip: this doesn’t work well if you’ve taped over painted wood. Though the tape came off easily, the paint underneath the tape also softened and peeled off with it.

Tin foil on the doorknob. source: realsimple.com
Trick #3: wrap tin foil around doorknobs. The genius is in the simplicity. How often have we either had to remove or end up with a paint-splotchy handle? This is definitely a time and headache saver. Inside Tip: use strips of tin foil to more easily get around the edges. A small knife can be used to tuck it underneath the doorknob if there is space.

Use Glad Press ‘n Seal plastic wrap on toilets. source: familyhandyman.com
Trick #4: Use Glad Press ‘n Seal plastic wrap on toilets. Tight spaces often mean accidental paint smears and splotches, so it’s a good idea to take an extra minute or two to protect your family throne. Inside tip: this clever idea can also be used on stoves, mounted microwaves, faucets, electronics, etc. The major trick is to press the plastic upon itself for an even tighter seal.
We’d love to hear any paint tricks you may have up your sleeve. Leave a comment below!
Featured image source: missmustardseed.com