

This post contains affiliate links.
Last week, I traveled down to my mom’s house in Laguna Niguel to attempt a furniture refurbishing project for the first time. Actually, that’s not completely true. At the time of this post, I had done some rehabbing – once on an old desk and dresser a few years back – but this was my first “DIY styling” of a furniture piece, more involved than sanding and sealing.
My mom’s courtyard needed a punch of color amongst the creams and muted pastels of her patio furniture. So, I decided to take inspiration from the striped colors of her cushions and paint them onto each slat of her park bench that’s been sitting outside in the elements for the past nine years. The cost? Only $35 for the supplies (we already had the basic tools). The results? A gratifying Wow!
Supplies:
• rubber or vinyl gloves
• Rust-Oleum primer (comes in different colors – we used white)
• pint of outdoor polyurethane paint (any color you wish!)
• newspaper
Tools:
• pliers
• screwdriver
Optional:
Instructions:
 Wipe off dust and cobwebs on all surfaces with a damp rag.
 Tighten all the screws…you may need to use pliers to hold the bolt in the back to tighten fully.
 Wire brush off rust. Really get into the nooks and crannies and “put some elbow grease into it,” says Klunkers.
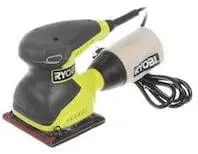
 Use a hand sander to take off the really tough rust. We used P60 grit sand paper here, but you can also go as coarse as P50.
 Clean cast iron with soap and water to really remove excess rust dust and particles.
 Wire brush wood slats to remove peeling varnish, splintered wood, and weathered dirt and grime.
 Using your hand sander, smooth out the rough surface on all slats, including the underneath. Use your sanding block (photo 2) to get into the hard-to-reach areas. I initially used P60 grit sand paper to work out the rough edges of the wood, then went to P120 to smoooooothen it out! In other words, I made it tooshie-smooth!
 My 82 year old mom, Lois, gets in on the DIY action! (Oh, and yes, she gave me the “go ahead” to tell y’all how seasoned she is!) DIY is for ALL ages!
 Optional detailing: round out the edges of each of the wood slats for a more comfy sit.
 After taping off the wood around the cast iron, prime with a can of Rust-Oleum. Use smooth, back and forth strokes about 8-12″ away from surface to avoid drippage. Note: Rust-Oleum comes in different colors, so be sure to purchase the appropriate shade for your project.
…and now…the final steps!
 Sturdy and smaller detail brushes will help finish off your bench faster and easier. Home Depot paint expert, Tommy, suggested we try both the Wooster and Purdy hand brushes, quality products that can be used again and again. The winner? Hands down…Wooster. It was more firm, substantial to hold, and painted smoother and more complete than the Purdy…in our opinion.
 Begin painting all the cast iron. We used two coats. Note: be sure to also paint the underneath as well. In fact, to avoid re-rusting, all surfaces should be painted.
 When painting lattice work, it helps to have someone on the other side painting and catching any drippage. Thanks mom!
 Almost finished now! The inspiration: mom’s patio cushion colors. Thanks Behr paints!
 Before painting these colors, line up the color scheme from front slat color to back.
 Paint wooden slats.
Note: start with the underneath. We started painting the top, then turned it over and painted the bottom (using the cream color we painted on the cast iron). Unfortunately, we had to touch up the top slats again, as the brush strokes from the cream paint underneath smeared onto the colored slats. Ugh…lesson learned!
 Project manager Klunkers always on the job!

Optional step: Polyurethane…its consistency and color is a little bit like milk.
 Apply, sand, then apply another coat (we only applied the sealant to the tops of the wooden slats-not any of the cast iron). Use regular, smooth brush strokes. Because we used exterior paint, this step is optional, but will finish and protect your bench nicer and longer. Note: A pint costs approx. $15 which will add to the overall cost of this project. The benefit? You’ll have plenty left over for your next DIY project!
Tips: here are just a few more tips to make this project easy-peasy!
 Tip: After purchasing your paints, be sure to take a photo with your smart phone in case you’d like to buy more of the same color…this label can easily be smeared or covered with paint.
 Tip: for reduced messes, here are two ways to keep paint in the can and not on your floors-#1, punch holes into the inside ridge of your paint can. After pouring you’ll find there will be less drippage (see our “Holey Paint Cans” blog for more info.). #2. attach a rubber band around the paint can and use to scrape excess paint of your brush. This works brilliantly!!!
After Wow!

So darling!
 I had never noticed this heart detailing…now it’s just part of the charm of this bench.
 Klunkers is pleased again!…and definitely eying those cookies!
Q. Would you attempt a DIY project like this?
All photography by Skaie Knox, HomeJelly
HomeJelly UPDATE!
Check out our HomeJelly Readers’ rendition of this fun project…see how fantastic they did!
Martine Engel (along w/site manager “Bella”)
Great Job!