

Naked wood candle holder, closed tiers.
My cousin Ole, the forth generation Karstad to take ownership of our family’s homesteaded farm in Minnesota, announced back in January that he was getting married in August. With plane tickets bought and accommodations arranged, I knew I was destined to go “off-registry” and make a wedding gift of my own. Our gardeners had recently cut back our pepper trees (ugh. those incessant berries!) which left our backyard babysitter to several large branches. After fending off my husband who on many occasions tried to throw out these precious stumps of DIY wood “gold”, I took to creating the following beautiful, three-tiered wood candle holder, aux natural.
Here’s what you’ll need:
- tree branch(es) – three different sizes in diameter (mine was approximately 8″, 7″, and 6 1/2″ respectively)
- hand saw or chain saw or…(I asked our gardeners to cut approximately 2 to 3″ thick disks, one from each of the three branches – made this project that much easier!)
- hammer
- fine grade sand paper (P220)
- sanding block
- pencil
- drill and 1/8″ bit
- chop stick
- wood glue
- paint and colored markers
- candles
Here’s what you do:
1. Choose/cut your wood piece(s).

Choose/cut wood pieces.
2. Remove bark. Use your hammer to bang off the bark as well as the back of the hammer to pry off more stuck-on pieces. The dryer the wood, the easier it is to do this step.

Remove bark.

Naked wood piece.
3. Sand rough edges. The wood underneath the bark is already very smooth, but you may want to sand down the cut edges as well as any branch stubs that may still have splintered pieces.

Sand rough edges and branch stubs.
4. Arrange and mark holes on tiers. I wanted this to emulate an offset three-tiered wedding cake, so after sanding, I stacked the pieces to look like one. I then marked holes for where I was going to insert a mini-post, so that my cousin could fan it open later.

Arrange and mark holes on tiers. Inspector Klunkers, as usual, is on the job.
5. Drill through each tier. Be sure to place each tier onto a scrap piece of wood in order to avoid drilling into the concrete.

Drill through each tier.
6. Insert glue and chop stick. You can also use a dowel. I originally wanted to drill a hole large enough to insert a regular sized taper candle. Unfortunately, I didn’t have a large enough drill bit. If you’d like, try it…the candle will act as a dowel and can be lit…(maybe I’ll try that some other time!)

Insert glue and chop stick.
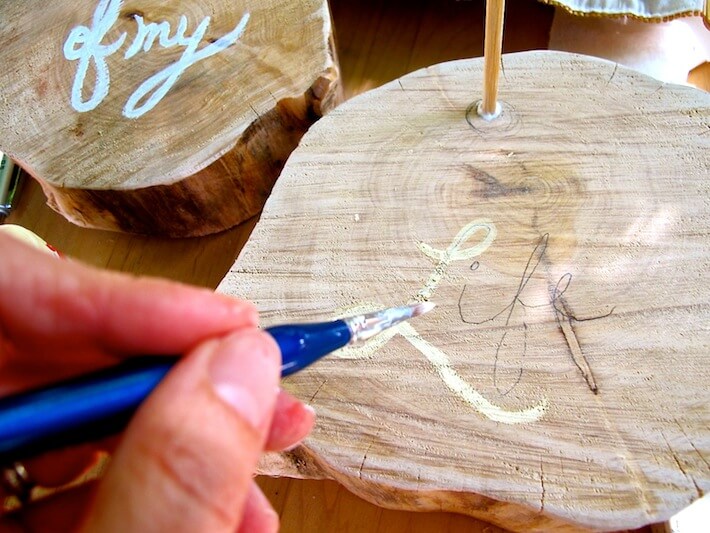
7. Complete graphic artwork. Choose any wording you wish. I chose the play on words phrase, “Light of my Life” (so many levels!)

Complete graphic artwork.
8. Saw off excess chop stick. This step might also be done before step #6, I suppose. Be sure to attach all three tiers, then measure where you’d like to cut the dowel. If there is any bit still slightly sticking through, you can pound it down with a hammer. For a totally finished look, fill with wood putty, then sand. Done!

Three tiered naked wood candle holder.