
I know there are many of you like me, whose hearts go pitter-patter at the thought of free furniture. Well, on a recent neighborhood walk with Klunkers, I nearly passed by two curbside, weather-warn, wooden deck chairs with a sign on one of them that read:

My kinda shopping! So, stopping to take a closer look, I noticed one of the arms was broken and the reclining mechanisms needed some love, but I decided I’d adopt them anyhow, and take them home. It was then just a quick call to the hubbie to pick us up (with dog and deck chairs in tow), then off to the drawing board to see how I could upcycle my new free finds into something superb!
Upcycling deck chairs into a bench – here’s what I did…
Supplies:
• Allen wrench
• ruler
• pencil
• jigsaw
• sand paper (fine – P120 and coarse – P60)
• hand sander and sanding block
• painters tape
• paint brushes
• outdoor paint (I used Glidden’s “Red Delicious”)
• indoor/outdoor poly/stain (I used Varathane’s “American Walnut”)
• outdoor polyurethane
• tarp
• optional: easy-up tent (outside and well ventilated, this kept me oh, so shaded from the sun and kept my work relatively free from falling leaves).
Instructions:
Step #1: After wiping down the dust and cobwebs, I used my Allen wrench to tighten any loose screws, then unscrewed the inside arms and removed them. Note: I was excited to see that the missing under-screw fell out when I loosed the inside arm. Perfect! I could now use it to fix the broken outside arm…done!

Removing the inside arm rest.
Step #2: I carefully marked the cut lines then used my jigsaw to remove both arm bases.

Marking the cut line.

Using the jigsaw to cut off the arm base.

Arms cut off.
Before proceeding, I reused the piece I just cut, measured the cut line, then cut the block to later use to join the backs together.

Reusing the cut arm to join the chair backs.

Where I will be joining both chair backs.
Step #3: I sanded, and sanded, then sanded some more.

Sanding, sanding, and more sanding.
Step #4: I wanted to do something interesting, so I measured 12″ from the floor, then taped off the legs and arms for a dipped effect.

Taping off for the dipped effect.
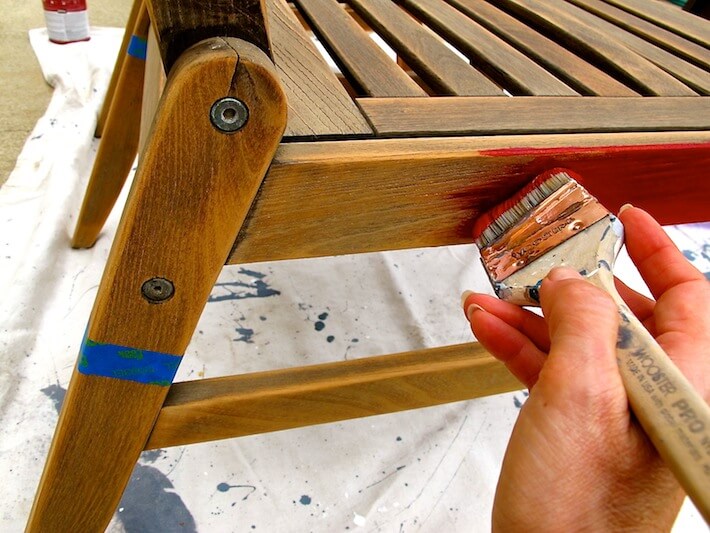
Step #5: From the tape upwards I painted using the “Red Delicious” paint. I painted two coats.

Painting on the color.

Watching the paint dry.
Step #6: From the tape and below, I brushed on the poly stain (just one coat, cuz I liked the color of one coat).

Brushing on the poly/stain.
Step #7: Over the paint and the strips of raw, sanded wood, I brushed on a protective coat of polyurethane (just a single coat).

Brushing on the finishing poly.
Step #8: To join the two deck chairs together, I first pre-drilled holes on the front and back legs, then screwed in screws (4 on both the front and back legs to properly connect them). I then screwed in the painted block piece to join the backs.

Drill…Screw…Connect!
From the curb to superb refurb!

Upcycled deck chair bench done!

Deck chair bench closeup details…and Klunkers.

Upright…reclined. I just love how you have to work together to recline in this bench.

Klunkers loves his new bench!
Now It’s Your Turn!
So…how’d I do? Please tell me what you think about the design! Have you found curbside “trash” and turned it into something fab? Do tell!
If you’d like, check out another one of my “free find” rehabs I did for my brother-in-law Johnnie.
All photography by Skaie Knox, HomeJelly