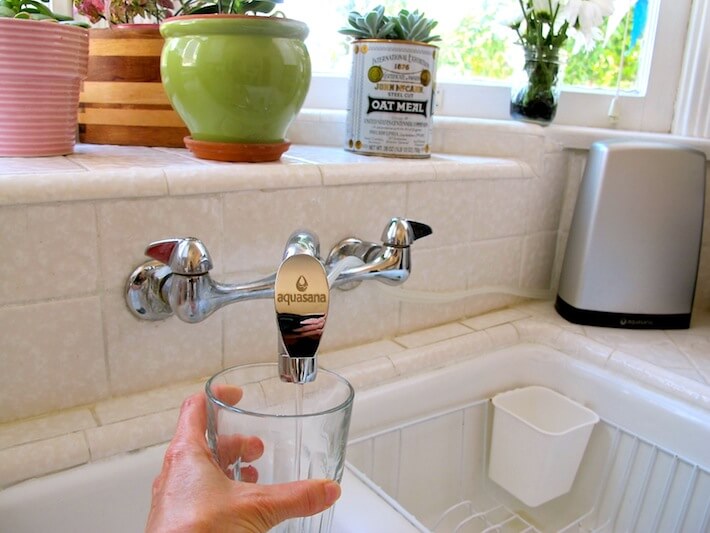

Aquasana water filter.
For years now, we’ve been ordering Sparkletts water, not just for its taste, but for the dispenser that makes making hot tea and pouring bleary-eyed, in-the-middle-of-the-night cold quenchers a breeze. Well, recently I was introduced to a stylish countertop water filter that will not only save us money on drinking water, it’ll add to our healthy approach to cooking and, equally important, the watering of our K9 kid, Klunkers.
So, when I had the opportunity to blog on and review Aquasana’s water filtration system, which provides 450 gallons of water and can last approximately 6 months (depending on how much you use daily), I knew I had to try it and see if I could actually tell the difference between our LA tap and our newly filtered H20.
The taste-test results are in. I could absolutely tell, from the first glass, that this water was quite delicious, and gratefully had no trace of the old tap’s metallic and “yucky-je-ne-sais-quoi” quality. Oh, and besides the favorable flavor factor, this easy-to-install filter touts additional health benefits, “Our products take out 60+ contaminants from the water, including 90% of chlorine while leaving in beneficial minerals like calcium, magnesium, and potassium all while improving overall air quality in your home.”
Giveaway!
If you’d like to have tasty and healthy drinking water in your home, see the giveaway instructions at the bottom of this post!
Now, I was a wee-bit wary when it came time to install our new filter. On the contrary, it practically installed itself! The only parts I needed were the silver countertop filter and the diverter valve and hoses.

The simple attachment process of the Aquasana filter.
There were four simple steps. (1) I removed the old aerator on our faucet.

Removing the old aerator.
(2) I then replaced it with the new diverter valve.

Attaching the diverter valve.
(3) I then attached the hoses, blue end to blue hole, white end to white hole. Note: be sure to push them in firmly or you’ll have leakage.

Pushing the hoses into the filter.
Finally, (4) I did the initial 10 minute flush to clear the filter and ready it for drinking.

Flushing out the filter.
The sleekness of this countertop drinking water filter blends well with our other appliances, but if you’re needing to conserve the space you have, there is also an under-the-counter model as well. I’m thinking next, I’ll have to try the shower filter.

Clean and healthy water.
Aquasana Water Filter Giveaway!
For a chance to win an Aquasana water filter (shower or kitchen faucet, worth $80-$150), you must do ONE of the following tasks:
1. “Share” this blog post on YOUR Facebook or Twitter page – (simply click one of the social network icons at the top of this blog).
2. Subscribe to HomeJelly’s newsletter – (and be sure to leave a comment below letting us know you subscribed and which filter you’d love!).
OR
3. “Like” Aquasana’s Facebook page and write “HomeJelly giveaway…I want the shower/kitchen filter!” on their wall (or anything you’d like). Just be sure to include HomeJelly somewhere in the comment so they know you’ve entered.
The giveaway is closed. And the winner is…Mystie Edwards!!! Congratulations! Thanks to everyone for your participation! We so appreciate it!
All photography by Skaie Knox, Homejelly