
Klunkers’ doggie ramp!
I was struggling to write today’s blog. Not only because it involves the fact that our wonderful dog, Klunkers, diagnosed with degenerative myelopathy, needs this project, but that Matt and I basically rigged/”winged” it. Don’t get me wrong – we certainly applied our DIY know-how…it’s just that we had no instructions and had to somewhat feel our way through the dark on this one. Still, I think we did okay! Admittedly, it was pretty fun to deconstruct a pallet (used to transport our new washer and dryer), for most of our materials.
So…I’ll do my best, but, will mostly show you how we built this doggie ramp by way of a photo tutorial. Klunkers, you can now come out from behind that tree.

Pallet
Supplies:
• pallet (refer to this handy post on how to know if your pallet is safe to use)
• pry bar and hammer (for deconstructing pallet)
• wood screws
• drill and Phillips bit
• hand saw or circular saw (to cut pallet piece to size)
• extra 1′ x 1/2″ boards for the side panels
• L-brackets to secure the side panels
• artificial turf (you can often find remnants in the scraps section of Home Depot)
• staple gun and staples (to attach artificial turf to ramp)
• 1/4″ wide moulding (for the ramp “steps”)
• no-slip tape (to press onto the “steps”)
Instructions:
1. Start by deconstructing your pallet. Use a hammer and pry bar, along with a bit of patience and finesse!

Start by deconstructing your pallet.
2. Measure the width and length of your stairs. Then, use pressed wood (it’s much cheaper!) for the ramp.

Steps to the backyard.

Measure the width and length of your stairs, then use pressed wood (it’s cheap) for the ramp.
3. Cut your pallet pieces to fit the width of your ramp.

Cut your pallet pieces to fit the width of your ramp.
4. Screw in your support pieces. Here’s the “rigging” and “wing’n it” portion of the how-to. You’ll just need to add pallet pieces where they can fit and add strength to your ramp.

Screw in pallet pieces to add strength to your ramp.

Place your pallet pieces any which way to add strength to your ramp.

As you work down your steps, you’ll need to add more pallet pieces under your ramp.

Screw in side pieces to keep under pieces secure.

Screw in more pieces to fit the angle of your ramp – this is at the bottom step.

Finished bottom
5. Staple your artificial turf onto the top of your ramp. This helps to prevent doggie paw slipping.

Staple your artificial turf to the topside of the ramp.
6. Nail in your moulding pieces for the low profile ramp steps.

Add moulding for low-profile steps.
7. Stick on the no-slip tape strips onto the moulding.

Tape on the no-slip strips onto the moulding.
8. Attach the L brackets for the side panels.

Attach the L brackets for the side panels.

Ramp almost complete.
9. Screw on the side panels.

Screw on the side panels.
You’re done!

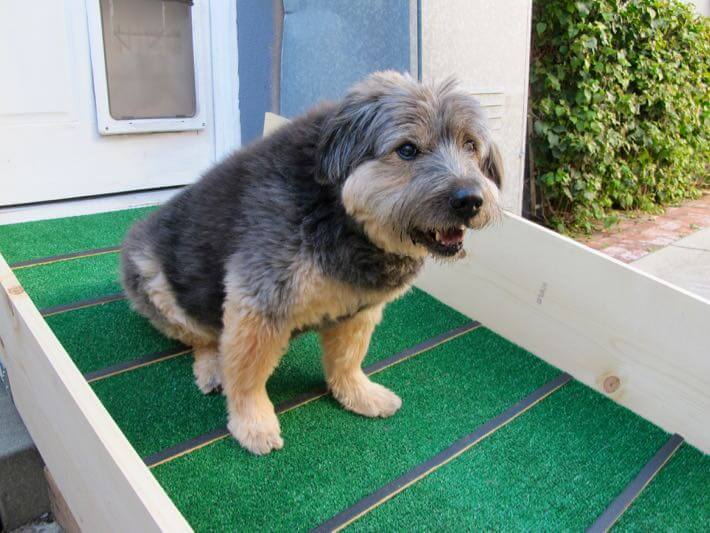
Klunkers’ ramp is finished!

Klunkers loves his ramp!

Side panels prevent Klunkers from walking off the side.
Now It’s Your Turn!
If you have any ways to improve this ramp…do tell!
All photography by Skaie Knox, HomeJelly