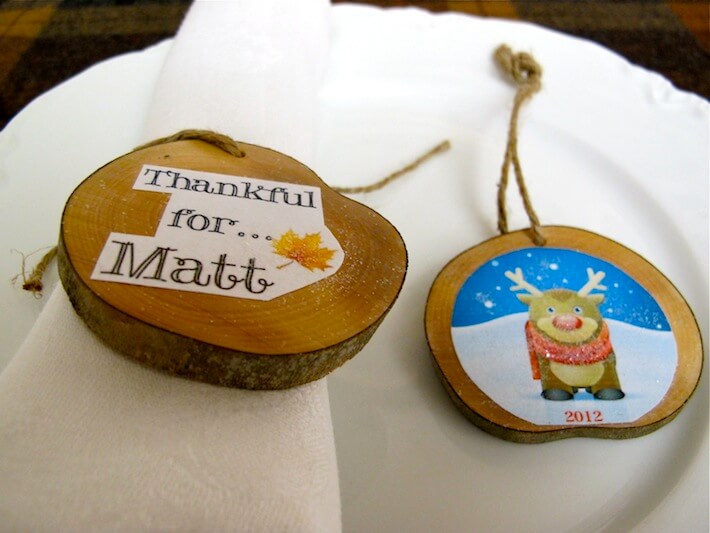

Front and back of keepsake.
This Thanksgiving, there will be 17 of us gathering together for a day of board and video games, chit-chat, looooots of food and drink, and…of course, to give thanks. Many are traveling from far out of town so I thought it would be special to make something they can take home and use for the next holiday…Christmas that is!
Why not? Y’all know I’m into repurposing, right? So how ’bout this, I thought I’d create a napkin holder/name plate/Christmas ornament…fewwww! All it took was a little inspiration from my life-long gal pal and HomeJelly contributor, Bridget Johnson, who created beautiful canvas keepsakes using simple materials and vintage images. I’ve also had a pile of branches cut down by Matt this summer that I’ve been intending to use in a DIY something or other. Now’s my chance and it’s so easy. So, don your safety glasses and pull on some gloves. Join me in creating a keepsake memory that’ll show the ones you love how thankful you are to have them in your life.
Here’s what you’ll need:
- branches-approx. 2 1/2 – 3″ in diameter
- saw
- sand paper & sanding block
- small brush
- mod podge
- an image on paper (wrapping paper, a magazine or an image printed off the computer)
- twine or ribbon
Here’s what you do:
1. Cut down a branch that has a diameter of about 2 1/2″ – 3″.

Choose/cut your wood piece. Klunkers, the foreman, looks on!
2. Using your saw, cut a 1/2″ disc off the branch. Repeat for the number of guests attending.

Measure a half inch for cut line.

Cutting the wood discs…my very first time using a compound miter saw!
3. Drill a small hole for the twine, then gently sand both sides so that the surface is smooth.

Drill hole for twine.
4. Choose your image and your font. (a) You can cut pictures out of magazines, use wrapping paper, or google images on the computer and print them onto copy paper. (b) You can print out a message for the other side like “Thankful for…(name of guest)” or whatever you’d like. Be sure to make the guests’ names ledgible, as this will also be their name plates at dinner. I might also include the year, just to mark this particular holiday in stone (er…wood).
5. Cut the image and message the size of the wood piece.

Cut out images.

Match guest’s message to image.
6. Brush a small amount of glue onto the wood, then place the image on one side of the wood and brush more glue on top of the image. It will go on cloudy but will dry clear. Do the same for the name/message side of the wood. Optional: add glitter to glam up your napkin holder name plate ornaments!

Apply first layer of decoupage adhesive.

Apply second layer over image.

Add glitter detailing.
7. Once dry, thread a small piece of twine, large enough to later hang as an ornament. Do NOT tie twine together yet.

Thread twine.
8. When setting the table, tie the twine around each ribbon in a BOW, facing the “Thankful for…(name of guest)” side of your keepsake outward.

Place setting with keepsake as napkin holder name plate.

Napkin holder name plate.

Front and back of finished keepsake ornament.
Your guests will be extra thankful for this wonderful gift, a memory they will cherish for years to come! Happy Thanksgiving! Oh, yeah, if you’re too busy baking pies and peel’n potatoes today…try this for your Christmas guests!
Who are you thankful for? We at HomeJelly are thankful for YOU!
All photography by Skaie Knox, HomeJelly.