
The 30’s and 40’s were very interesting times in home design. Beautiful details, awesome wood floors, cute nooks and built-in crannies…but, the kitchens were another thing. Ugh. They were small, inefficient, had zero counter space, and were often kind of dull and uninviting.
Fast forward several decades where home owners are giving old fashioned kitchens new and updated improvements, like today’s “Before & After”, completed by DiggersList friend, Linn from the HomeProject. She and her husband decided to roll up their sleeves, buckle on their tool belts, and have a go at renovating their 1946 kitchen, which ultimately, took about a month and just $6,000 to finish (and, yes, that included all new appliances!).
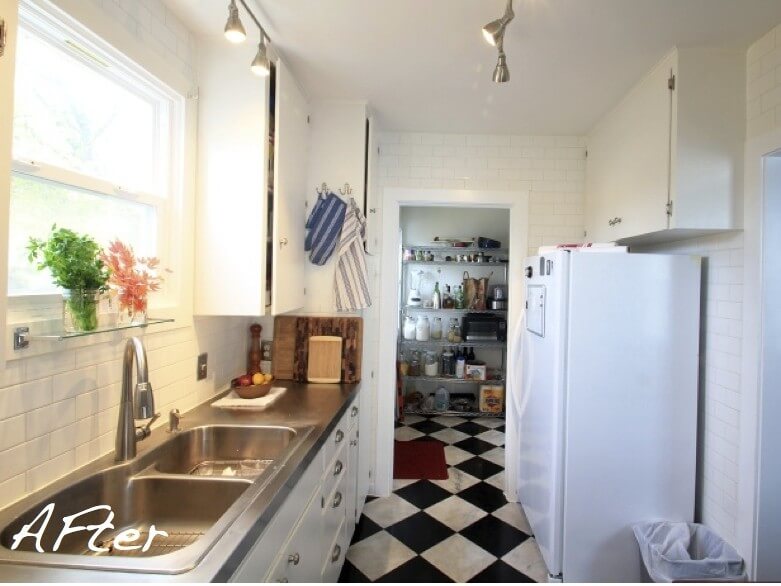
 Because the space is so tiny, about 90 square feet, Linn and her husband wanted to keep things simple, bright and functional. Despite the fact that they both are self-taught, these DIYers pulled off setting marble granite tile (see cool checkered floors), subway tiling the walls and back splash, refinishing the cabinets, and even installing a new stainless steel counter and sink, feewww! A round of applause, please.
 One of the simplest ways to bring more light into a room is to clear any obstructions from the windows, as shown below. By flipping the locations of the stove and the refrigerator, the sun can now pour right in and make room for more functional counter space and storage.
 New and modern track lighting is allowing “home-improvers” to inexpensively and tastefully direct light more specifically, and add a touch of elegance at the same time. Here, Linn and her husband can now prep, clean, and feature areas in their kitchen with beautiful spot lighting.
 When it comes to finishing the cabinets, Linn suggests not taking any shortcuts. “At first we didn’t sand some cabinets and shelves before painting. Well, those cabinets immediately started peeling paint, so we had to do everything over again. Especially when you’re dealing with oil-based-paint covered cabinets that you’re painting with water-based-paint; you really have to be careful with prep work: sand well, apply a primer and then finally a few coats of the finished paint.”
 What we at DiggersList dig most about this reno is how these homeowners really went for it! Additionally, they stayed true to the style of their home, added quality materials that will last for years (stylistically and durability-wise), and they stayed within a budget they could handle. Well done!
If you would like to learn more about this project, please visit Linn and her husband at the HomeProject. All photos courtesy of Linn.