
Often ringing in my ears are the words of my mom’s life motto, ala the lyrics of Chrissie Hynde: “Waste not, want not.” Yup. It can drive my husband a bit batty at times, but he comes around when he sees how much money I save reusing leftover materials from projects past and/or demolition around our house. Today’s reclaim project is made from the last of our garage’s shoddily-designed shelving we took down last summer. You can see the open industrial shelves and console table I made from the initial pile we had stacked in the backyard.
Oh, and I’ve had these crates, courtesy of my cousin Tom, collecting dust between parties I’ve decorated just sitting there, looking up at me as if to say, “Pleeeease use us in a more dignified manner! We can be of so much more use to you.” Maybe it was the heat of the day, or maybe I’m getting the hang of this do-it-herself business. Either way, the results of this surplus pairing (and a little quirky painting), is a fun and practical park bench. Ah, mom would be proud!
Supplies:
• reclaimed wood (my piece was 1 1/2″ x 11″ x 5 1/2′)
• two wooden crates
• electric sander and block sander
• coarse sand paper (P60 – P80)
• assorted paints (I used leftover craft paint and outdoor paints – the final coat of poly urethane will seal it later)
• poly-stain – (I used Varathane‘s American Walnut…you can chose from several shades of stains)
• small and large brushes
• drill
• wood screws
• two handles (optional)
If you wanna DIY this at home…
Instructions:
Step #1: Find a piece of old wood, big enough to seat several people on a bench.

Reclaimed wood from circa 1960s.
Step #2: Using your electric hand sander and coarse sand paper, put on eye protection, a mask, and some groov’n tunes and go nuts! Sand all surfaces smooooooth. Your tushies will appreciate it.

Sand wood piece.
Step #3: Create your lettering. (a) choose a saying and a font (I used the ’70s inspired font, “Hoodoo U NF” from myfonts.com) and print out each letter on a separate piece of paper, (b) scribble pencil onto the back of each letter, so that it covers the edges of each letter, (c) tape each piece of paper onto your wood piece where you’d like, (d) trace over the front of each letter – the scribbled pencil will end up transferring onto the wood, (e) fill in each letter with paint, (f) allow to dry, then sand to distress to your liking. Lettering…complete!

Create the lettering.
Step #4: Lightly sand crate.

Lightly sand crate.
Step 5: Paint, sand, poly-stain. (a) brush on colors from your lettering randomly, (b) sand to distress as much as you desire, (c) brush and/or rub on poly-stain. Note: I felt the need to be daring here, so I tried to create a fun paint affect. Hmm…not sure it came out the way I wanted, so, it’s up to you if you want to try this or just poly-stain it. ([side-mouth]…just poly-stain it!)

Paint, stain & poly.
Step #6: Attach the handles to the crate.

Attach the handles.
Step #7: Attach the bench top to the crates. Tip: a good idea here is to pre-drill to avoid cracking the wood. It also makes screwing in the wood screws a snap!

Attach the bench top.
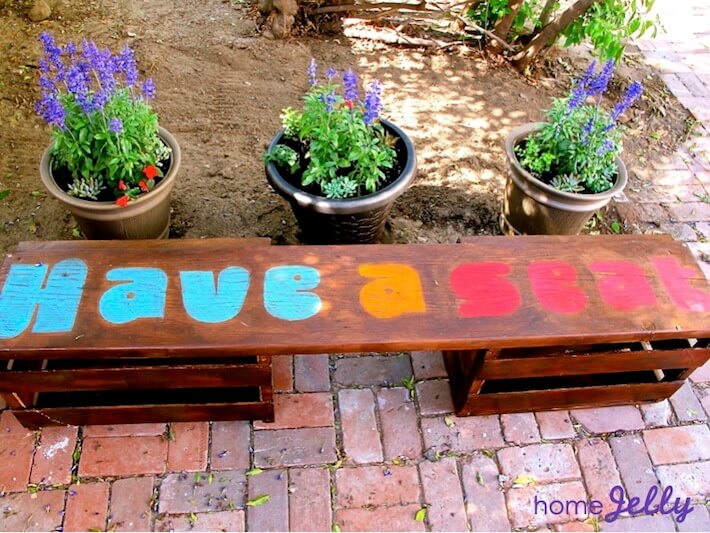
Yay! You’re done!
I was wrestling with the idea of attaching casters to one side so that it would be easy to move about the backyard. However, that meant I would have to attach six equally sized legs to the pressure points of the crates which would quite possibly weaken its overall stability, so I left it as is. Again…done!
What do you think?

Side view of bench…have a seat!

Reclaimed wood and crate bench, too!

Napa wine crate and handle details.
What would your bench’s slogan be?
All photography by Skaie Knox, HomeJelly