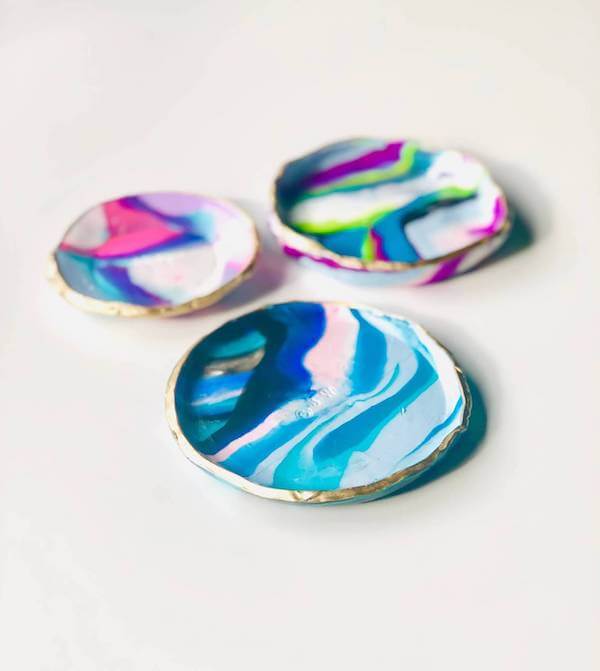
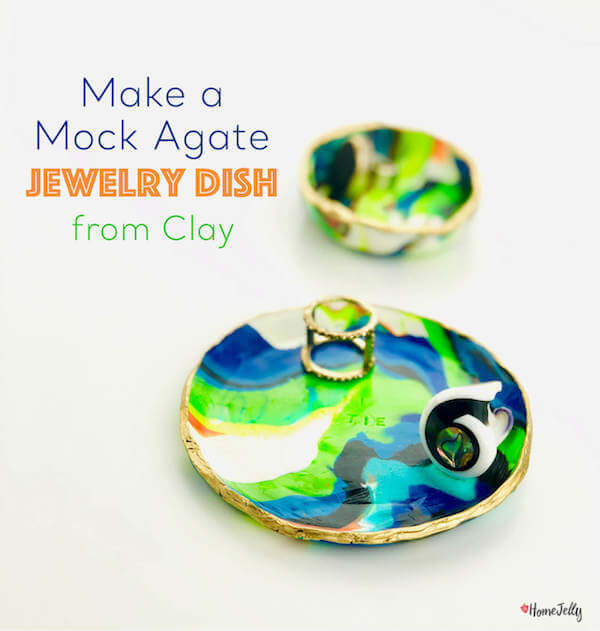
Mock agate jewelry dishes are jewelry in and of themselves!
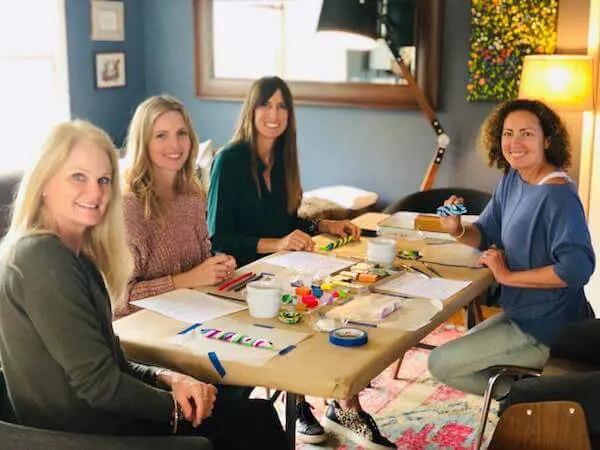
I recently hosted a gal-pal party called, a CrafTea Party, where I prepared yogurt and fruit parfaits, tea sammiches and yummy vanilla scones with mock Devonshire cream and jam.
Crafting clay dishes with my girls, Wendy, Andrea, Kristin and Heidi.
In addition to lots of gab ‘n giggles, I provided a fun craft for my friends to try and take home – a sort of adult version of the goodie bag, only, they DIY’d their own goodie. I decided on something simple, yet impressive and useful: mock agate coasters made from clay.
Watch how to Make a Mock Agate Jewelry Dish from Clay!
[mv_video key=”h6pktyxdcznxhmdpoxao” sticky volume=”70″ aspectRatio=”16:9″ title=”Make a Mock Agate Jewelry Dish from Clay” thumbnail=”https://mediavine-res.cloudinary.com/video/upload/h6pktyxdcznxhmdpoxao.jpg”]
They can be made, baked, then finished in about an hour. Splendid! These jovial jewelry dishes are also wonderful to be given for all kinds of occasions: a hostess gift, Valentine’s Day, anniversary, birthday, graduation, or the holidays.
Now, then…let’s get this party started!
Supplies:
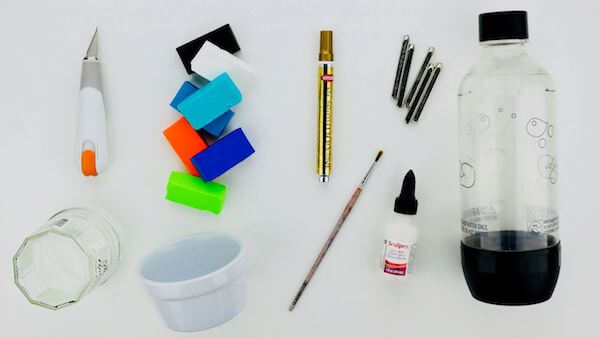
• knife or exacto knife
• rolling pin or glass jar or wine bottle
• wax paper
• small bowl or bottle (with bottom desired diameter of your dish)
• multi-colored Sculpey oven baked clay & black and white clay
• baking tray
• Krylon 18 kt. gold leafing pen marker
• craft brush
• Sculpey glaze – 1 oz.
Optional:
Instructions:
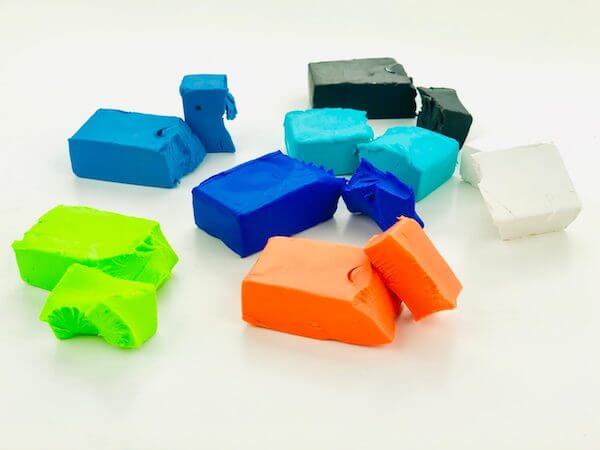
Oven-bake clay comes in all kinds of fabulous colors. This clay is by Sculpey – so easy to use.
Important Tip! Wash hands and wipe work surface to prevent dirty clay! Also, use a craft mat to protect your work surface, then be sure to place down wax paper when rolling out your clay to prevent it from sticking to your mat or work surface.
1. Roll 5 – 7 different colors of clay into 5″ long snakes. Some colors can be thinner than others – the thicker the snake, the more prominent the color. If you’d like just a hint of neon pink, make that snake thinner.
2. Twist snakes together. Fold, then roll out to double the length. You can stop here or repeat 1 or 2 more times. The more you twist and fold, the more you’ll incorporate the colors.
3. Roll into a ball, then roll out. There’s no science here, you can make your dish as small or large as you’d like. We rolled ours out to a 4 1/2″ diameter, 1/4″ thick. Tip! Using a glass or bottle to roll out your clay allows you to see its shape.
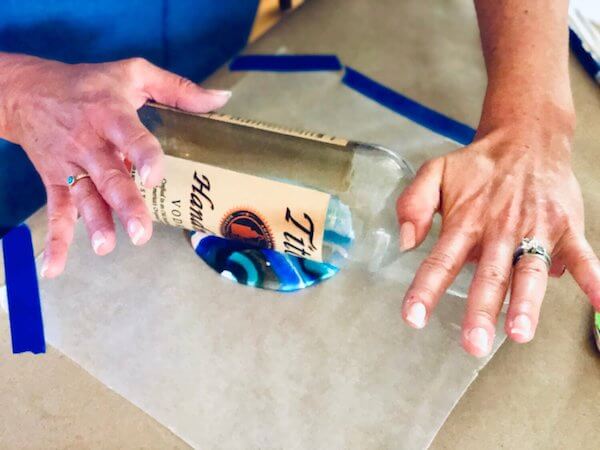
Roll out clay with a full glass bottle makes it easier to see what you’re doing and adds weight to make rolling easier.
4. Place a 4″ bowl or glass onto clay, then using your knife, cut out. Tip! If you’d like to create a square dish, use a ruler, then cut.
Cut out a circle of clay using any size dish you like. source: Wendy Earley
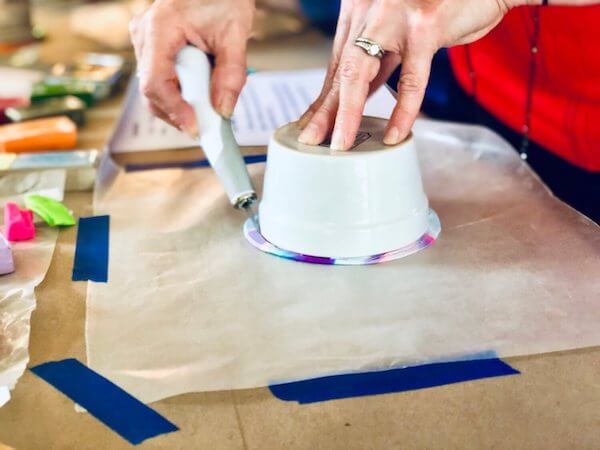
5. Place clay disk onto the bottom of an upturned glass or bottle and mold it into a dish shape. Get creative and look around your house for interesting shapes! Tip! If you’d rather just form the edges with your fingers, go nuts! You can also make the edges scalloped or rough…there are no rules here, people!
6. Carefully remove your clay, then place it right side up onto a parchment paper-lined baking tray. Optional: if you’d like to add any stamped lettering, do so now. Tip! If you get fingernail indents in your dish, use the back of a spoon to smoothen.
7. Bake using the directions on your clay package – mine was 275°F/130°C for 15 minutes for every 1/4″ thick piece. Remove from oven, then allow to cool – about 10 – 15 minutes.
8. Using the gold leafing pen, paint the rim of your dish. Optional: you can also write any lettering or message with the pen in side or on the bottom of your dish. Again, there are no rules!
9. Brush a layer of glaze for a glossy finish.
You did it!
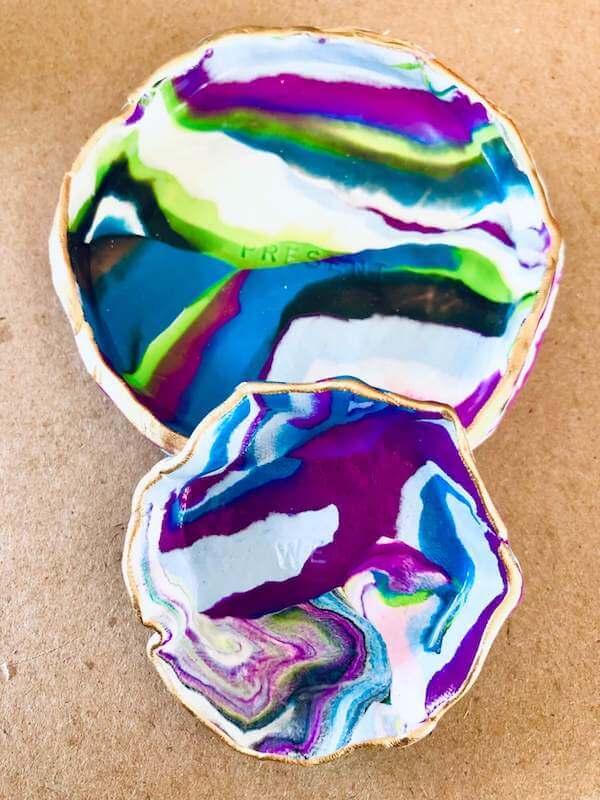
Finished dishes DIY’d by my friend Wendy…didn’t she do a great job? source: Wendy Earley
Pin It!
If you like this project, pin it to DIY later!
All photography, except where noted by Skaie Knox, HomeJelly