
Reclaimed wood shelving before & after!
Sometimes the materials for a project are staring you right in the face. Well, for me, while cleaning out our garage last summer, they instead, bonked me on the head. Yup. As I was clearing out unneeded clutter from under and behind this awkward, space-wasting, old shelf system, I stood up too quickly and “Bonk!”, literally saw stars. It was a small price to pay, though, because as Matt came to my aide, he strongly exclaimed, “These stupid shelves are going!” Sure enough, by days end, we had a stack of beautifully chunky wood pieces (we estimate circa 1960s by some of the markings) ready to be reclaimed and upcycled into something fabulous.
Fast forward six months, and I was ready to put my power tools where my mouth was. Not only did I turn this beautiful old wood, with stamps and nail holes to prove it, into a customized console table, I created industrial style open shelving with the help of plumbing fixtures (of all things!). My inspiration for such a project? I had seen an episode of the new HGTV show, House Hunters: Renovation where 30 Rock cast member Keith Powell (aka James “Toofer” Spurlock), along with his wife, built and installed these shelves which inspired today’s how-to:

HGTV homeowner shelving system.
Join me now in DIYing this fun and very, VERY easy 1-2 day project (these below are simplified for a cleaner vibe). Oh, and in case you don’t have access to old garage shelving, I’ve listed some places to find reclaimed wood in your area. I’m hoping maybe you’ll try something like this in your home or office space…no bonking required.
Industrial Style Shelving…here’s what you’ll need:

Reclaimed shelving supplies.
• reclaimed wood – dimensions and number of wood pieces depend on what you wish, ours were four (4) 1 1/2″ thick by 11″ to 12″ wide and 33″ long pieces of wood. Note: to locate locally reclaimed wood, check out woodfinder.com.
• measuring tape
• pencil
• circular saw (not pictured)
• coarse sand paper – P80, and optional, you can fine sand your shelves with very fine – P220
• smooth cloth
• Tudor Brown Original Briwax – or you can choose any color you wish!
• eight (8) 1 1/2″ screws or nails
• level
• rubber mallet
• eight (8) 1/2″x12″ black nipple pipes – you can use either the “silver” galvanized or “antiqued” black plumbing hardware. We chose the latter for a more aged, industrial look. Note: to remove excess “antiqued” finish off the black plumbing hardware, wash each piece with warm soap and water, then dry with a clean rag.
• eight (8) 1/2″ black elbows
• eight (8) 1/2″ galvanized floor flanges – they didn’t have the black ones, but they came out looking fab anyhow!
• anchor screws and drill bit (included) – each screw holds up to 77lbs when installed in drywall. So technically, each side of our shelving system can hold up to 308lbs!
Note: this looks like a lot of supplies, but most of these tools are very practical for future projects, the other supplies can be used again and again! The TOTAL COST for the piping supplies and anchor screws was: $111.41 (we had all the other tools and supplies). We made four (4) sets of shelves.
First things first, let’s reclaim that wood…! Here’s what you do:
Step #1: wipe off your wood piece(s) in preparation for measuring and cutting.

Wipe off wood piece to ready it for measuring and cutting.
Step #2: measure and mark the desired length of your shelving, then cut using a circular saw. Note: one of the best DIY moves I’ve ever made was purchasing these saw horses. I bought them for a total of $10 ($5 a piece) at the Habitat for Humanity ReStore Orange County…yeah!

Measure and mark the desired length of your shelving.

Matt cutting the measured length of our shelving. I’m still working my way up to this particular power tool.
Step #3: Using your coarse sand paper and electric sander, smooth wood to desired feel. Note: sand gently around old stamps to maintain historic character.

Sand gently around old stamps to maintain historic character.

Sand to desired smoothness.

Old nail holes…character, character, character!
Step #4: using a soft cloth, wipe on Briwax to cover entire wood piece. Tip: for a more finished look, after it dries, buff wax with a clean, soft cloth.

Using smooth cloth, wipe on Briwax to cover entire wood piece.
Now, onward to installing the pipe shelving hardware…
Step #5: Using both your tape measure and level, measure and mark where you’d like to mount the shelving hardware. Tip: we put the wood piece’s back edge up against the wall, placed our level on top of it, then drew a line to indicate the “top” and “bottom” of the shelf.

Measure and mark where you’d like to mount your shelving hardware.
Step #6: using your flange as a template, mark the screw holes with a pencil, then drill about 1″ deep. Note: with the nipple pipe screwed in, just below the top two screw holes of the flange is where the bottom of the shelf will go (see line marking).

Drill holes for anchor screws.
Step #7: using your rubber mallet, pound in the plastic sheaths of your anchor screws so they are flush with the wall.

Anchor screws.

Pound in plastic sheaths of anchor screws.
Step #8: Place your floor flange over the plastic sheaths, then screw onto wall. Repeat steps 5 through 8 for the rest of your shelving hardware. Note: this part of the project goes much faster and easier with some jamm’n tunes! Thanks Little Big Town!

Drill in floor flanges.
We’re almost done…assembling the hardware and prepping the shelves!
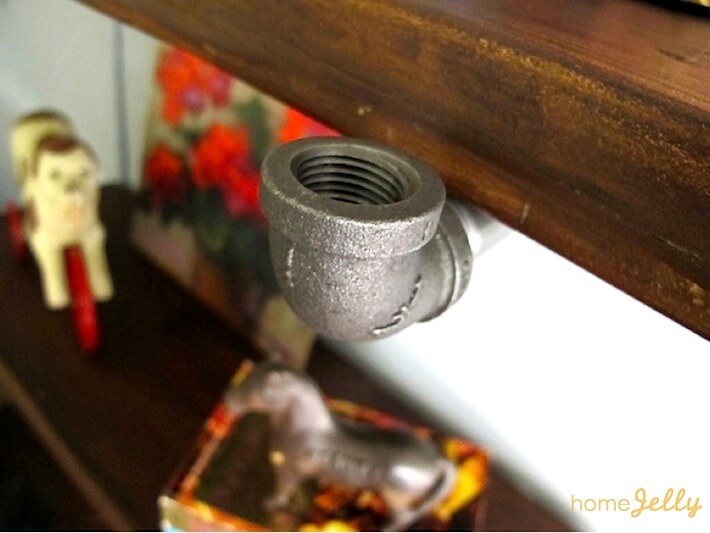
Step #9: assemble the plumbing hardware shelving: (a) simply screw the nipple pipe into the floor flange and, (b) screw the elbow joint onto the nipple pipe. (Um…yes, we’re still talking about shelving!).

Screw the nipple pipe into the floor flange.

Screw the elbow joint onto the nipple pipe.
Step #10: to prevent your open shelves from shifting or, God forbid, falling off their hardware, (a) measure, (b) screw in stability screws, and (c) finish by placing wood shelf onto pipe shelving.
 Measure where stability screws should go. You can find where to mark by placing shelf onto pipe, then draw one pencil mark on each side.")
(a) Measure where stability screws should go. You can find where to mark by placing shelf onto pipe, then draw one pencil “dot” on each side.
 Screw in stability screws")
(b) Screw in stability screws.

Stability screws can be drilled in at an angle for easy placement onto pipe. Note: the screw on the right had a little farther to go.

(c) Place stability screws onto pipe shelving hardware.

Stability screws keep open shelves from shifting. Those of us in earthquake and kid country will really appreciate this!
Aaaaaaaaaaaand…we’re finished!

Assembled reclaimed wood with pipe hardware shelving! So industrial chic!

Reclaimed, imperfect wood adds character.

Reclaimed wood shelving loves its fun accessories!

Reclaimed wood and plumbing hardware creates industrial style shelving…oh, yeah!
What would you like to reclaim and make? Share your ideas with us below!
All photography by Skaie Knox, HomeJelly