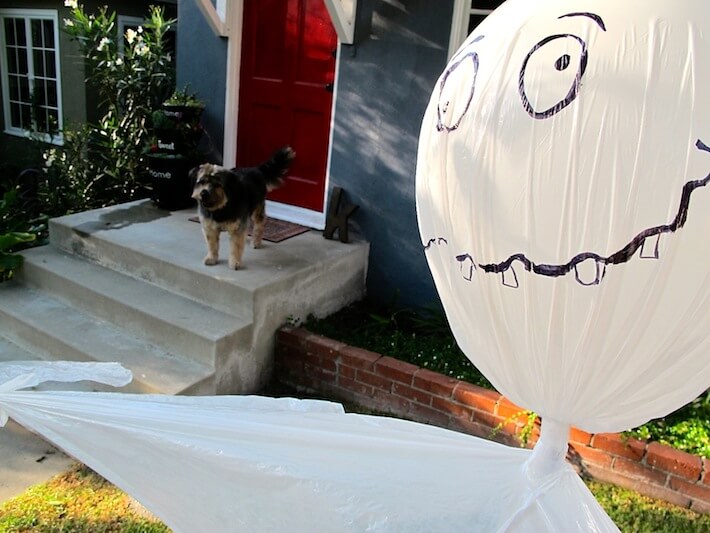

“Ring-a-round-the-rosie” floating ghosts.
This post contains affiliate links.
This yeas is gonna be different. We’re going to have one of those fun houses on the block where kids can’t wait to visit on Halloween! Luckily, I stumbled across A Life Inspired and discovered this “ring-a-round-the-rosie” crew of kid ghosts – dancing characters that playfully remind me of a Halloween Peanuts special. In our front yard stands a very large tree, a perfect place to stage our hand-holding, adolescent apparitions. I did want to make one minor change, though…I wanted them to float! So, with a simple garden stake and the help of a constant ocean breeze rustling by, the levitating effect was delightfully spooky! Even Klunkers howled in guard dog’s defense!
Floating Ghosts…
Supplies:

Floating ghosts supplies.
- white tall kitchen plastic bags (you’ll need three bags per ghost)
- scissors
- 5-6 garden stakes
- rubber mallet or hammer
- 5-6 cotton balls
- 11″ white balloons
- clear packing tape
- black Sharpie
- black glitter paper (optional)
Instructions:

Cut both sides of plastic bag to create your ghosts’ arms.
1. Prepare the arms and body: (a). To make the arms, cut along both sides of a plastic bag from the opening down to the bottom of the bag (see finished cut on photo above). (b). Next, cut a very small slit into the center of the plastic bag (see circled dot on photo above). (c). For the body, just cut a very small slit at the center-bottom of the bag (no additional cutting required).

Pound stakes into place.
2. Pound garden stakes into place: using your rubber mallet, pound the first stake into the ground, then measure 4 1/2 feet between the next stakes and continue with the rest. Note: depending on the size of your tree trunk, be sure the stakes are far enough away from the tree so the activity looks authentic – ours was about 2 1/2 feet from the trunk…it could have been more like 3 feet, but we would have needed to add another ghost.

Place body and arms onto stake.
3. Place body and arms onto stake: punch the garden stake through the cut hole of body, then place the arms onto the stake and let them fall to the ground.

Tape balloon onto stake.
4. Tape one balloon onto the stake: (NOTE): before doing this step, tape a cotton ball onto the tip of the stake, then tape the balloon on. Because of the breeze, the balloons easily popped as it kept hitting the fairly sharp edge of the stake’s tip – after pounding it into the ground with the mallet, the plastic peeled back a little, creating a sharpness to it.

Tightly tape plastic bag onto balloon.
5. Tightly tape third plastic bag onto balloon: to get the pointy head, be sure to adjust the plastic bag so that the balloon fits into one of the bottom corners. Gather the bag at the ghost’s “neck” and tightly tape it off.

Tape arms in place.
6. Tape arms in place: move the arms back up and pull the head’s excess plastic bag through its hole. The arms should now be snugly tucked under the head. Now, tape it off at the neck. Note: be sure the arms are where you want them so their “hands” can hold the flanking ghosts.

Tape body in place.
7. Tape body in place: now do the same with the body. Move it up and under the arms…like the arms, pull the head’s plastic bag through the body’s hole so that the body’s plastic bag now fits snugly under the arms. With the “shoulders” of the plastic bag adjusted properly, tape the body in place. Just lift the arms out of the way and tape right underneath them. Note: don’t worry about all the tape…you’ll never see it!

Floating ghosts, ready for Halloween!
8. Tie ghost hands together: take the ends of each hand and tie together…you can add some extra fun by attaching plastic pumpkin pails. Draw or cut out black glitter paper to make funny or scary faces…you’re done!

Ghost face closeup.

Klunkers grrr-grumbles at the floating ghosts!
Photography by Skaie Knox, HomeJelly.com