

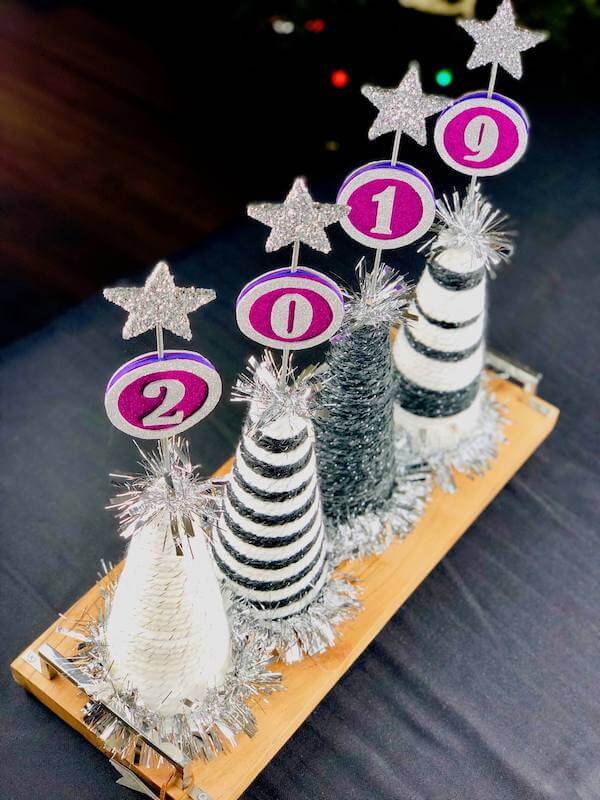
Ring in the new year with a fun pop’n hats centerpiece like this one!
This is a sponsored post and contains affiliate links.
If you’re like me this 365 ¼th time around the sun, you’re excited with anticipation for the countdown to the new year! I mean, we’re talking about ringing in new possibilities, new adventures and new what-may-comes! This end-of-the-annum eagerness has inspired today’s craft project: a super fun, pop’n party hat centerpiece to celebrate the new year! Video Tutorial:
Video Tutorial: Craft a Pop’n Party Hat Centerpiece!
[mv_video key=”da2rb1xygeusubdnyblp” sticky volume=”70″ aspectRatio=”16:9″ title=”Craft a New Year’s Pop’n Party Hat Centerpiece” thumbnail=”https://mediavine-res.cloudinary.com/video/upload/da2rb1xygeusubdnyblp.jpg”]
Grab your kids or a best friend (and a bottle of your favorite wine!), along with the following craft supplies and enjoy a fun afternoon get’n ready for Father Time’s arrival! I’ve even included a FREE downloadable template to make this even more easier!
Here it is in 10, 9, 8, 7, 6, 5, 4, 3, 2, 1…HAPPY NEW YEAR!
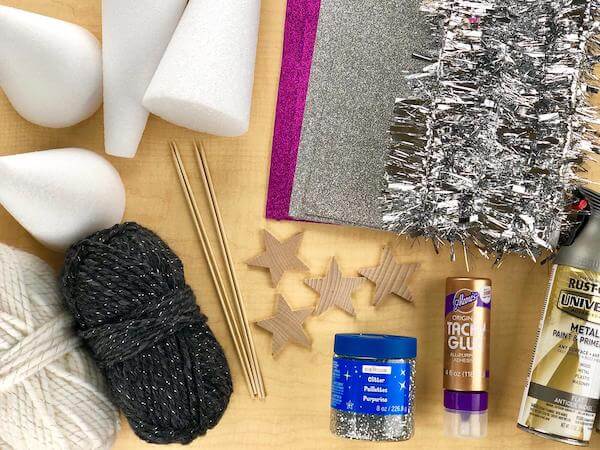
Pop’n hats centerpiece supplies.
Supplies:
• 4 white styrofoam cones (3.8 in. x 8.8 in.)
• 4 wooden stars (2.25 in.)
• 4 wooden skewers
• 2 adhesive glitter foam sheets (silver and purple or whatever colors you wish!)
• craft glue (we love Aleene’s)
• spray paint or craft paint (silver or whatever color you wish)
• glitter
• 12-18 yards of white and black yarn (we used Lion Brand Wool-Ease “Celebration” & “Constellation”)
• 2 yards of silver tinsel garland
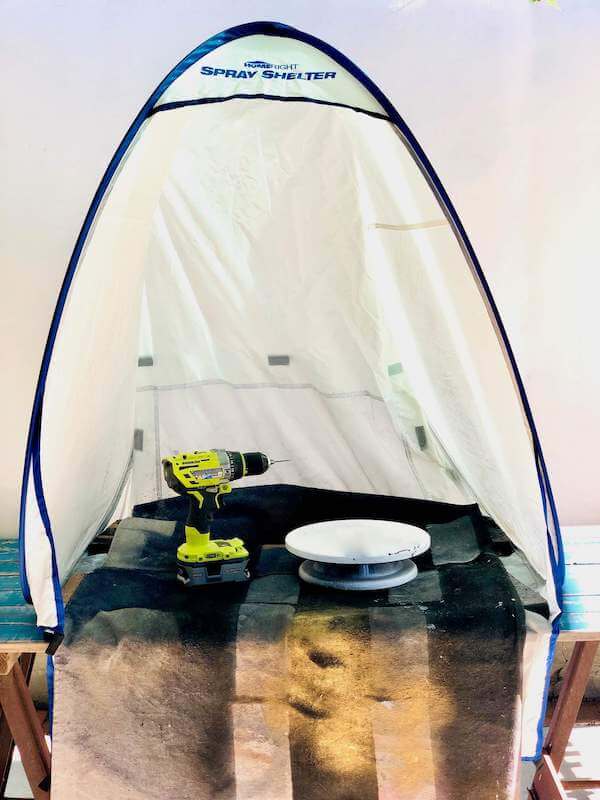
Pop’n hats centerpiece tools.
Tools:
• HomeRight Small Spray Shelter
• drill
Instructions:
1. Drill small hole in edge of each wooden star. Use a 1/16″ – 5/64″ bit – just large enough for the tip of a skewer to fit.
2. Add craft or wood glue into each hole, then insert TIP of skewer. Allow to dry.
3. Paint stars. Using your turntable and spray shelter, paint stars completely. Allow to dry. Tip! Use an egg container to hold skewers in place.
4. Print and cut out circles and numbers templates. Use this FREE downloadable PDF template.
5. Create circles and numbers. Follow these steps (available on downloadable template):
- A. Trace template onto back of glitter foam sheets, then cut out.
- B. Cut out EIGHT (8) A circles in colored glitter foam paper (ex. purple).
- C. Cut out EIGHT (8) B rings and TWO (2) each of this year’s numbers in silver glitter foam paper.
- D. Adhere ONE SET of Bs to As, until all circles have rings.
- E. Adhere numbers to circles and rings.
- F. Finish by adhering As to As onto the skewer mid-way under the star and hat.
6. Adhere yarn to foam cones. Using craft glue or hot glue, start at the base, then continue covering up to top. Tip! For variety, try using different patterns. See video for ideas!
7. Add tinsel around the base. Simply twist the wire in the tinsel to secure.
8. Insert skewers into top of hat.
9. Add tinsel to top of hat. Pull off some of the tinsel to expose wire. Twist wire around skewer to secure.
You did it!

This crafty centerpiece is fun and beautiful to ring in the new year!

I just love the color and design patterns of this new year’s eve centerpiece project.
Pin it!
If you love this project, share it! If you’d love to DIY this project now or next year…pin it for later! Thank you!

This post was sponsored by We’ve teamed up with HomeRight and are proud to be one of their paid brand ambassadors. We also received a HomeRight product sample to use in this post and have included affiliate links to the tools and supplies we used in this project which helps fund these posts and projects. Our personal opinions are completely our own based on our experience. We wouldn’t have it any other way!