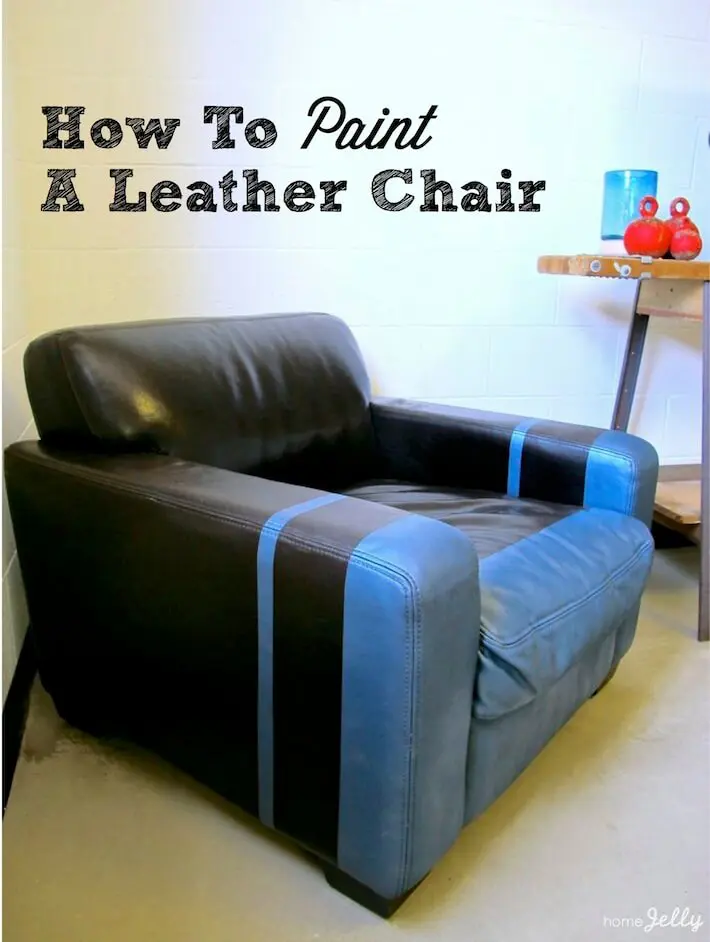

How to Paint A Leather Chair
This is post contains affiliate links.
I seriously had doubts about this one. I had never painted leather, let alone a $1,000 fine leather club chair. Due to a couple rips, too much sun and Klunkers’ wet, squishy, post-meal mouth that he’d rub against the bottom cushion to wipe clean (ish), this prior beauty was now a likely candidate for a “curbside freebie”. “No!” I exclaimed. “Not on my DIY watch!” I just knew there was some way to save it.
But, seriously…leather? I’ve painted many a wooden chair, where, if I made any mistakes, I could simply sand them away. Leather is not at all forgiving and requires a DIY no-going-back, steely resolve. (Hunh! Cue muscle man flexed arm pose)…I was up for the challenge.

Icky elephant skin.
With this resolve, I hopped on Google and got to work. The first order of business was to fix the tears. My 84 year old mom and I joined forces, using a vinyl and leather repair kit I picked up at Pep Boys – I’d give our results a first-timer’s “A for effort”, “A” also passing for acceptable (and yes, DIY is for ALL ages!). Still, the elephant skin of the front section of the chair was unacceptable. It would be waaaay too expensive to recover, however, and everyone knows slip covers went out with giant TV consoles.
This narrowed our options down to one: paint! But I had never painted leather before. I was terrified (okay, not terrified, but certainly dubious); nonetheless, I gave it a shot. After reading loads of previous how-tos, (this one, by Little Yellow Barn, which was especially helpful), I jumped in without a water-temperature-testing toe dip or anything. See now, how my original doubts were soon transformed into shouts of joy!

Painted leather chair…yep.
Supplies:
• vinyl and leather repair kit
• Ajax bleach
• sponge with scrub pad
• soft hand-towel or rag
• drop cloth and/or newspaper
• leather spray paint (I used Original Equipment Reproduction Interior paint – teal blue)
• leather conditioner (I used Fiebing’s Mink Oil Paste)
Instructions:
1. Clean the leather. Using a damp sponge (with scouring pad) sprinkled with just a bit of Ajax, gently scrub clean. This will also serve as a way to prep the leather for painting by slightly roughening the surface. Use a soft towel or rag to wipe dry. Extra: for super-grimy surfaces, use a soft rag and wipe with mineral spirits right before applying paint.
2. Tape off design and cover. Decide what type of design you’d like, then measure and tape off making sure the edges are pressed down extremely well – this will insure crisp lines. Yum! Be sure to cover the part(s) of your chair you wish to keep as is, to avoid overspray.

Measuring the design lines.

Taping off the design.

Covering the chair…no overspray, no way!
3. Spray away…1-2-3 times! Yes, this is a bit of a process, so have patience. Start with about 50% coverage, allow to dry for about 15 minutes, then paint some more (approx. 75%). Let dry for another 15 minutes, then paint again. You should just about have full coverage. You may need to spray to touch up, but be sure not to allow any drips!

Spray painting the leather.
4. Remove the tape. After you finish painting, immediately remove the tape. This is crucial to prevent lifting off the edges. DON’T WAIT!!! You’ll be totally impressed with your results! You’ll see! Allow your chair to cure for at least 24 hours (I did for an entire weekend).
5. Rub on sealing/conditioning paste. Use a soft rag and rub in small circles all over your entire chair. Pay special attention to your painted areas and be gentle. You’ll be amazed at how good your chair looks after just one coat of this paste. There will be a slight oiliness to the touch, but it will dry over the next few days.
Note: if you prefer, you can rub off excess paste with a soft towel. This step is also to help preserve the paint and avoid pealing. As of this post, the chair has been used for over seven months and it still looks fantastic! Boom!

Rubbing on the mink oil.
Finished!

The after-yum-yum!

Crisp close-up.

Painted leather chair…mission accomplished!
Now It’s Your Turn!
We’d LOVE to hear your leather painting adventures or questions…leave a comment below!
All photos by Skaie Knox, HomeJelly