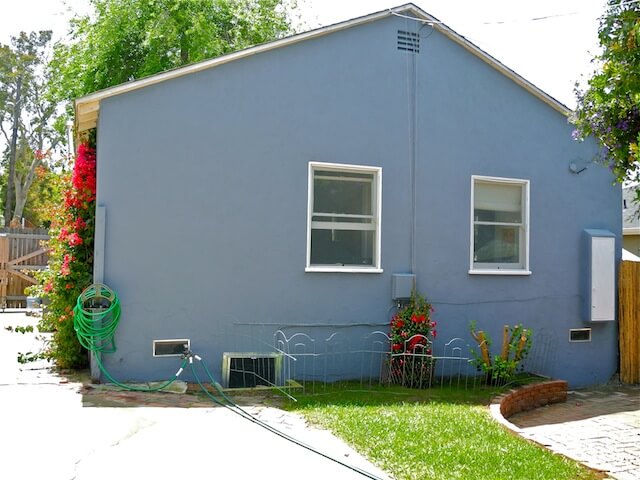

Back of house before.
“Rental-schmental!” It’s ours for now, and despite our landlord’s tightly shut wallet and reluctance to home-improve his 1930s era property, we were still willing to part with a few bucks to spruce up this house we call home. Spring sure has been a busy season for us, from completing some spiffy outdoor decor projects like the “Home Sweet Home” stacked planters, serving bowl bird bath and welcoming mailbox post with a repurposed solar light, to totally making over our curb appeal. So, this past weekend, we finally finished “our” bungalow’s exterior makeover, where we tackled the final back wall, and gave it the “paint pampering” it deserved.

Back of house after.
Here is a little photo trek that illustrates our painting day of fun, what we used, and some tid-bit tips that we hope will help make your next DIY exterior house painting project easier and relatively fuss-free.

Tools and supplies.
Tools & Supplies:
- painter’s canvas
- gloves, mask & goggles
- ladder
- hand brush and/or power sprayer for cleaning
- scrapers (plus extra blades) & wire brushes
- hand & block sanders & sand paper
- wood putty and sealer & putty knives
- brushes & rollers (plus extender bar to paint in high places)
- paint & primer
- stir sticks & paint can key (or screw driver)
- paint trays & cups (plus a swivel hook is helpful for high places)
- Optional: bondo & activator for “DIY MacGyvering” of major damaged woodwork.
Project Pods: Feeling like we’ve earned some “DIY street cred”, we’ve discovered being organized is key to lowering the frustration-factor when doing a big project like painting a house’s exterior. Lay out all the supplies you’ll need (cuz it’s probable you’ll forget a thing or two, like we did here), and group the tools into project pods-i.e. scraping = scrapers, goggles, mask, gloves; sanding = sand paper, hand sander, block sander, scissors; bondoing/patching = bondo, activator, stick for mixing, cup or tray for ingredients, putty knife…etc. This will help you be efficient when it comes to completing all the steps needing to be done.

Wall peeling. Ug-oh!
Before: here’s a close-up of the crumbling, peeling walls that clearly needed some care and attention. We’re also planning to call the cable company and thank the genius who installed this box right in the middle of the back of our house (with the additional bonus of useless cables that don’t hook up to anything)!

Skaie scraping (punny.)
Scraping: needing an arm workout anyway, scraping the walls was a great workout and actually quite cathartic. After years of staring at this grey blah mess, (and we still ask ourselves “Why did it take us so long to do this!?!), it was such a release to actively dig into the ugly and prepare it for the pretty. Tip: be sure to scrape until edges are relatively smooth. Be careful not take off the entire wall…with older homes like ours, we could have gone all the way, eliminating the entire top surface if we dug in too hard.

Matt sanding.
Sanding: luckily this back wall didn’t have a heck of a lot of sanding needed; just two windows and a dilapidated ledge we ended up bondoing was all there was woodwork-wise. Read more about our window ledge bondo how-to. MacGyver would no doubt approve.

Matt painting.
Painting: starting from left to right, Matt quickly polished off the brunt of the painting within an hour. The pain is in the prep! most anyone will tell you…the painting is the fun part! Tip: even though this is the back of our house, we made sure to pay attention to the details like taping off the vents (who wants sloppy drips even here?), and laying down our painter’s tarp over the brick work.

Swivel pail hook.
Swivel pail hook: after visiting the Habitat for Humanity Restore of Orange County, I found this cool contraption for just a buck! I thought it might be handy for when Matt clambers up to the top of the ladder to paint the tip-top of our house.

Helpful swivel pail hook.
…yup, it sure did! If you look closely, you’ll see one end clips to the paint can handle, then the other hooks to one of the rungs of the ladder, thus allowing a hands-free dipping of the paint brush! Tip: be very careful when painting in high places. Gadgets like the swivel pail hook is a great way to increase safety (via returning the use of both hands to the painter) during your project. Also, ask someone to hold the ladder below. Note: In the photo above, I was on the ground holding the ladder which was extended about 15 feet high. Don’t fall honey!

Painting to vanish cables and cable box.
Painting tricks: keeping with the spirit of MacGyver, we decided that eye-sore of a cable box and cables had to go. Not literally, but visually. So, we decided to go for it and paint them. As you’ll see in the after photos…it worked! Poof! They’re practically gone! Tip: be careful not to paint over vents or allow drips to seep inside the cable box. Also, if you are at all unsure about the kind of wires you’re dealing with, you may want to consult an electrician to mark and/or identify them before painting. As an extra measure of safety, be sure to shut off your home’s power.

After back of house.
Fini! So, even though it was a lot of work and soaked up another weekend…it sure was worth it! In addition to painting, we also decided to cut down a big bush (that was shaped to look like a tree) that now allows us to see out into our gorgeously green backyard. We also planted some new grass seed underneath the windows, and thanks to the fallen “tree” the sun can now shine down on this part of the yard. Finally, we were able to locate a mess of cables that were connected to nothing and remove those as well. All in all, we are tremendously pleased with our backyard space!
What have you recently done to home-improve your backyard space?
All photographs by Skaie Knox, HomeJelly